
👋 Introduction
The Problem:
Giving workers local administrator rights on their devices is a common requirement in many organizations. However, managing and securing these local administrator accounts can be challenging.
LAPS (Local Administrator Password Solution) is a tool designed for this purpose, but it is intended for administrators, not end users. As a result, it is effectively unusable for end users. At present, it is not possible to restrict which LAPS passwords a user with the appropriate Entra permissions can read, without creating admin units. But this is not a viable solution in this case, as it would require creating a unit per device, which would quickly exceed Entra’s administrative unit limits. As a result, any user who has read access can view the LAPS passwords for all devices.
This is not great. If you do not want to grant end users access to the Entra portal and allowing them to read all LAPS passwords, this is a non-starter.
My approach:
If you want to take advantage of the built-in LAPS functionality, do not want to use Endpoint Privilege Management (EPM) or do not have the required license, another approach is needed. To address this, I cooked up an automation that allows users to request their LAPS password without accessing the Entra portal and without granting them any permissions to read LAPS passwords themselves.
To do that we need the following components:
- a custom role for accessing LAPS passwords
- an Azure Automation Account to run custom PowerShell code
- an enduser with an exchange mailbox
What is Azure Automation?
Azure Automation is a cloud service that enables you to host, configure and execute automations, such as runbooks. A Runbook is a script, hosted in Azure Automation, that executes workflows using PowerShell, Python or a graphical logic, either on demand or on a defined schedule.
⚙️ Configuration
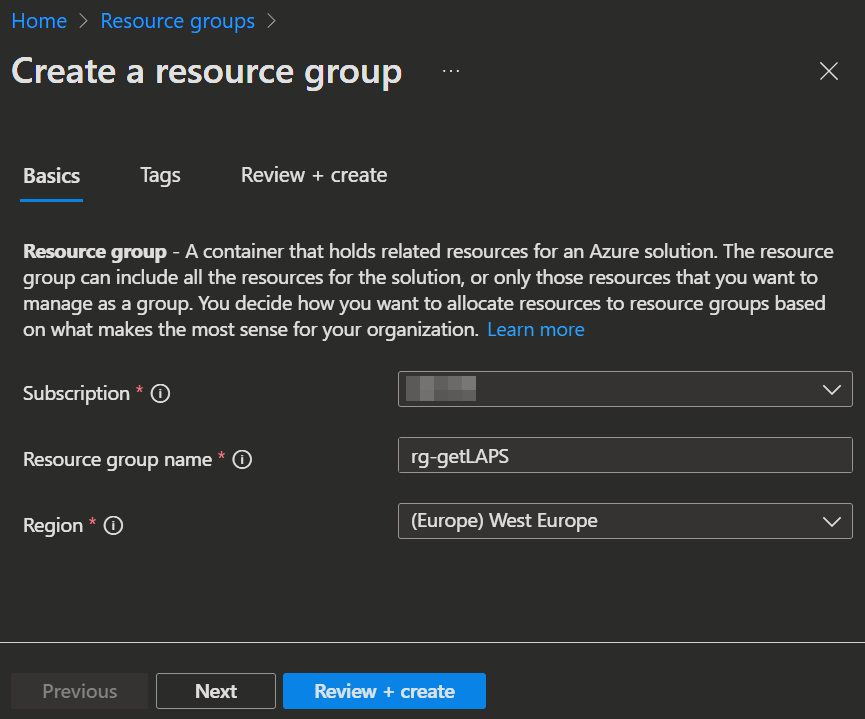
Resource Group
To get started we first create a resource group to group our new stuff together.
- Open the Azure admin Portal -> Resource groups and click
+ Create. - Enter your Name and select your Subscription and Region.
- Then
Review + createthe group.
Automation Account
Next we create the Automation Account we need.
- Open the Azure admin Portal -> Automation Accounts and click
+ Create. - Enter your Subscription, the Resource group we created, a name and the same Region as the Ressource Group.

- Click
Next, make sure to select System assigned in the advanced tab under Managed Identities and clickNextagain. - In the Networking tab you can select how you want to connect to the automation account. In our example Public access is ok, but you maybe want to consider a Private Endpoint depending on your Azure Network infrastructure.
- Now you can click
Review + CreateandCreateagain.

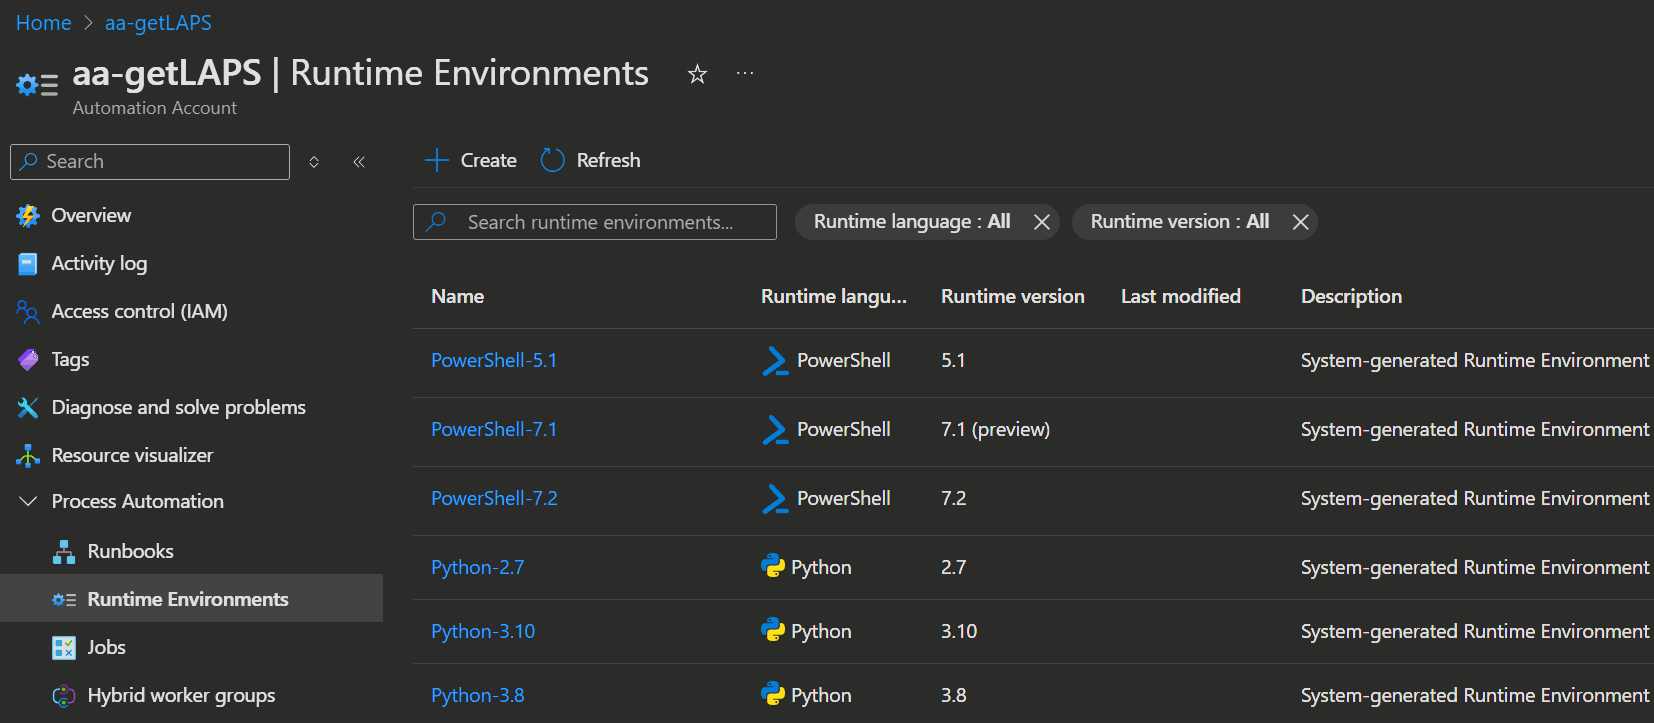
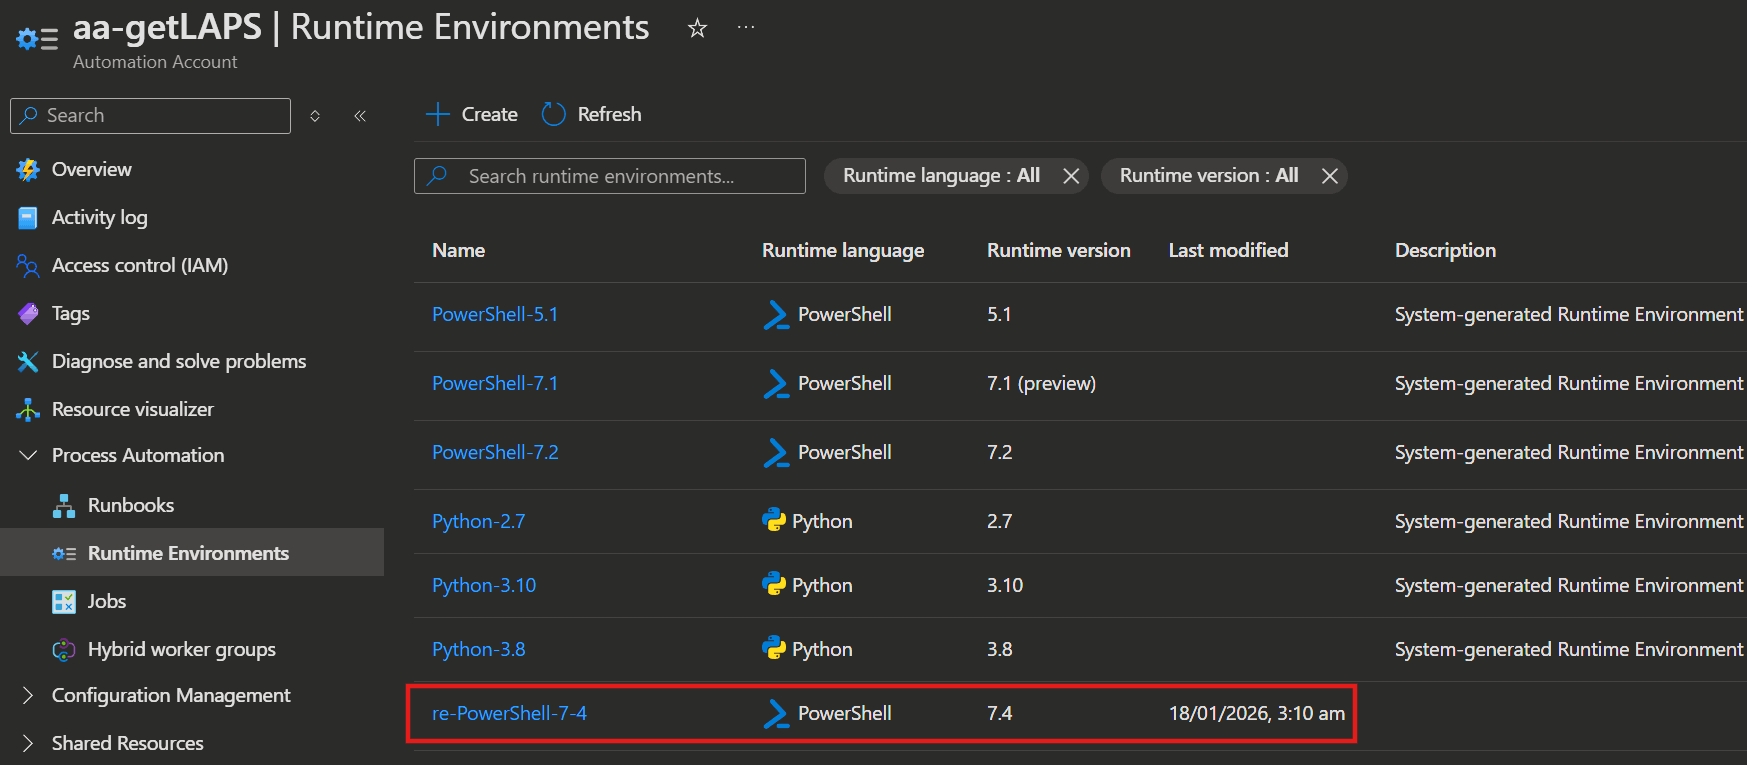
Runtime Environment
Now we start configuring the Automation Account by creating a Runtime Environment.
- For that we open the Azure admin Portal -> Automation Accounts again and open the previously created Automation Account.
- Now select Process Automation -> Runtime Environments and click
➕ Create.
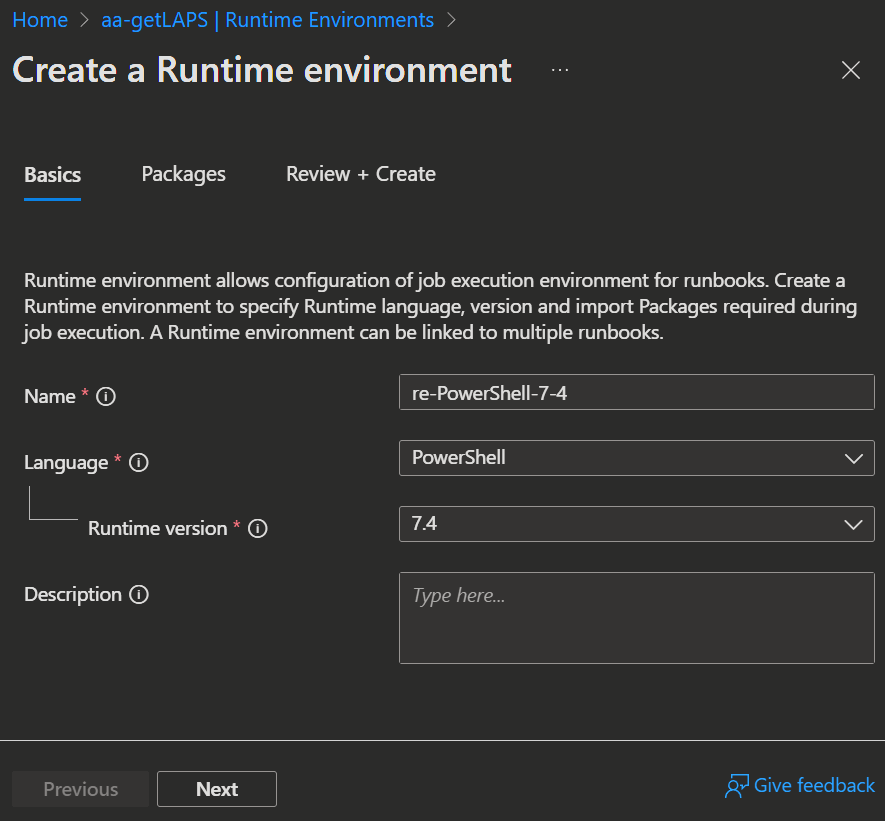
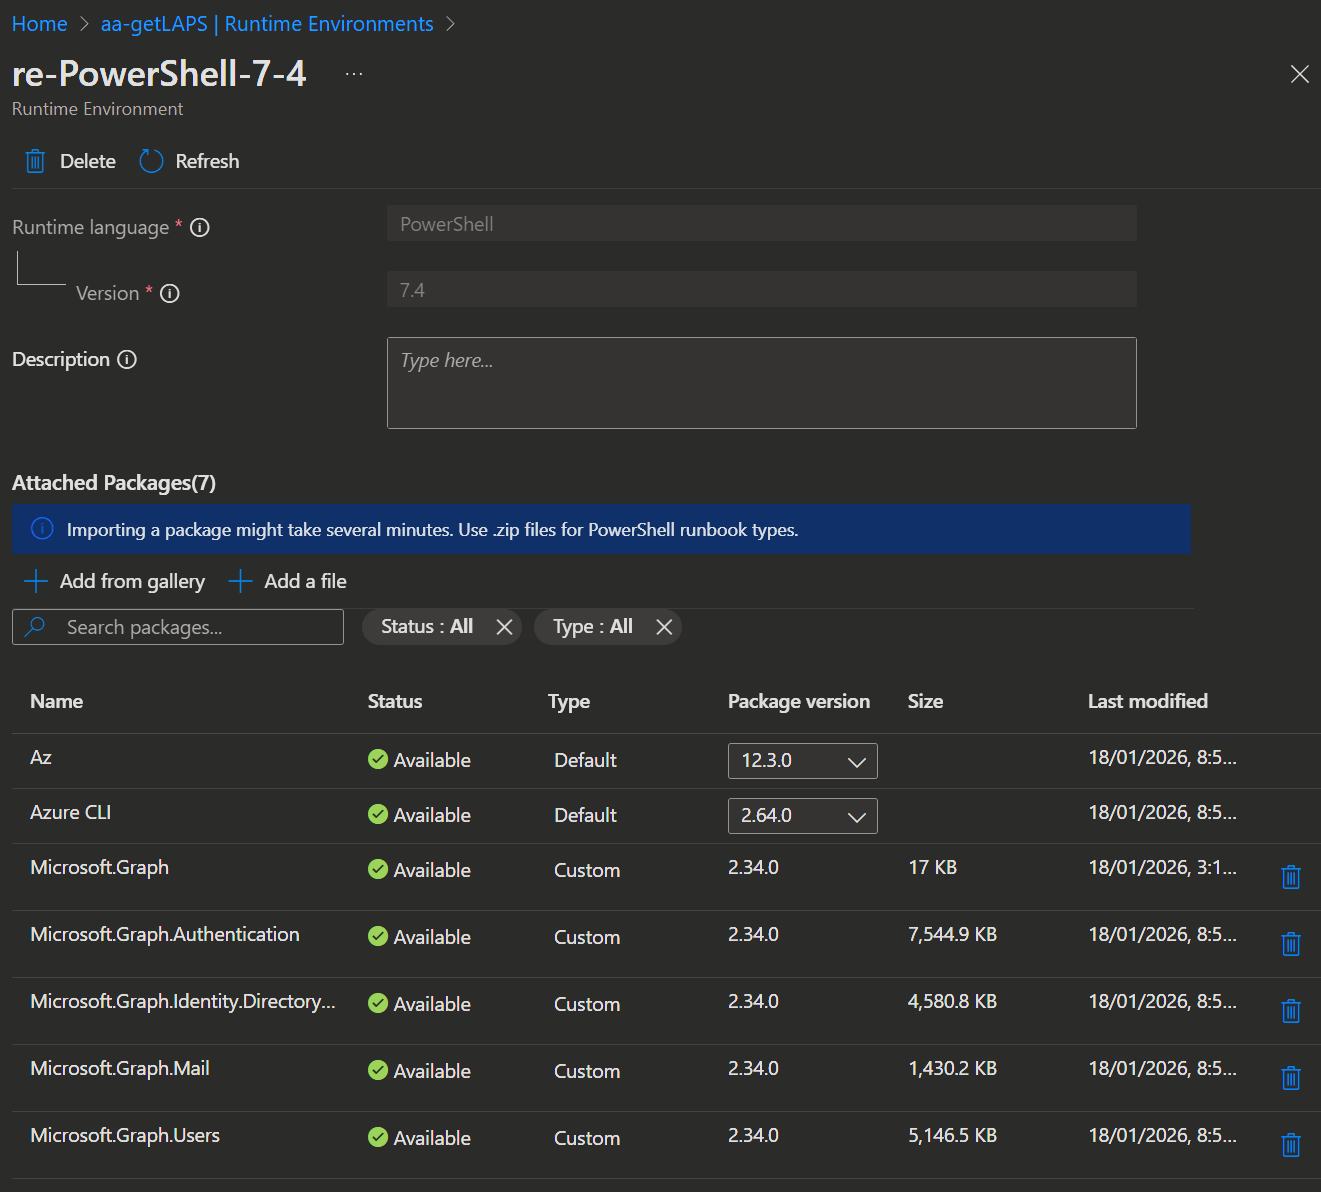
- Enter a Name and select the following attributes:
- Language: PowerShell
- Runtime Version: 7.4
INFO
Runtime 7.2 is not good, because it has a bug in its PowerShell Graph modules.
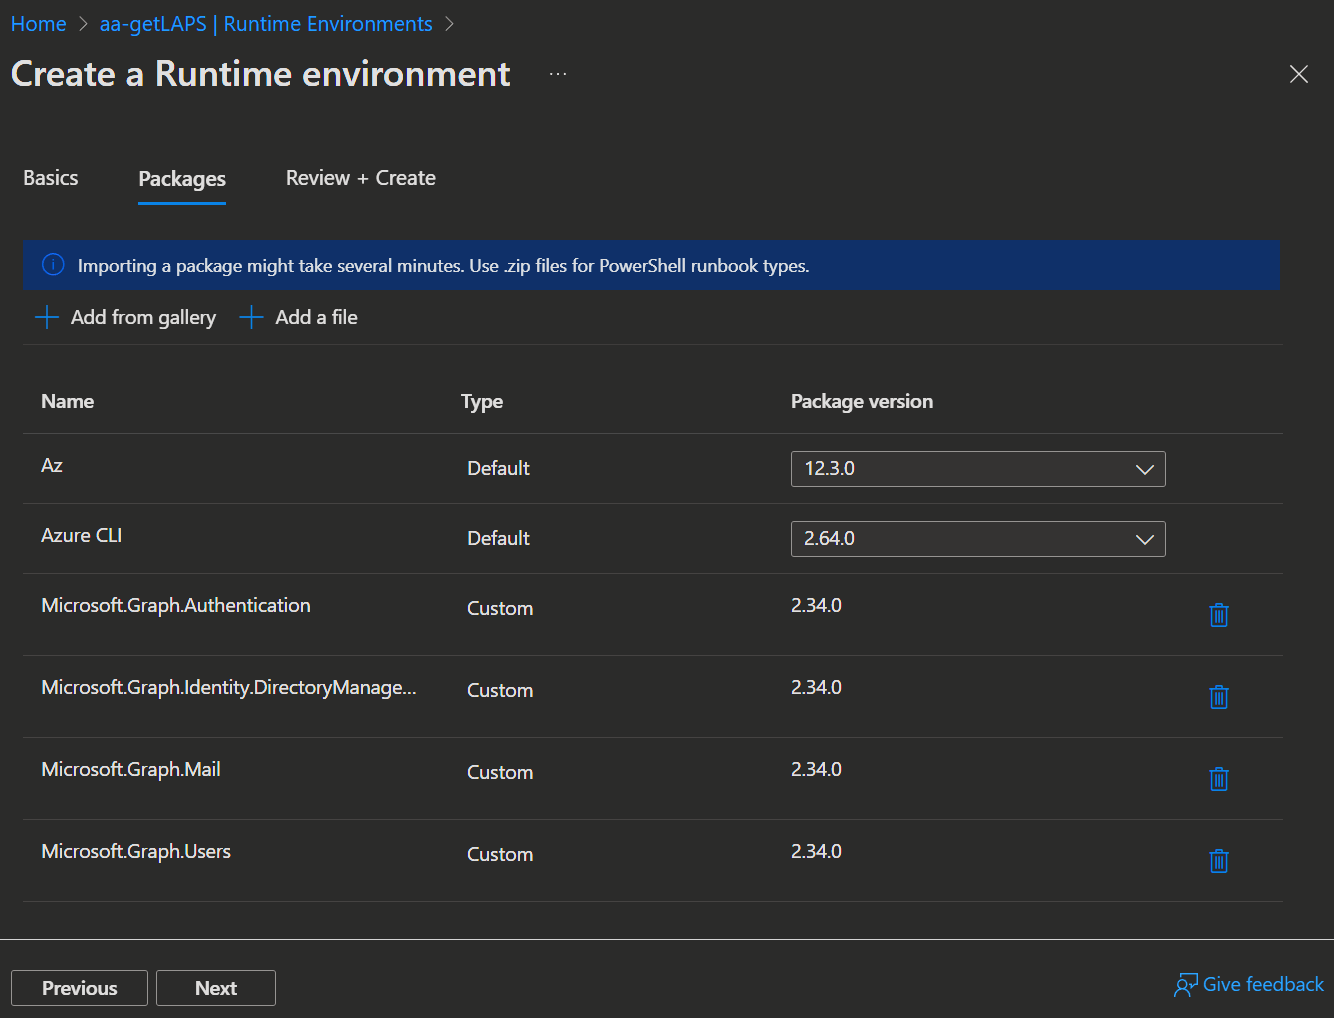
- Click
Nextand select the following Packages with➕ Add from gallery:- Microsoft.Graph.Authentication
- Microsoft.Graph.DirectoryManagement
- Microsoft.Graph.Mail
- Microsoft.Graph.Users
- Now Click
NextandCreateand wait for the Runtime Environment to be ready.
Runbook
Next, we will create a runbook to add our script and run it autonomously.
- For that we open the Azure admin Portal -> Automation Accounts again and open the previously created Automation Account.
- Now select Process Automation -> Runbooks and click
➕ Create.
INFO
There are 2 Toturial Runbooks automatically created for you and you can just delete them if you like. They will then also vanish from the Resource Group.
- AzureAutomationTutorialWithIdentity
- AzureAutomationTutorialWithIdentityGraphical

- On the Basics page select the following attributes:
- Runbook: Create new
- Name: Whatever you like
- Runbook type: PowerShell
- Runtime Environment: Click
Select from existingand select the previously created runtime environment.
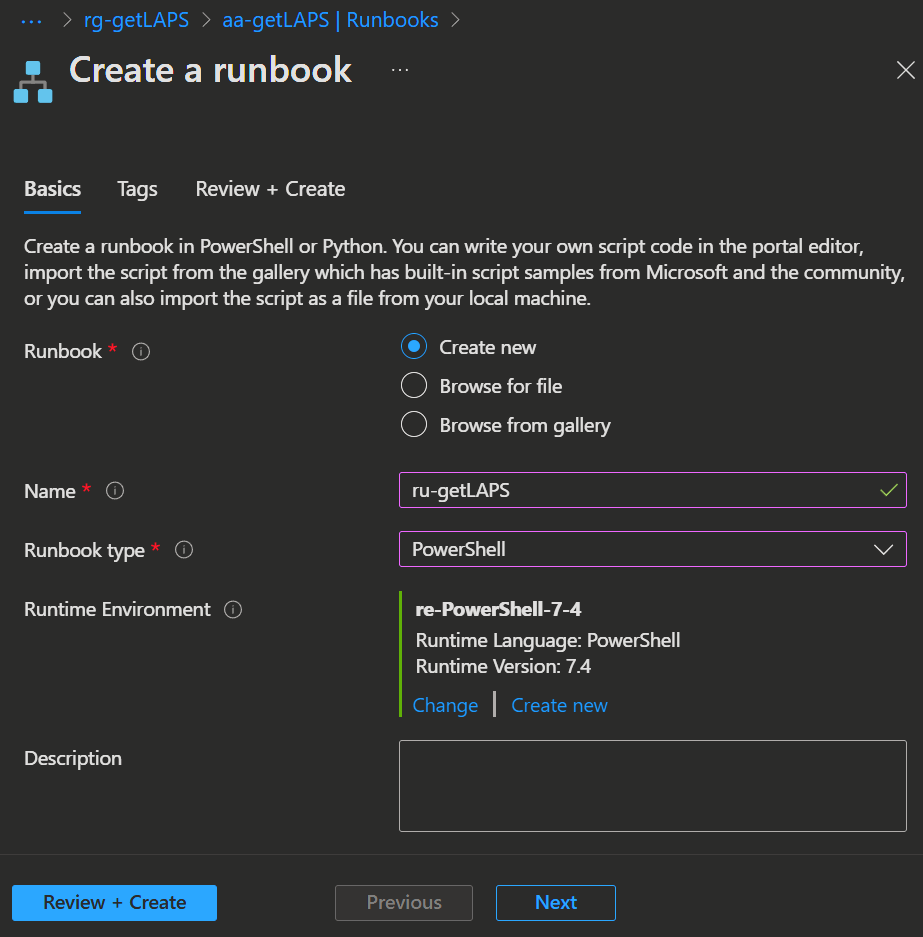
- Now you can click
Review + CreateandCreateagain. - Next you will get dumped directly into the Editor. Here you can paste the script below in and click
SaveandPublish.
<#
.AUTHOR
	Michael Frank

.Dates & Version
	- Created: 22.09.2025
	- Lastupdated: 18.01.2026
	- Version: 1.0

.SYNOPSIS
	Get LAPS Passwords for all devices owned by a user and send them via email.

.Component
	The following PowerShell 7.4 modules must be installed:
    - Microsoft.Graph.Authentication
    - Microsoft.Graph.DirectoryManagement
    - Microsoft.Graph.Mail
    - Microsoft.Graph.Users

.Graph Permissions
    - Device.Read.All
    - Mail.ReadWrite
    - User.Read.All
    - DeviceLocalCredential.Read.All
    - Mail.Send

.DESCRIPTION
	This script connects to the Microsoft Graph API using the managed identity context.
	It retrieves all devices owned by a specified user in Entra ID and fetches their LAPS passwords.
  The passwords are sent to the user's registered email address, so they never leave the server.
  Ultimately, the sent mail is deleted, meaning the user only has to worry about the mail in their inbox and not a folder full of passwords in their sent items.
#>

Param(
[String]$EntraUserID
)

$Pass = @()

# Log in with the managed identity

Connect-MgGraph -Identity -NoWelcome

# Getting the devices of the passed user

$Devices = Get-MgUserOwnedDevice -userid $EntraUserID

# Getting the LAPS Passwords

foreach ($Device in $Devices) {

    $device = get-mgdevice -deviceid $Device.id | Select-Object displayname
    $Pass += Get-LapsAADPassword -DeviceIds $device.displayname -IncludePasswords -AsPlainText -ErrorAction SilentlyContinue

}

$user = Get-mguser -userid $EntraUserID

# Mail gets created and send

$params = @{
	subject = "LAPS"
	body = @{
		contentType = "HTML"
		content = "$($Pass)"
	}
	toRecipients = @(
		@{
			emailAddress = @{
				address = $user.mail
			}
		}
	)
}


$mail = New-MgUserMessage -UserId $EntraUserID -BodyParameter $params

Send-MgUserMessage -UserId $EntraUserID -MessageId $mail.id

# Script needs to sleep for a few seconds so the mail can get send and delivered
Start-Sleep -Seconds 5

# Get the send mail ID
$mails = $mails = get-MgUserMessage -UserId $EntraUserID -Filter "Subject eq 'LAPS'" | select Id

# Delete the send LAPS mail
remove-MgUserMessage -UserId $EntraUserID -MessageId $mails.id[0]- Confirm the publishing at the end.

Roles
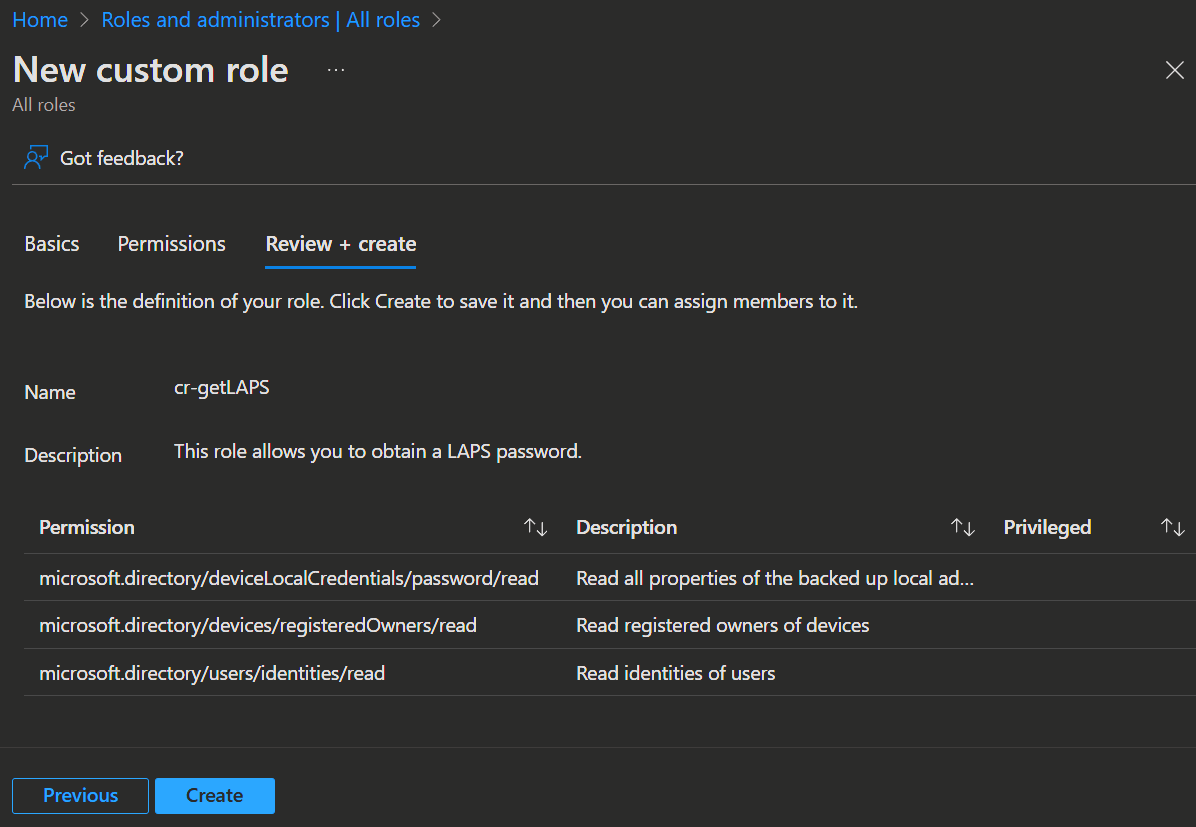
After creating the runbook, we need to set up the access to the LAPS passwords for the runbook.
- For that we first open the Entra admin center -> Roles & admins and click
➕ New custom role. - Enter the Name, a good Description about what the role does and select
Start from scratch.
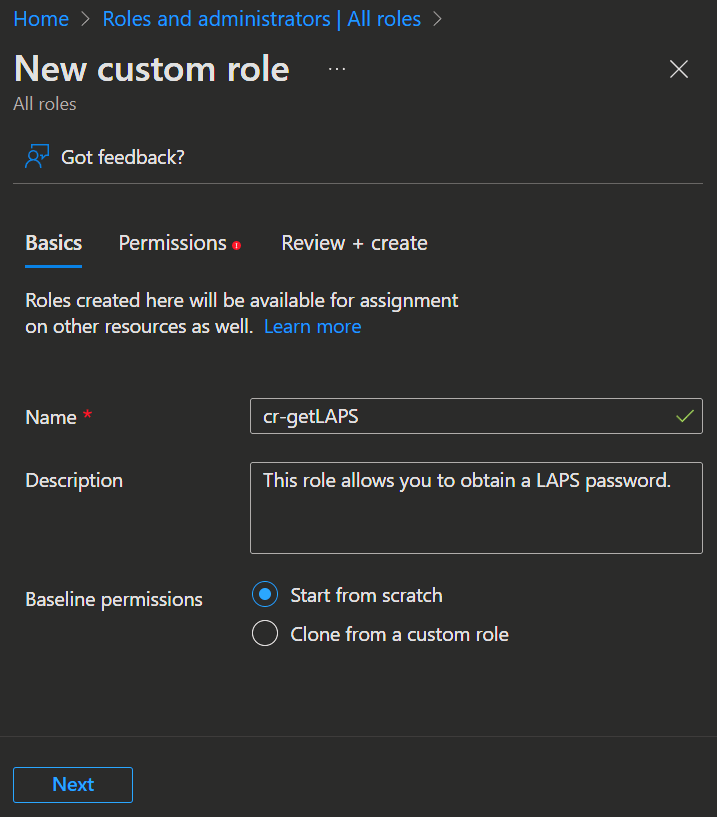
- Click
Nextand select the following permissions to read the LAPS passwords, the users and the devices of the users.microsoft.directory/deviceLocalCredentials/password/readmicrosoft.directory/devices/registeredOwners/readmicrosoft.directory/users/identities/read
- Then click
Nextagain andCreate.
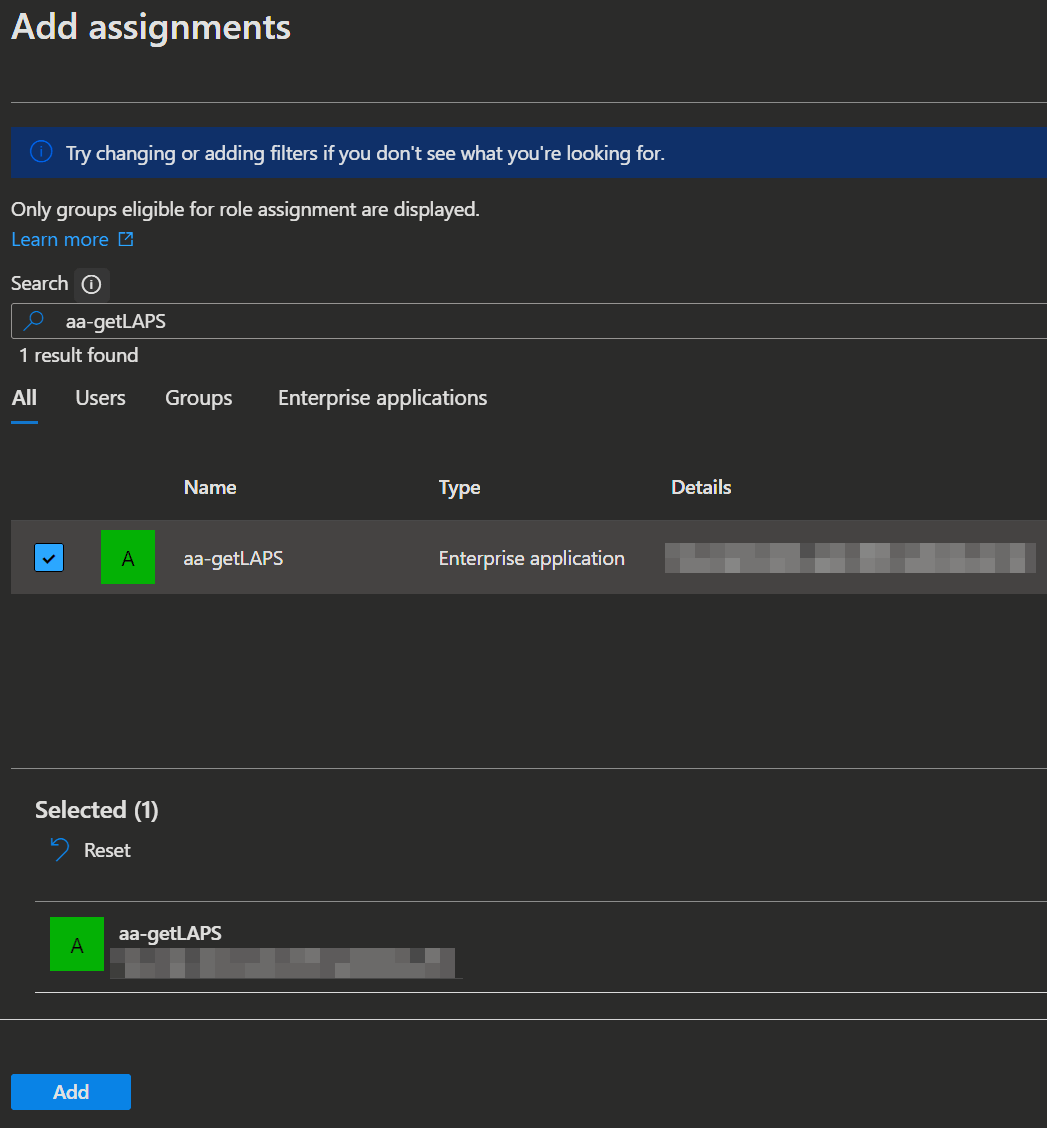
- Next click on the newly created role and you will get to the Assignments page for the role. Click
➕ New assignment, search for the name of the previously created automation account, select it and clickAdd.
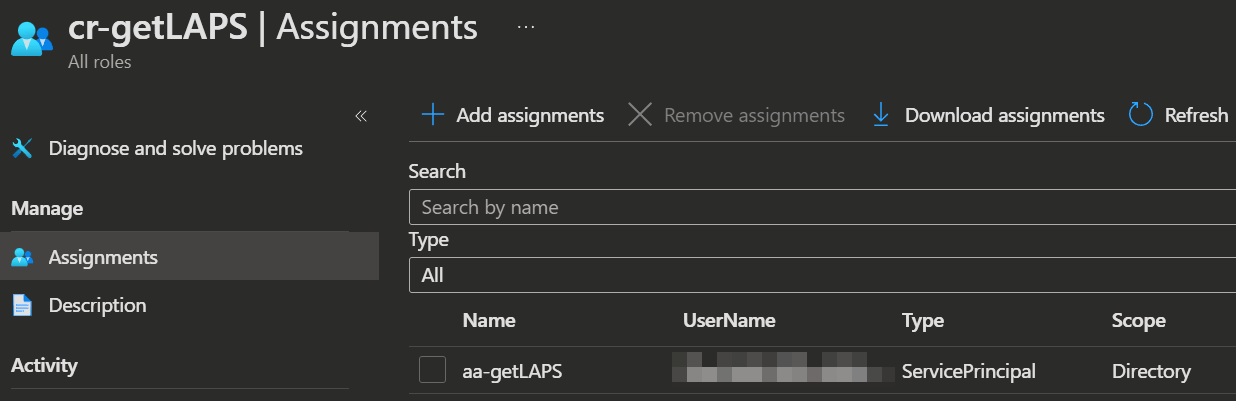
IMPORTANT
You can not select the service principal from the list of users without searching, because service principals will not get listed by deafult. This is so that you will not be overwhelmed with Service Principals when selecting a user or group.
Enterprise App
Once the custom role is created and assigned, you must also assign the appropriate Graph API permissions to the automation account. This step ensures that the Managed Identity, which acts as the security principal for the PowerShell execution, possesses the necessary authorization to interact with Microsoft Graph.
Because these permissions cannot be assigned via the Portal UI, you must use PowerShell to grant them:
# Makes sure that the Entra PowerShell Module is installed and importet
$module = Get-InstalledModule -Name Microsoft.Entra
if (!$module){
  Install-Module -Name Microsoft.Entra -Repository PSGallery -Scope CurrentUser -Force -AllowClobber
}

Import-module Microsoft.Entra

# Connect to Graph
Connect-Entra -Scopes 'Application.ReadWrite.All'

# Define the required permissions
$permissions = @('Device.Read.All','Mail.ReadWrite','User.Read.All','DeviceLocalCredential.Read.All','Mail.Send')

# Get the IDs for your Service Principal and MS Graph
# IMPORTANT! Change the AppName (aa-getLAPS) here to the Name you used!
$clientServicePrincipal = Get-EntraServicePrincipal -Filter "displayName eq 'aa-getLAPS'"
$resourceServicePrincipal = Get-EntraServicePrincipal -Filter "displayName eq 'Microsoft Graph'"

# Iterates through the permissions and sets them up
foreach($permission in $permissions){
  $appRole = $resourceServicePrincipal.AppRoles | Where-Object { $_.Value -eq $permission }
  $appRoleAssignment = New-EntraServicePrincipalAppRoleAssignment -ObjectId $clientServicePrincipal.Id -PrincipalId $clientServicePrincipal.Id -Id $appRole.Id -ResourceId $resourceServicePrincipal.Id
  $appRoleAssignment | Format-List Id, AppRoleId, CreatedDateTime, PrincipalDisplayName, PrincipalId, PrincipalType, ResourceDisplayName
}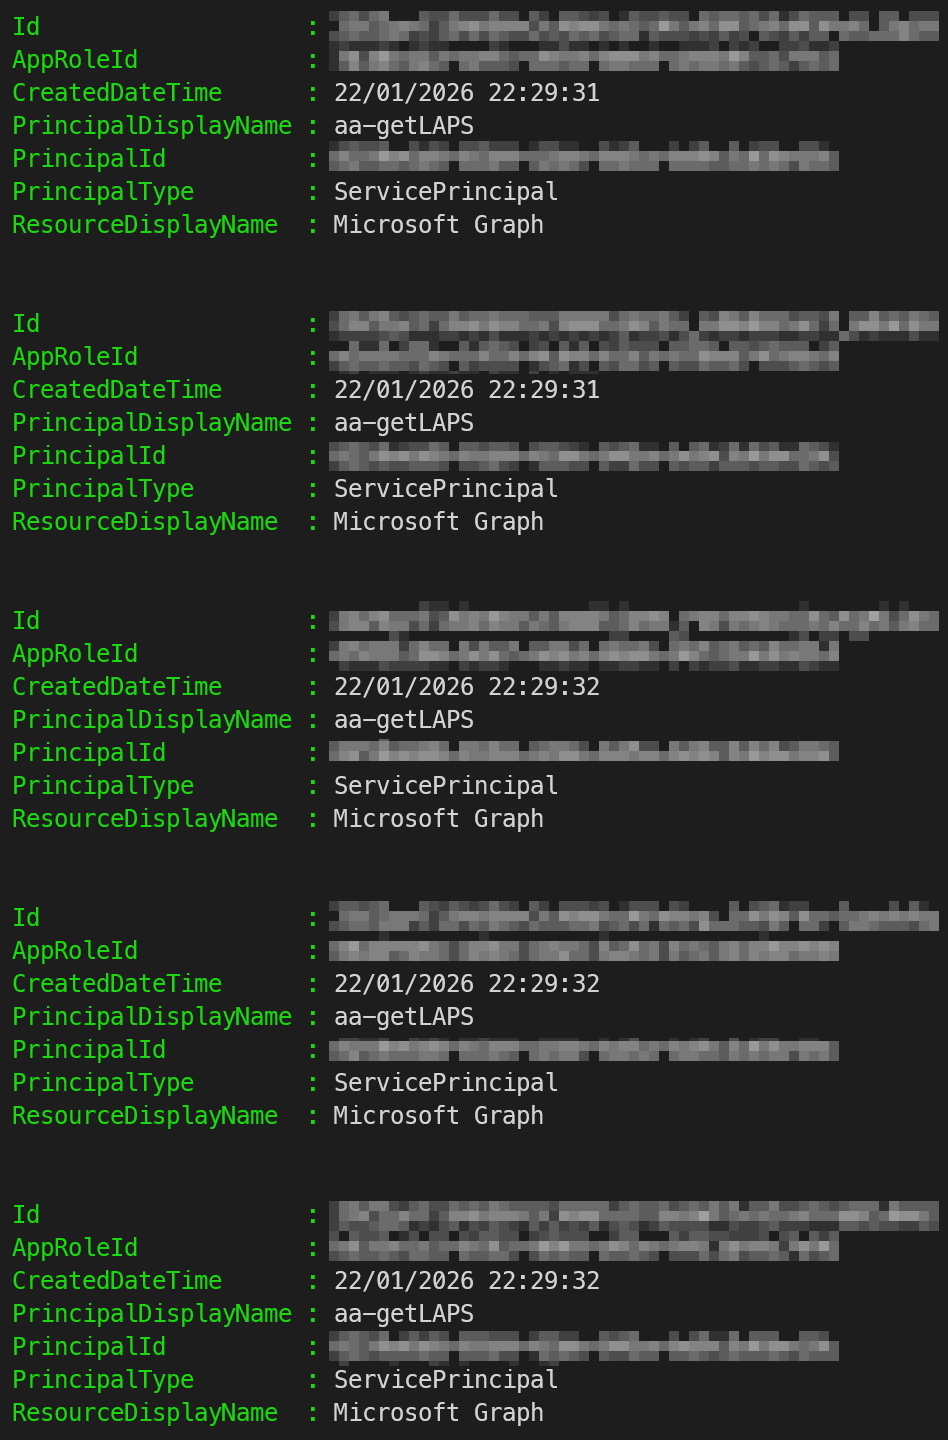
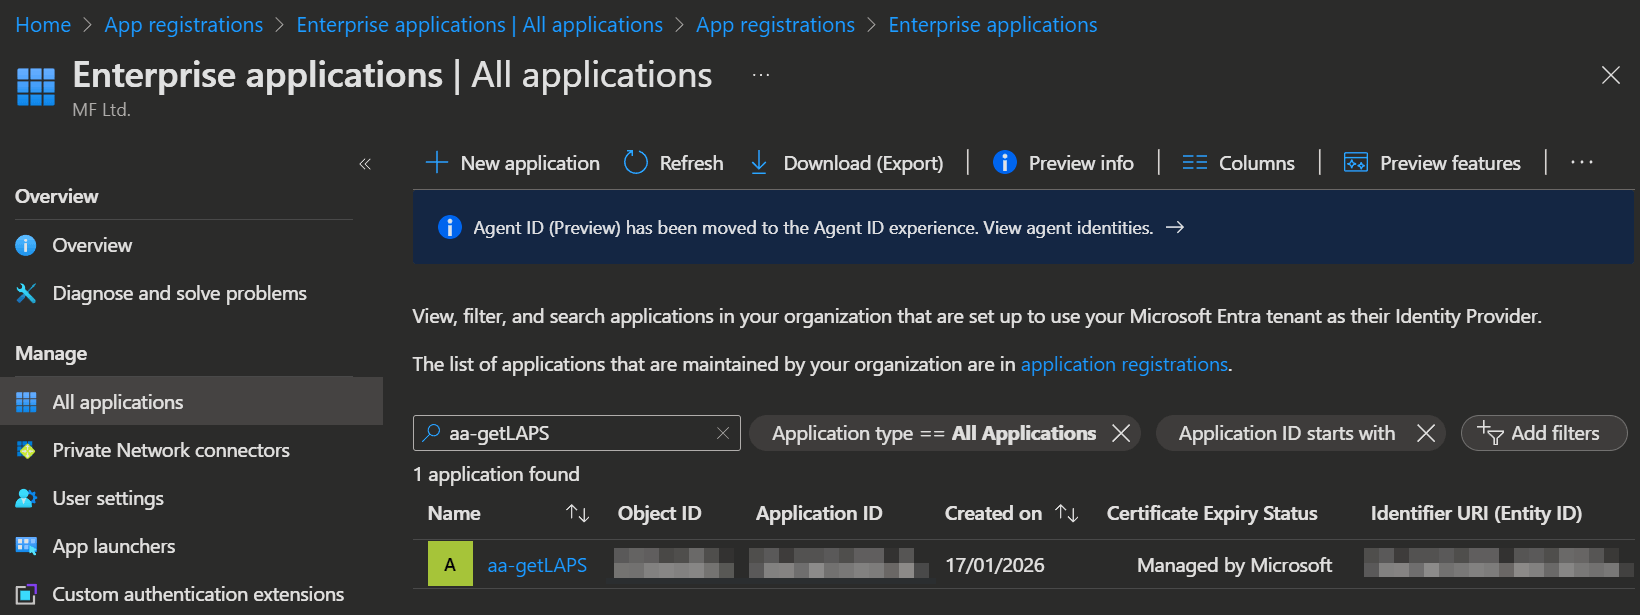
Now that we set up the permissions, you can check them in the portal:
- Open the Entra admin center -> Enterprise apps, set the Application type to
All Applicationsand search for the name of your previously created automation account.
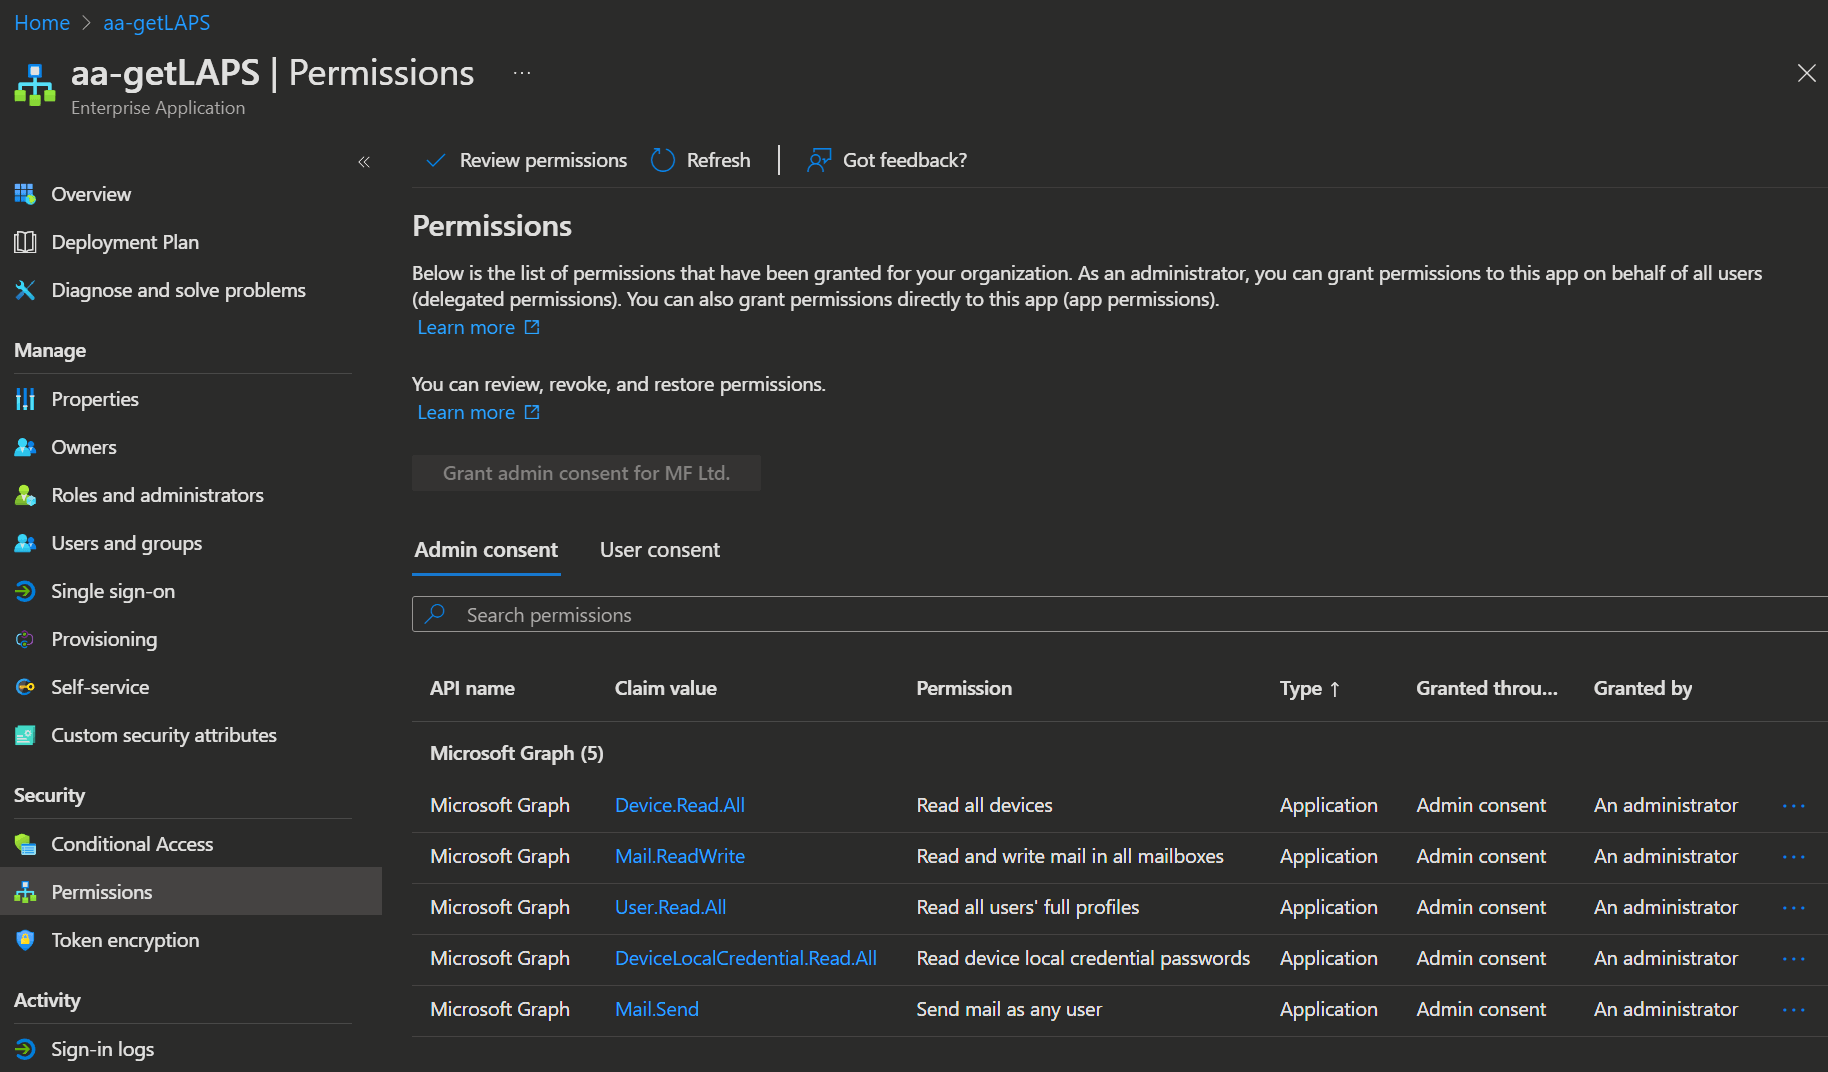
- Open the app and select Security -> Permissions.
Here you can now see the Graph API permissions we set up.
| Before | After |
|---|---|
 |  |
Enduser permission
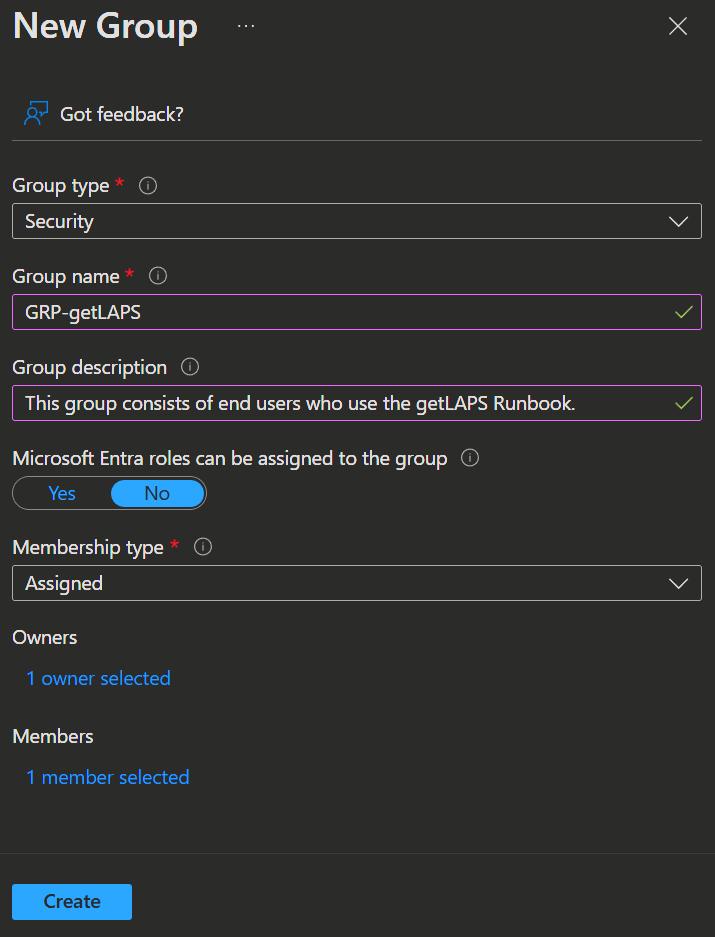
The enduser also needs permissions to trigger the runbook, for which we need a group.
- You can create one by opening the Entra admin center -> Groups and click
New group. - Enter your Name, Description and select your users and the group owner.
- Click
Createto create the group.
Now that we got a group, we give it permission to start the runbook. We can use a built-in role or create a custom role for least privilege.
- To get started, you open the Azure admin Portal -> Automation Accounts and select the previously created Automation Account.
- To create a custom role you select Access control (IAM) -> Roles search for the
Automation Job Operator, click on the 3 dots on the right and selectClone.
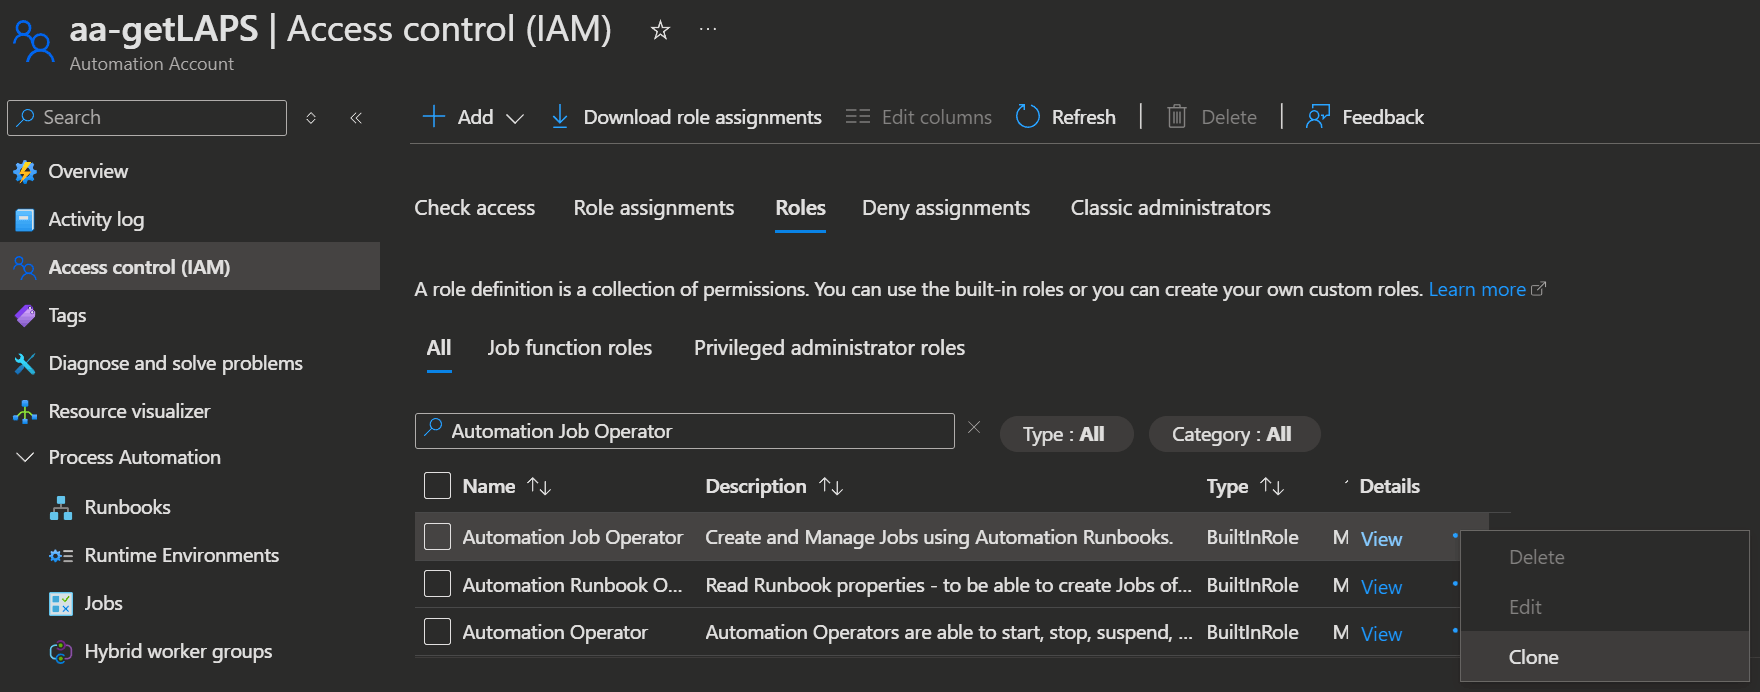
- Next you enter a Name, Description and click
Next.
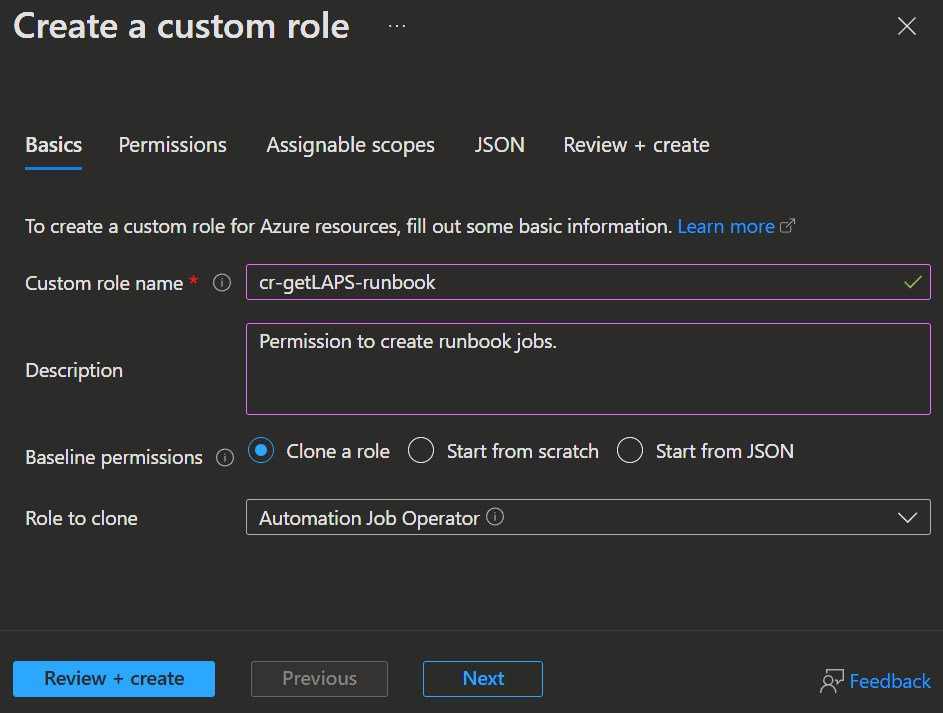
- In the Permissions tab you remove all permissions except the following 2:
Microsoft.Automation/automationAccounts/jobs/readMicrosoft.Automation/automationAccounts/jobs/write
- In addition, add the following with
➕ Add permissions:Microsoft.Automation/automationAccounts/runbooks/read
- Then you can click
Review + CreateandCreateagain, because the Assignable scopes will automatically be set to the current Automation Account.
INFO
Like this the users can only start a job and only in this specific automation account.

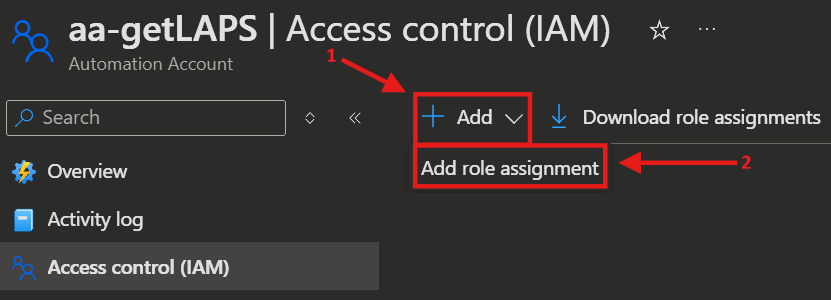
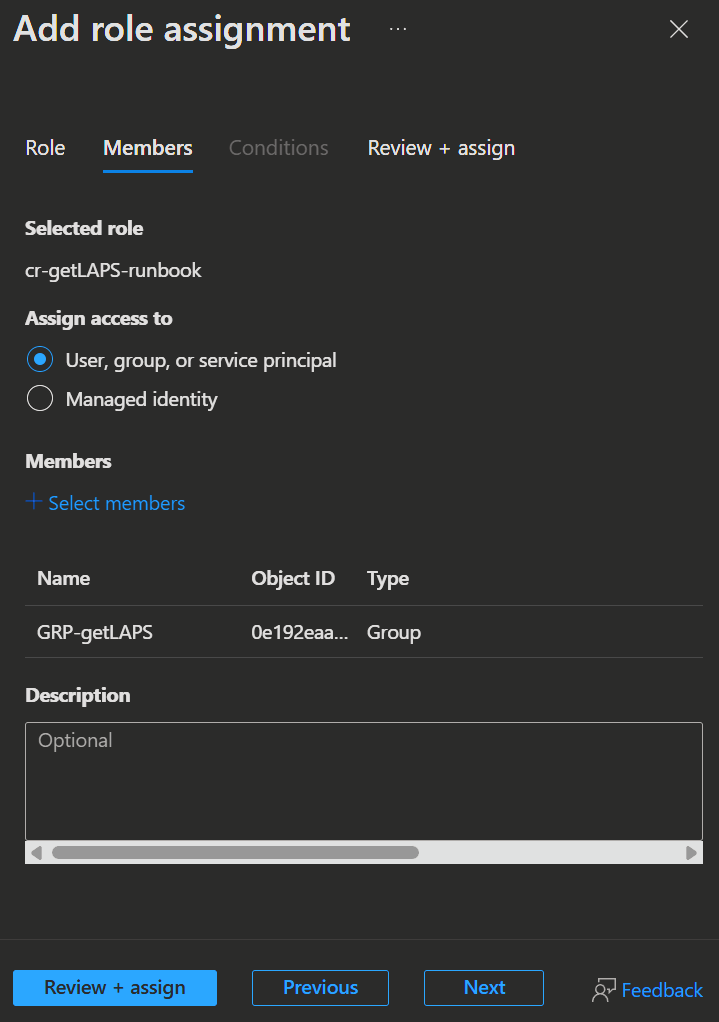
Now we need to assign the custom or build-in role:
- Back in the Automation Account, you select Access control (IAM) again, click
➕ AddandAdd role assignment.
- Now select either the previously created custom role or the built-in Automation Job Operator role and click
Next.
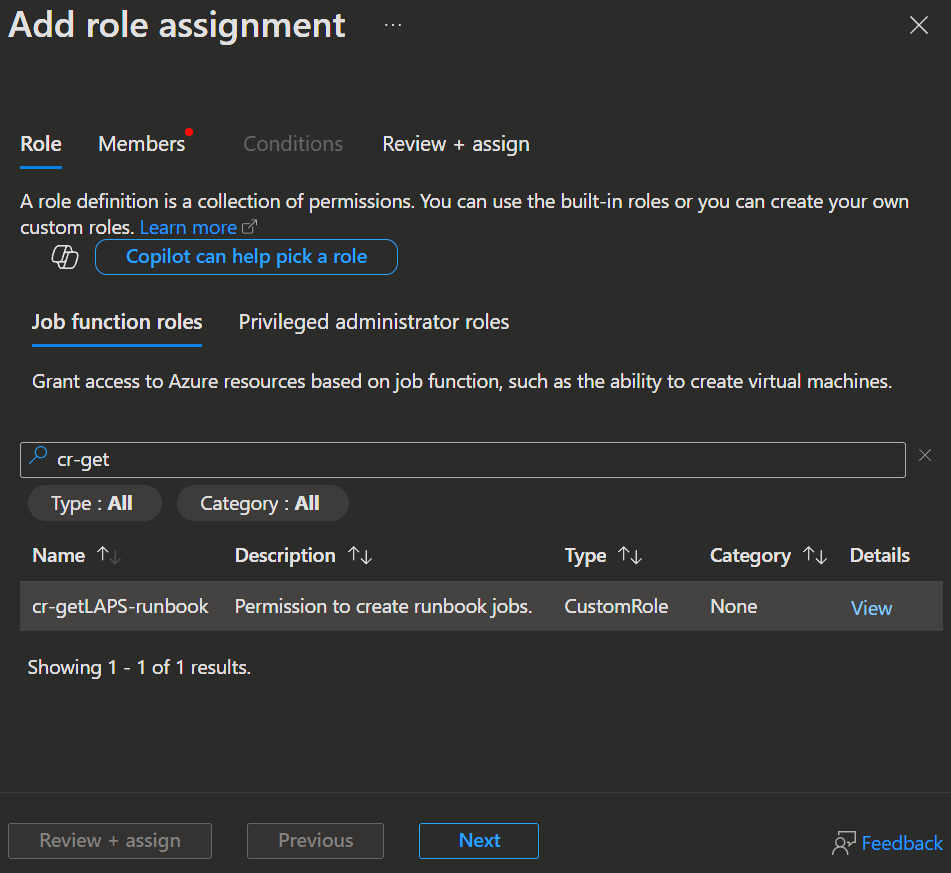
- Here select the Group we created earlier, add it with
➕ Select members, clickReview ➕ assignand thenReview ➕ assignagain.
👤 User Experience
Now that everything is set up, the enduser can request their LAPS password without any privileged access. For that you can use the following PowerShell script, integrate that into one of your self-service portals, use power automate or Logic Apps.
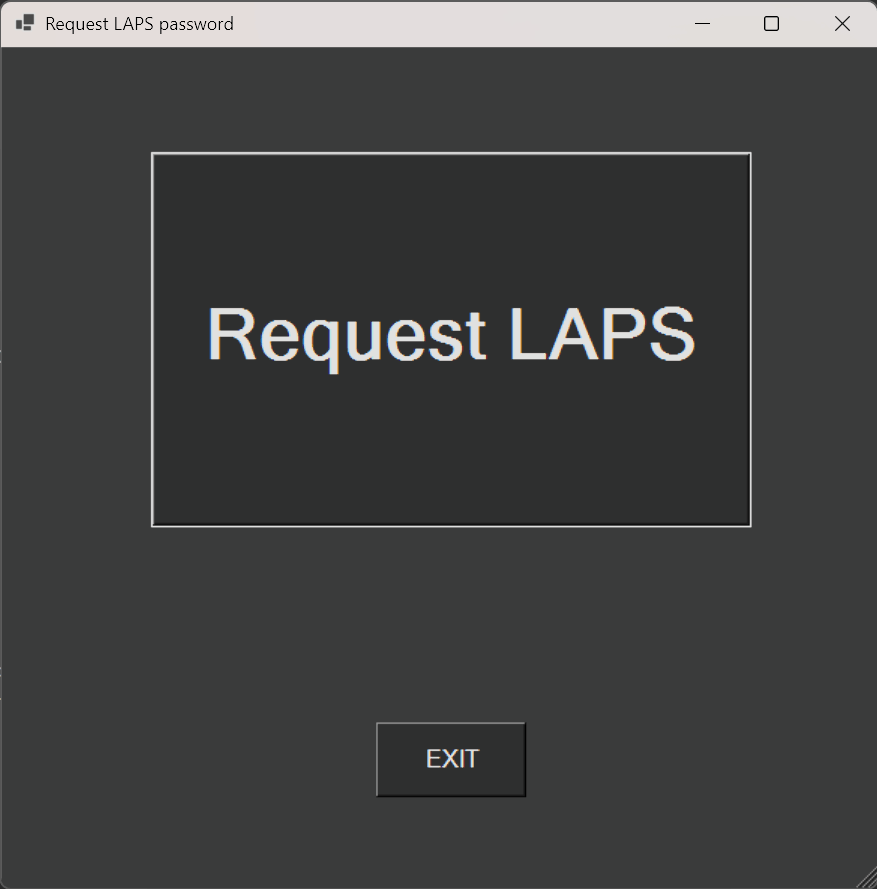
INFO
If you want your users to just execute something simple, I packed the script into an .exe with a simple GUI that you can deploy via Intune (Download). But be aware that I used the resource names seen in this article for the exe.
 |  |
|---|
To execute the script the user does not need any license or other permissions except to be a member of the group we created earlier. But be aware that the user needs a mailbox to be able to receive the LAPS password via mail.
# Install and/or Import the required modules
$required = 'Az.Accounts','Az.Automation'
foreach ($name in $required) {
if (-not (Get-Module -ListAvailable -Name $name)) {
Write-Host "Installing module $name..."
Install-Module -Name $name -Scope CurrentUser -Force -AllowClobber -ErrorAction Stop
}
Import-Module $name -ErrorAction Stop
}
# Connect to Azure
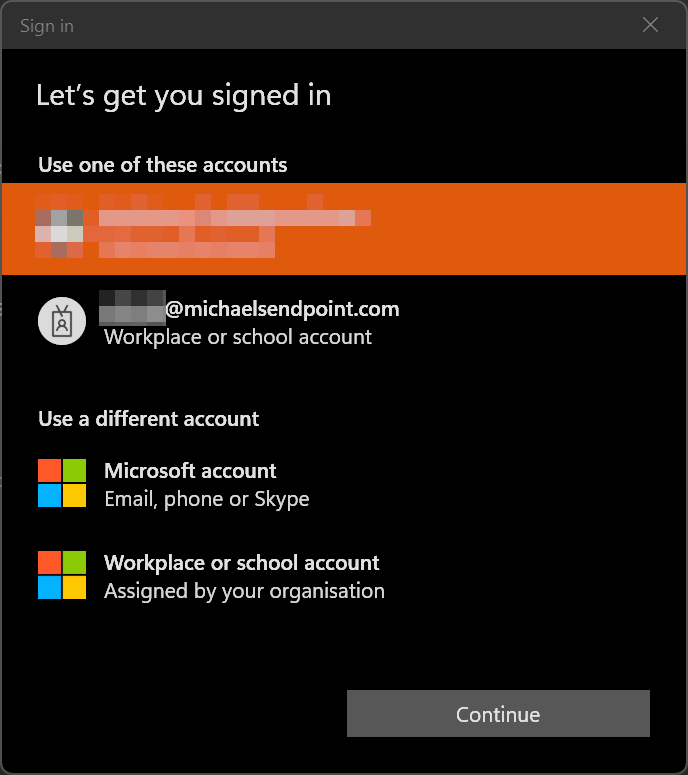
connect-azAccount
# Get the current user's UPN and Entra User ID
$upn = (Get-AzContext).Account.Id
$userid = Get-AzAdUser -UserPrincipalName $upn
# Start the Automation Runbook with the Entra User ID as parameter
$param = @{
Name = "ru-getLAPS"
AutomationAccountName = "aa-getLAPS"
ResourceGroupName = "rg-getLAPS"
Parameters = @{ EntraUserID = $userid.id }
}
Start-AzAutomationRunbook @param
# Disconnect from Azure
disconnect-azAccount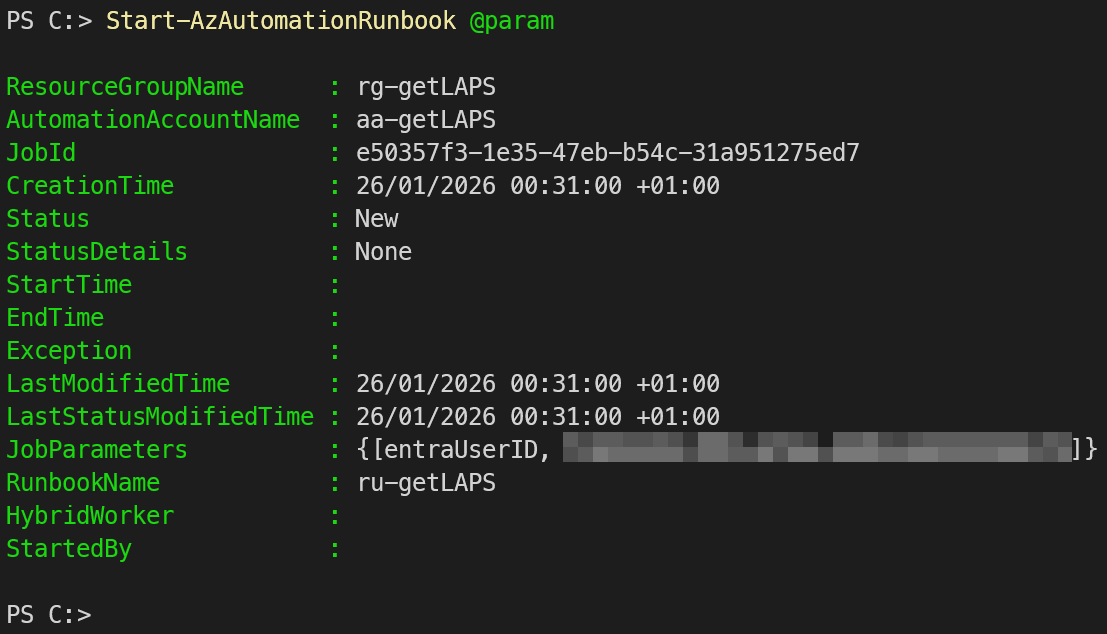
A few moments later the user will receive an email with their LAPS passwords in their inbox.
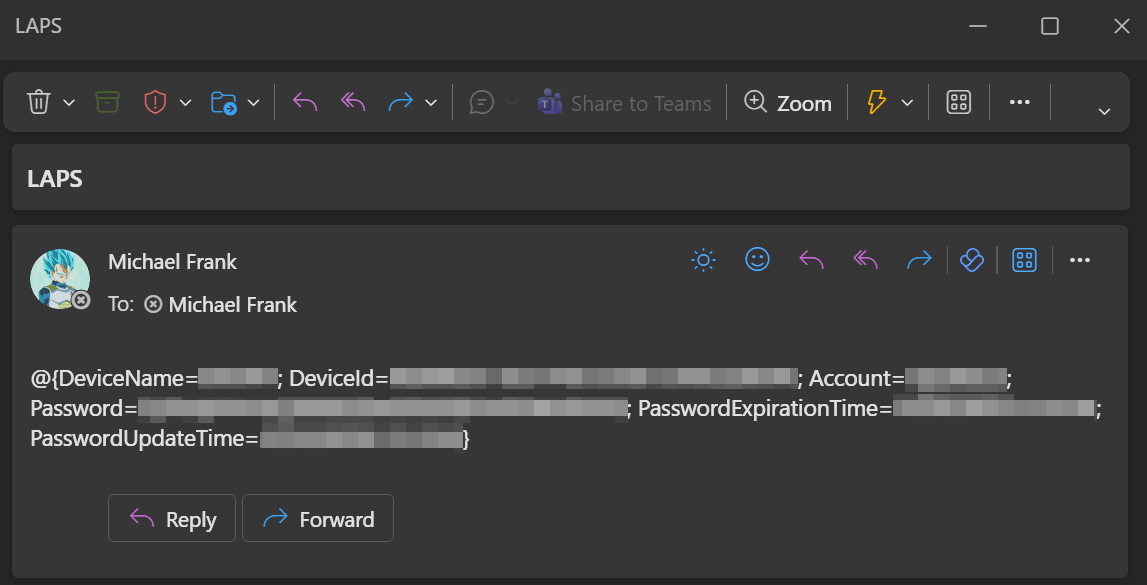
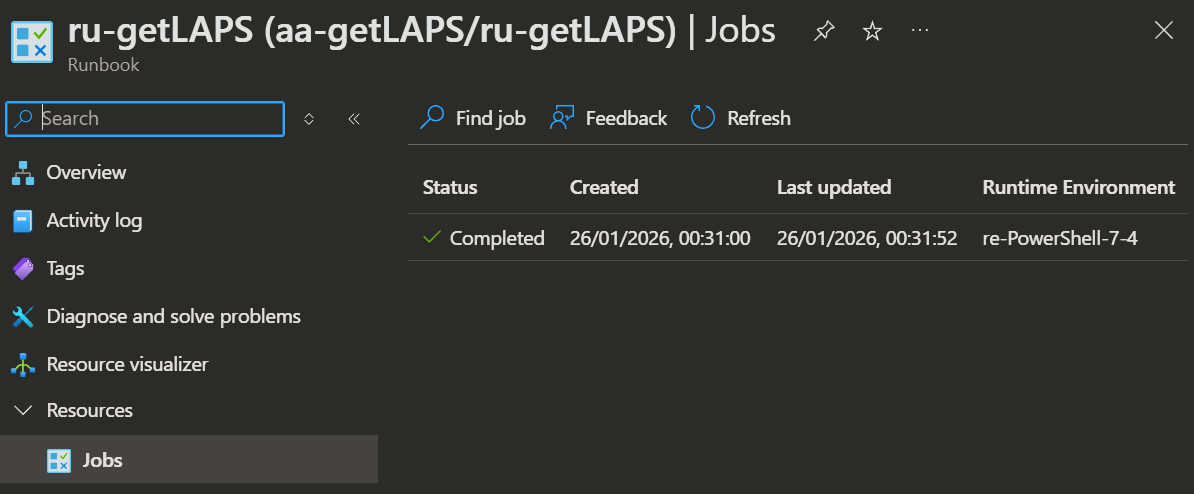
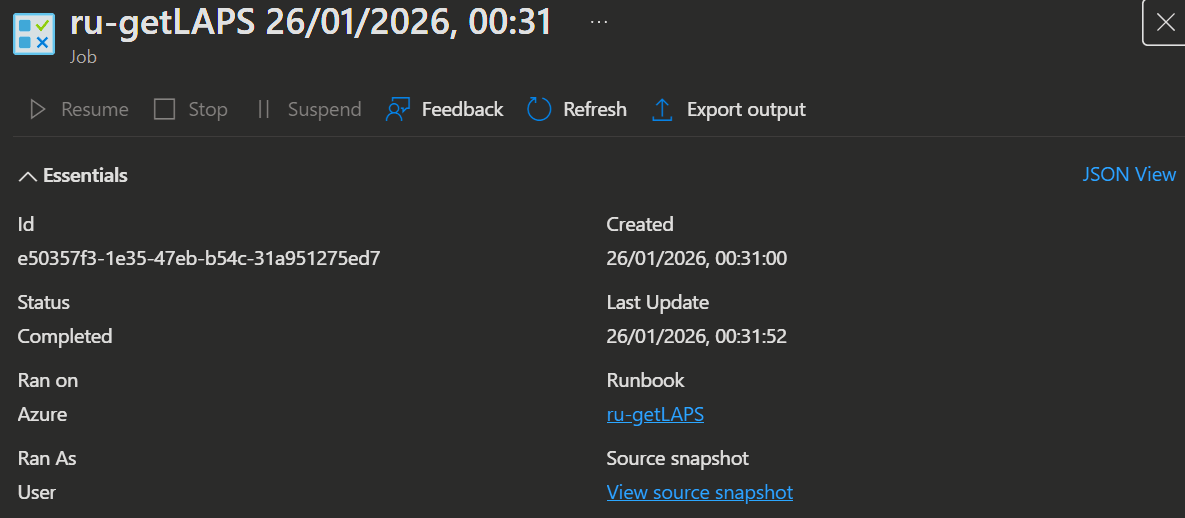
The admin can also inspect the job execution in the Azure Portal under the Automation Account or in the Runbook. The actual email content / LAPS passwords will not be visible in the job output in the runbook jobs tab, so a person without the proper permissions will not be able to access them.
💡 Conclusion
This approach provides a simple, auditable way to deliver LAPS passwords to end users without granting them broad access. By using an Automation Account with a managed identity and scoped Graph permissions, you centralize sensitive operations while minimizing privileged access.
With this self-service setup, you can enrich your environment even if you already use an Endpoint Privilege Management (EPM) solution, as it provides a quick and easy way to give admin access to a users whole device. So no matter if you plan to use it with admins or endusers, this provides a flexible, least-privilege self-service solution to a problem as old as client-server setups itself.