Install Win32 Apps with Winget
No more packaging required
👋 Introduction
Using Intune to install apps on Windows devices is really useful, but anyone who has set up lots of these knows how tricky it can be: getting the right version of the installer, changing it when new versions of apps are released, and keeping everything up to date. The idea of a "universal app" installer is really interesting. This is an app that can install any application, and it doesn't need the usual packaging.
But this approach isn't simple. Intune installs software in the system context, which is necessary for elevated permissions and seamless deployments, but it also introduces unique challenges. Winget, for example, is installed for each user via the Microsoft Store, and its different parts are not always easy to find in the system. This means that simply using Winget from a script won't work straight away when you use Intune to deploy it.
Even though there are some problems, if you set everything up right and add a few scripts, you can use Winget to create a process for deploying apps that is flexible, easy to maintain, and efficient. In this article, I will explain how to make this strategy work, talk about the technical things you need to think about, and give you some useful tips to help you manage your Intune applications more easily.
🤷 How are we going to do this?
To accomplish this kind of 'Universal App' which you can use to install any Winget application, we first need some kind of universal installation method deployed with Intune. The same for the uninstall method and the detection method.
So How are we going to do this?
1️⃣ First, we need a method to install an app without repackaging. We'll achieve this by passing the application as a parameter to our installation script.
.\[ScriptName].ps1 -app [Parameter]2️⃣ Next we need to create a script that accepts the application ID as a parameter, allowing us to install any app by simply parsing it the Winget package ID.
At the Start we need to declare the parameter that we want to pars to the script.
Param(
    [string]$app
)
Now we need to find the proper Winget folder so we can use it in system context. With that we can use the winget version that comes preinstalled with Windows. To locate the correct folder regardless of the installed version, we first need to resolve the path dynamically.
IMPORTANT
wingetcan not just be used as a command in system context (while permorming an installation through Intune), because winget gets installed trough the Windows Store as the App Installer and because of this important parts are not in place in sytem context. 
$ResolveWingetPath = Resolve-Path "C:\Program Files\WindowsApps\Microsoft.DesktopAppInstaller_*_x64__8wekyb3d8bbwe\winget.exe"
    if ($ResolveWingetPath){
           $WingetPath = $ResolveWingetPath[-1].Path
    }

$Wingetpath = Split-Path -Path $WingetPath -Parent
Set-Location $Wingetpath
At last, we call winget.exe with the required parameters and the application ID we parsed earlier.
This command will perform a silent, machine wide installation of the specified app in system context.
.\winget.exe install --exact --id $app --silent --accept-package-agreements --accept-source-agreements --scope machine --disable-interactivityWARNING
Calling the app installation with the --exact parameter enables us to install the specific App we want and not get a similar sounding app. But be aware that the App ID is now case sensitive and will not work if you make a spelling error.
3️⃣ Repeat the process for the uninstallation script, updating only the command and parameters to perform an uninstall.
.\winget.exe uninstall --exact --id $app --silent --accept-source-agreements --scope machine --disable-interactivity4️⃣ At the end we still need to create the detection, which can be a bit tricky because we can not simply use winget for that. If we would simply ask Winget with the command winget list Notepad++.Notepad++ it would give us an accourate answer, but that does not mean we get it in an easily usable format.
This is the answer we get from winget 
but if we capture the result it acutally commes out as an array. In addition the line No installed package found matching input criteria is always in the prefered language.
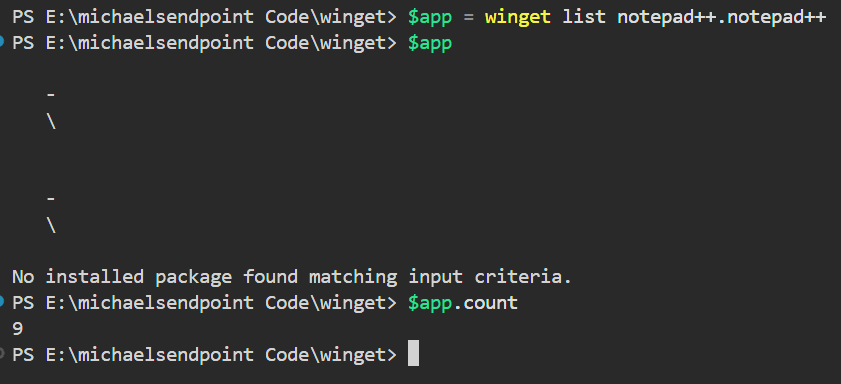
That is why we use the registry to find if the application is installed.
First we declare our parameter.
$appname = "Notepad++"Then we check for the registry entry in the 64-bit application path. If it is found we escape with the exit code 0 (success).
# This is for 64-bit applications on 64-bit systems
$app = Get-ItemProperty HKLM:\Software\Microsoft\Windows\CurrentVersion\Uninstall\* | Where-Object { $_.DisplayName -like "*$($appname)*" }

if ($app) {
    Write-Host "Found app $($appname)!"
    exit 0
}
If the application is not found under the 64-bit path, we then check the 32-bit application registry path. If the app is detected here, we exit with exit code 0 (success) and if not, with exit code 1 (not found).
# This is for 32-bit applications on 64-bit systems
$app = Get-ItemProperty HKLM:\Software\WOW6432Node\Microsoft\Windows\CurrentVersion\Uninstall\* | Where-Object { $_.DisplayName -like "*$($appname)*" }

if ($app) {
    Write-Host "Found app $($appname)!"
    exit 0
}
else {
    Write-Host "Did not find app $($appname)!"
    exit 1
}
Now we putting it all together.
📦 Use Winget to identify package information
When you open a PowerShell window you can use the Windows Package Manager with the wingetcommand. Winget will be pre-installed on all new Windows versions since Windows 10 21H2 or Windows 11 21H1. Alternativly you can download it at aka.ms/getwinget.
To find the package ID of the application you want to install, use the following command:
# Example for Notepad++
winget search Notepad++
📱 Create and implement the Intune App
Creating the App Package
- Download the Microsoft-Win32-Content-Prep-Tool from the Microsoft GitHub Page and unpack the ZIP file.
- In the unpacked folder create another folder called 'App' and copy the installation and uninstallation scripts into it (You can download both in my GitHub Repository).
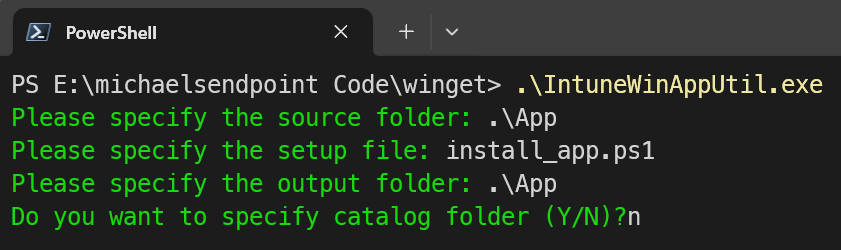
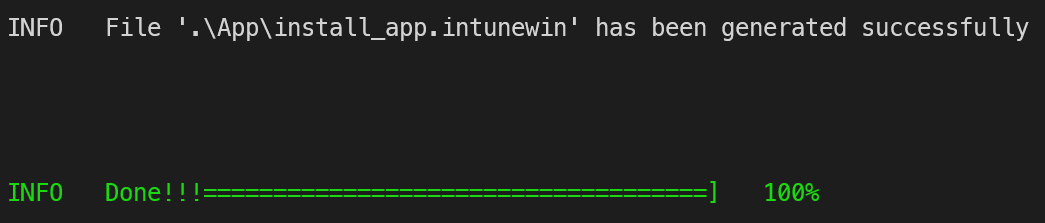
- Open a Powershell window and navigate to the folder where you extracted the downloaded files and run the
IntuneWinAppUtil.exe. - You will now be asked to specify a source folder, a setup file, an output folder and whether you want to use a catalog folder or not. After that you press Enter.
TIP
You can also download the finished INTUNEWIN file via DownGit from my GitHub Repository.
Creating the Intune App
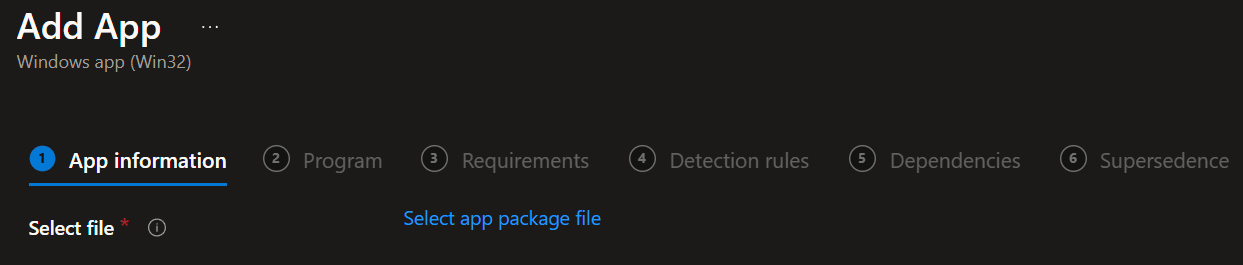
- Open the Apps blade in the Intune admin center, select 'Windows' and click 'Add'.
- Select the App type: Windows app (Win32).
- Now click 'Select app package file' and select the
INTUNEWINfile you created before.
- Now enter the name of the application and any additional information you need.
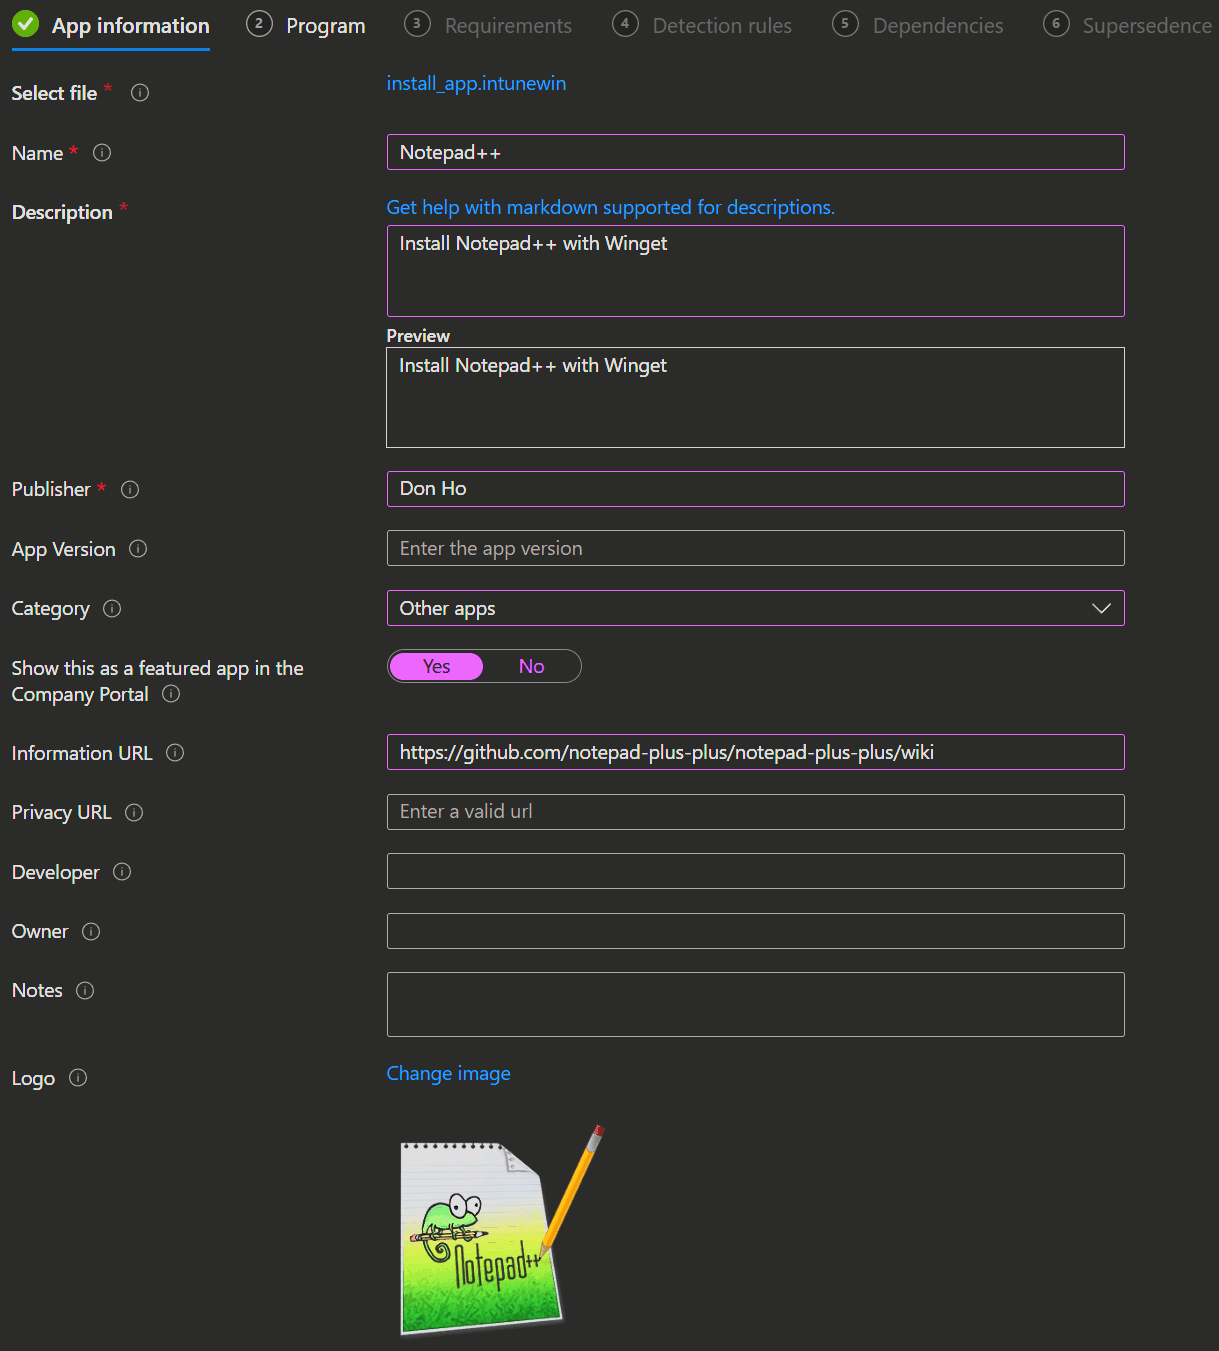
- The following tab 'Program' allows you to enter the installation and uninstallation commands.
- With the install command, we parse the scripts inside the `INTUNEWIN` file, the `-app` (Notepad++.Notepad++) parameter, which it will use to determine the intended app.
Powershell.exe -NoProfile -ExecutionPolicy ByPass -File .\install_app.ps1 -app Notepad++.Notepad++- The same is true for the uninstall command.
Powershell.exe -NoProfile -ExecutionPolicy ByPass -File .\uninstall_app.ps1 -app Notepad++.Notepad++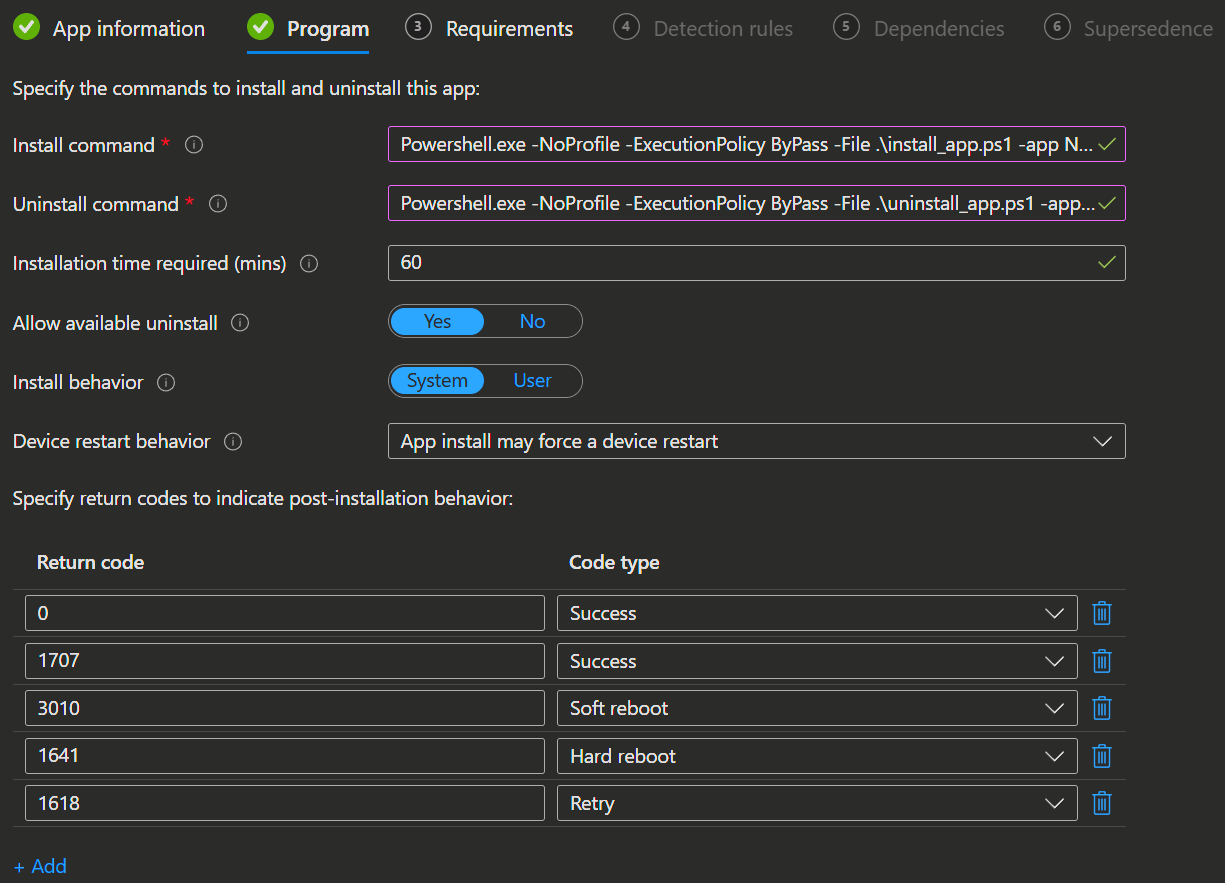
- In the next tab 'Requirements' you can set the 'Operating system architecture' (64-bit) and 'Minimum operating system' (for example 'Windows 10 21H1').
- In the 'Detection rules' tab, select 'Use a custom detection script' and upload the detection script you created earlier or download it from my GitHub Repository.
$appname = "Notepad++"

# This is for 64-bit applications on 64-bit systems
$app = Get-ItemProperty HKLM:\Software\Microsoft\Windows\CurrentVersion\Uninstall\* | Where-Object { $_.DisplayName -like "*$($appname)*" }

if ($app) {
    Write-Host "Found app $($appname)!"
    exit 0
}

# This is for 32-bit applications on 64-bit systems
$app = Get-ItemProperty HKLM:\Software\WOW6432Node\Microsoft\Windows\CurrentVersion\Uninstall\* | Where-Object { $_.DisplayName -like "*$($appname)*" }

if ($app) {
    Write-Host "Found app $($appname)!"
    exit 0
}
else {
    Write-Host "Did not find app $($appname)!"
    exit 1
}
WARNING
Be aware that you need to change the app name in the detection script for every new app.
Don`t use the Winget app ID here, but instead the actual app name that would appear in Windows.
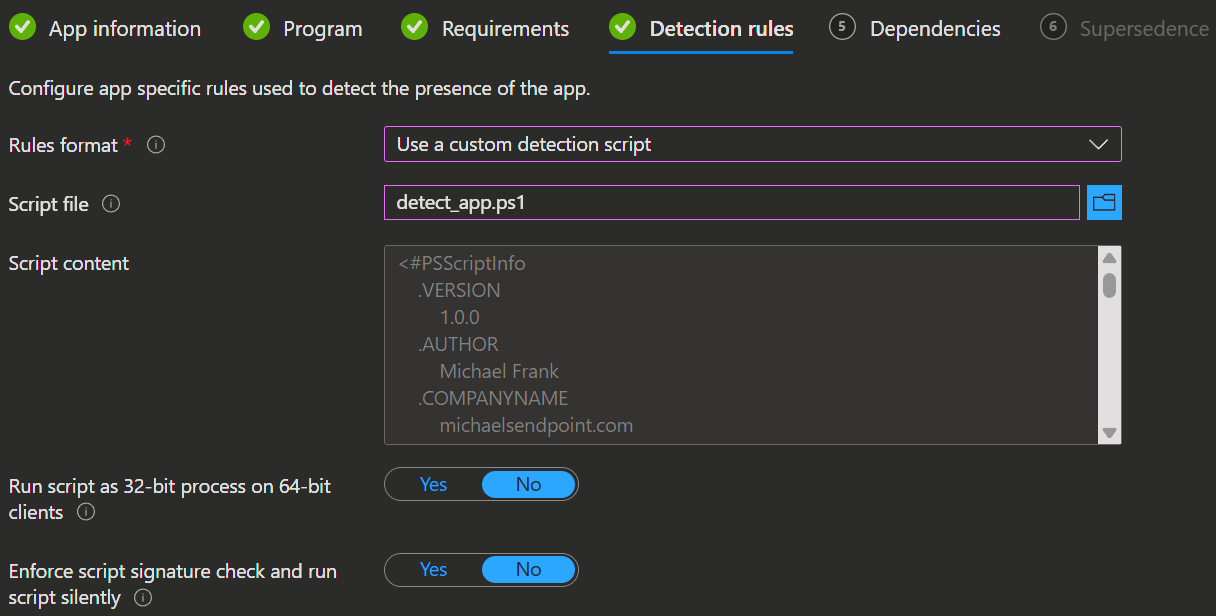
- Leave both options set to 'No' and proceed to the next tab.
- Next, you can skip the 'Dependencies' and 'Supersedence' and then assign the application to whomever you need.
💡 Conclusion
And that's it! With this approach, you can quickly roll out almost any app to your devices using Intune and Winget. No more tedious packaging and repackaging apps over and over. It's a huge time saver and keeps your deployment process flexible and modern by only using native tools. Give it a try, and you'll wonder why you ever did it any other way. 😉
Key Advantages
- Eliminates need for traditional app packaging
- No need to periodically update app packages
- Streamlines deployment process
- Maintains robust Intune management capabilities
- Uses native Windows Package Manager
- Requires minimal setup (just one .intunewin file for all apps)
- Easy to maintain and add to
- Keeps the same reporting and management capabilities as traditional Win32 apps
How to modify for another app
- Use the same .intunewin file - no need to create a new one
- Find the new app's package ID using: winget search [app name]
- Modify the install command:
Powershell.exe -NoProfile -ExecutionPolicy ByPass -File .\install_app.ps1 -app [new package ID]- Modify the uninstall command:
Powershell.exe -NoProfile -ExecutionPolicy ByPass -File .\uninstall_app.ps1 -app [new package ID]- Update the detection script with the new package ID:
$appname = "[new package ID]"
*
*
The rest of the configuration in Intune remains the same - just update the app name and description to match your new application.