
Endpoint Privilege Management
👋 Introduction
Endpoint Privilege Management (EPM) is a powerful feature in the Intune Suite that helps organizations strike the right balance between security and productivity by allowing users to elevate their privileges only when necessary. With EPM, you can grant standard users temporary admin rights for approved applications or tasks without making them full-time administrators. This approach supports Zero Trust principles and helps reduce the risks associated with excessive permissions.
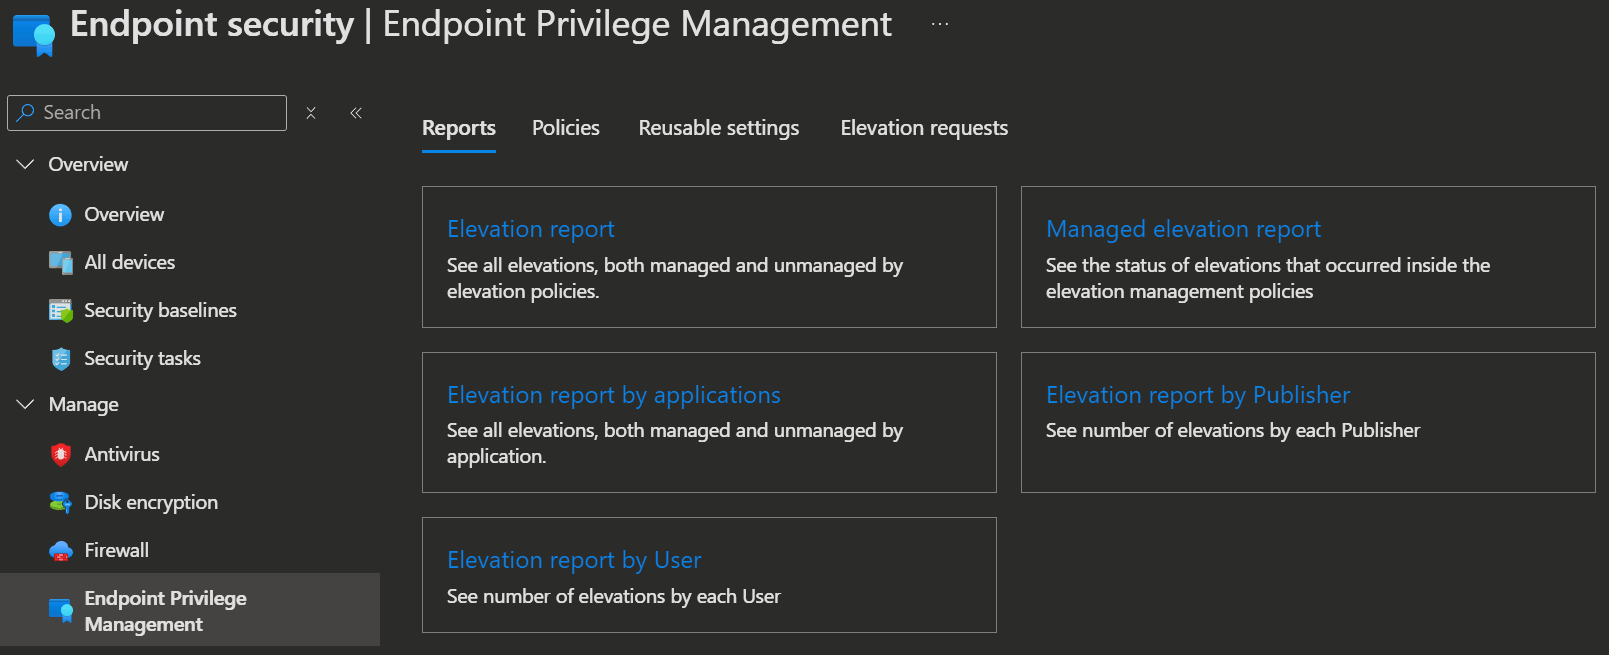
You can find and configure Endpoint Privilege Management in the Microsoft Intune admin center by navigating to Endpoint Security → Endpoint Privilege Management. Here, you'll be able to set up policies, manage elevation rules, review elevation requests, and access detailed reports to monitor usage and compliance.
In this article, I'll walk through the key features, configuration steps, and user experiences to help you get started with EPM and make the most of its capabilities.
Reports
Intune provides you with a few standard reports to help keep track of your elevations.
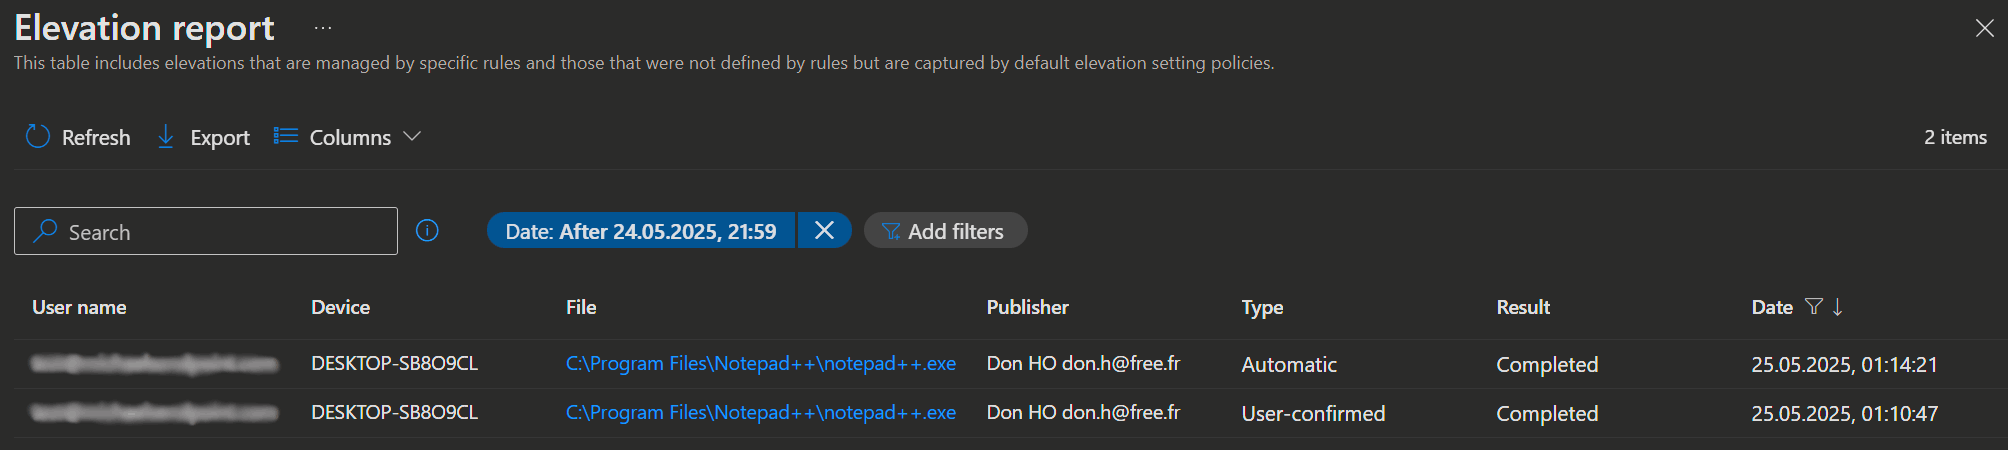
- Elevation report: See all elevations, both managed and unmanaged by elevation policies.
- Managed elevation report: See the status of elevations that occurred inside the elevation management policies
- Elevation report by applications: See all elevations, both managed and unmanaged by application.
- Elevation report by Publisher: See number of elevations by each Publisher
- Elevation report by User: See number of elevations by each User
If you require more detailed analysis and additional data, the Advanced hunting page in the Microsoft Defender Portal should come in handy. The following KQL queries can help you find more information about the elevations in your environment.
Finds process elevations:
DeviceProcessEvents
| where Timestamp > ago(7d)
| where InitiatingProcessIntegrityLevel != ProcessIntegrityLevel
    and ProcessIntegrityLevel == "High"
| project Timestamp, DeviceName, AccountName, InitiatingProcessFileName, InitiatingProcessCommandLine,
          FileName, ProcessCommandLine, ProcessId, InitiatingProcessId, ReportId, FolderPath,
          InitiatingProcessIntegrityLevel, ProcessIntegrityLevel
| order by Timestamp desc
Finds app elevations from the Endpoint Privilege Management:
DeviceEvents
| where ActionType == "AppElevationRequest"
   or ActionType == "AppElevationApproved"
   or ActionType == "AppElevationDenied"
| project Timestamp, DeviceName, AccountName, FileName, FolderPath, ActionType, ReportId, InitiatingProcessCommandLine
| order by Timestamp desc
Policies
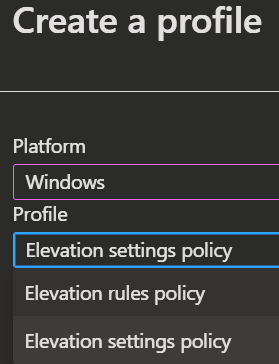
In the Policies tab you can create the Elevation rules policies and Elevation settings policies. You can find more information about that in the following article.
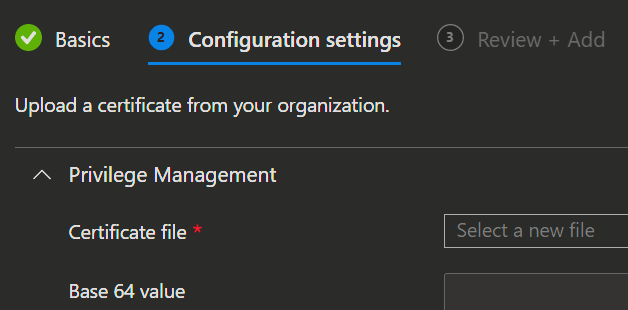
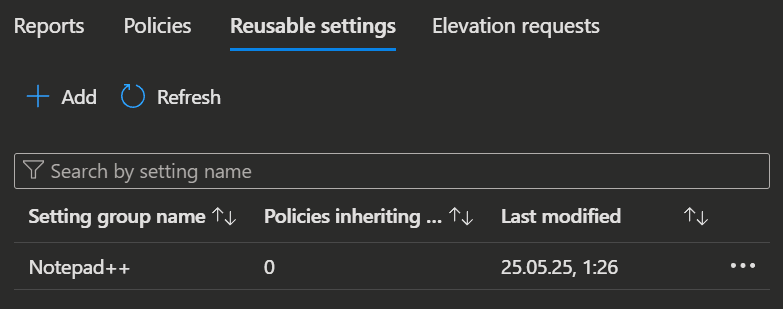
Reusable settings
Reusable settings allow you to upload certification files once and reference them across multiple policies, simplifying management and reuse.
- Click
Add. - Enter 'Name' and 'Description'.
- Upload your certification file.
- Review and add the setting.
WARNING
Please be aware that this feature is still in Preview.
Elevation requests
In the Elevation requests tab, you can view and manage user requests for privilege elevation. This section allows IT administrators to review, approve, or deny elevation requests submitted by end users. You can find more information about that in the following article.

🧑🔧 Configuration
When Endpoint Privilege Management Settings get applied to a device, EPM will get activated. In pratical terms, that means, that EPM will be implemented into the Context Menu of the System. To accomplish this the EPM Microsoft Agent gets installed in the backround. This agent includes the EpmTools PowerShell module, which you can use to troubleshoot or get additional file atributes for future rules you want to build.
Import-Module 'C:\Program Files\Microsoft EPM Agent\EpmTools\EpmCmdlets.dll'Following are the available cmdlets:
| Name | Description |
|---|---|
| Get-Policies | Retrieves a list of all policies received by the Epm Agent for a given PolicyType (ElevationRules, ClientSettings). |
| Get-DeclaredConfiguration | Retrieves a list of WinDC documents that identify the policies targeted to the device. |
| Get-DeclaredConfigurationAnalysis | Retrieves a list of WinDC documents of type MSFTPolicies and checks if the policy is already present in Epm Agent (Processed column). |
| Get-ElevationRules | Query the EpmAgent lookup functionality and retrieves rules given lookup and target. Lookup is supported for FileName and CertificatePayload. |
| Get-ClientSettings | Process all existing client settings policies to display the effective client settings used by the EPM Agent. |
| Get-FileAttributes | Retrieves File Attributes for an .exe file and extracts its Publisher and CA certificates to a set location that can be used to populate Elevation Rule Properties for a particular application. |
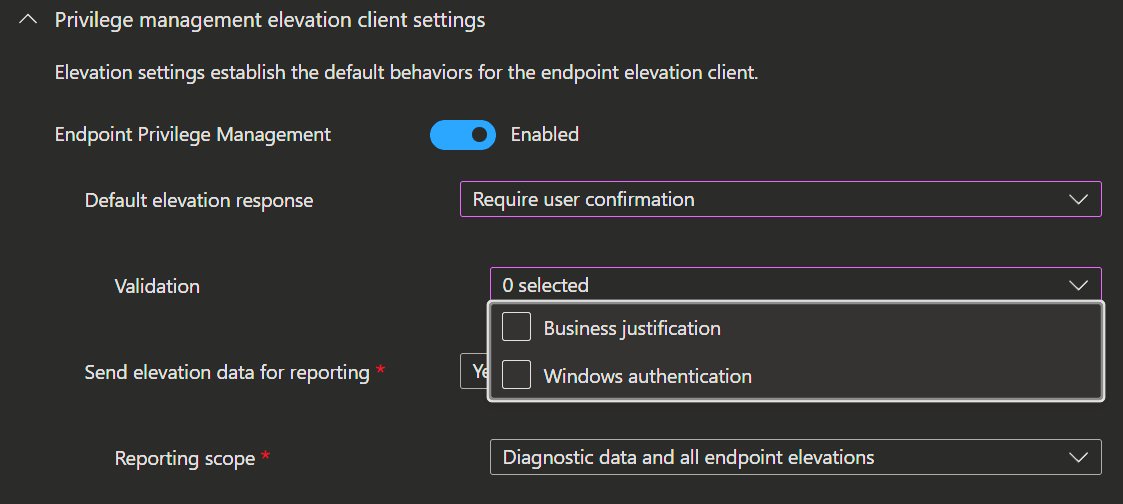
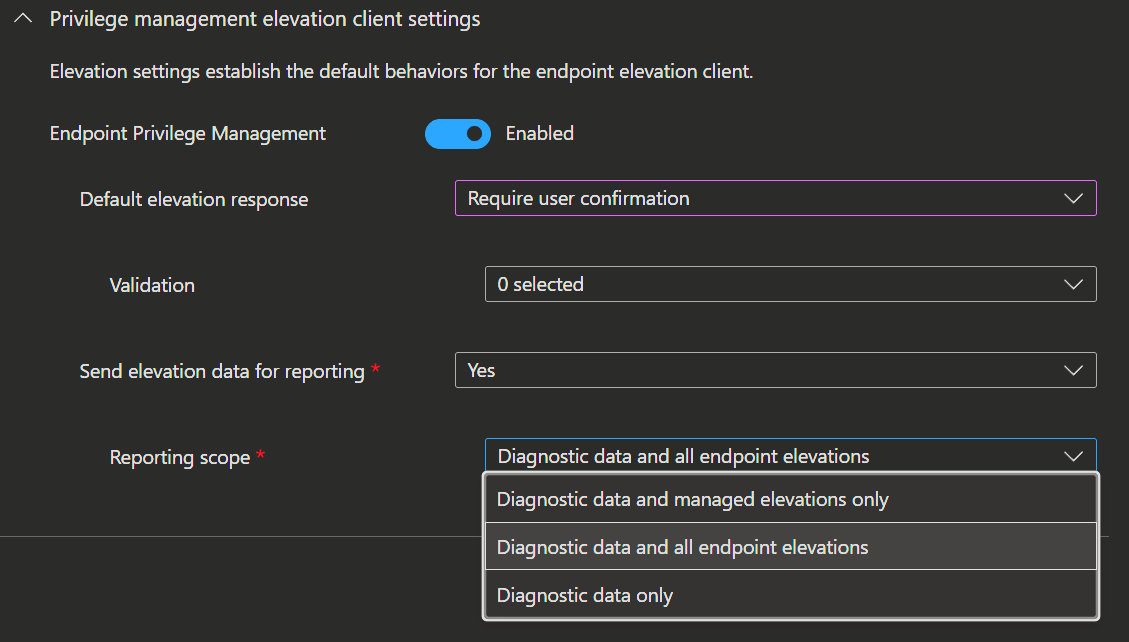
EPM Settings
Elevation settings let you decide how the elevation client should act by default on your endpoints.
- When you create a policy you start with entering the
NameandDescription. - Next activate the
Endpoint Privilege Managementswitch and and you're ready to dive into the rest of the settings.
  |
|
|---|
With the 'Default elevation response' settings you got the possibility to implement a Whitlist or Blacklist approche to your elevation requests and of course you can change that up between groups. To stay with the least privilege principles, you could make your IT accounts standard users instead of administrators and allow them by default to elevate apps. That would mean that they can still do all the tasks that need elevation, but are still standard users outside of that. In Addition, all the elevations would be logged.
On the other side of that, you can deny all non IT users by default the elevation and only allow specific ones with business justification or support approval.
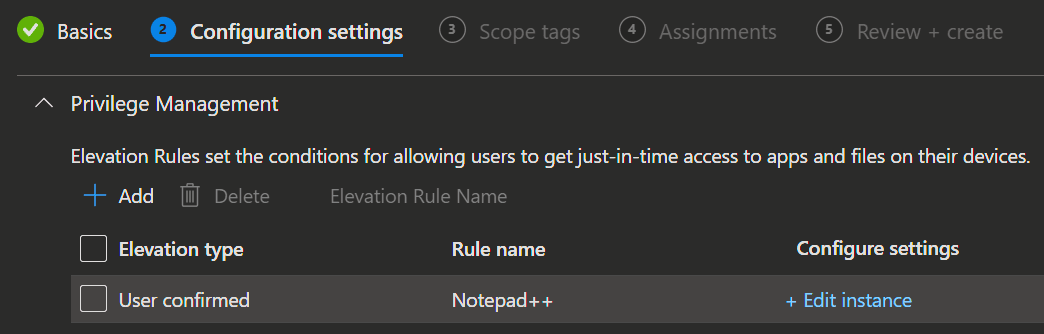
EPM Rules
Elevation Rules let you decide when and how users can get temporary admin access to specific apps or files on their devices just when they need it, and only for what you allow.
- When you create a policy you start with entering the
NameandDescription. - Next you can add individual
rulesto the policy.
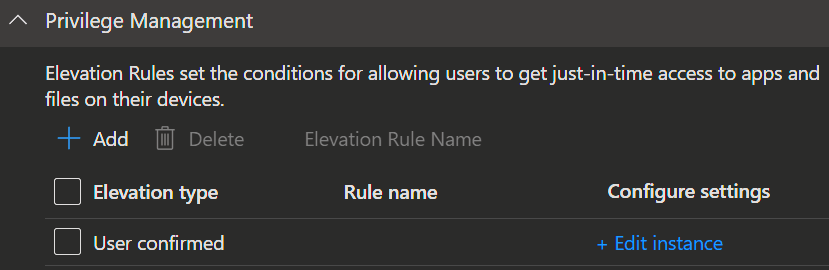
- When you click
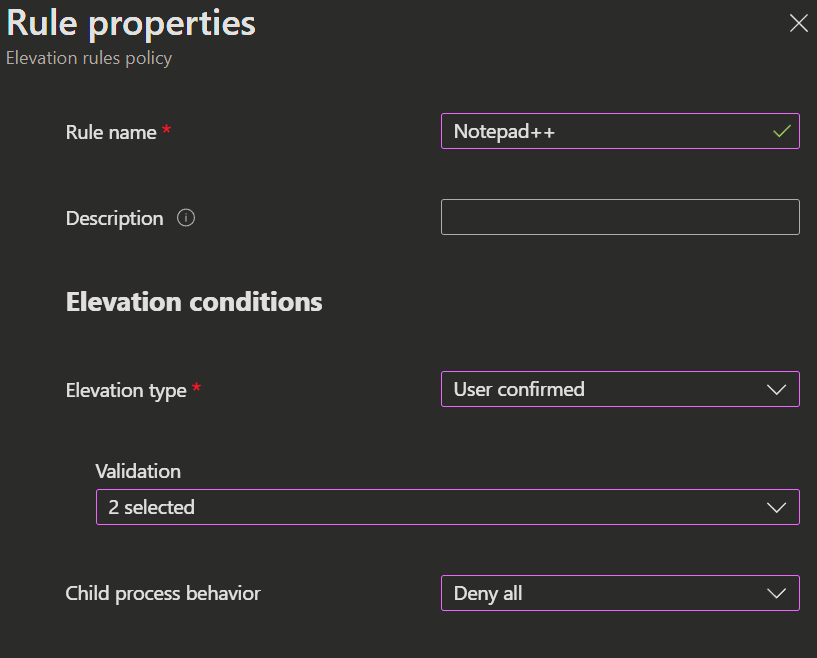
Add, theRule propertiesopen. - Specify the
Rule name,Description,Elevation conditionsandFile informationfor your elevation rule.
- Elevation type:
- User confirmed: The user must provide a
business justification, completeWindows authentication, or both to proceed with elevation. - Automatic: Elevation requests are approved automatically without user or IT intervention.
- Support approved: Elevation requests are sent to the Elevation requests tab, where IT can review and approve or deny them.
 |
|
|---|
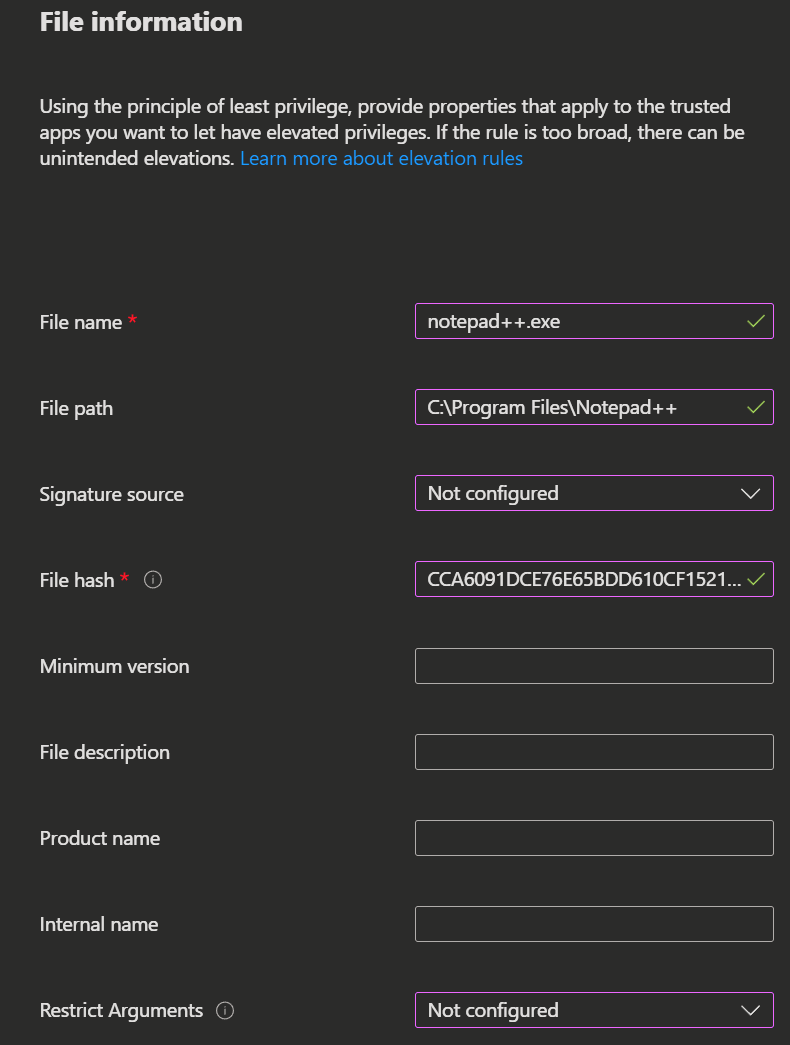
- Now you enter the
File information. For this you need at least aFile nameand aFile hashor acertificate.
- Signature source:
- Use a certificate file in reusable settings: You can use a previously uploaded certificate from your Reusable settings.
- Upload a certificate file: You can upload the certificate for the file you want to elevate.
 |
|
|---|
TIP
An easy way to get the file hash of an executable is to use the get-filehash CMDlet.
get-filehash notepad++.exe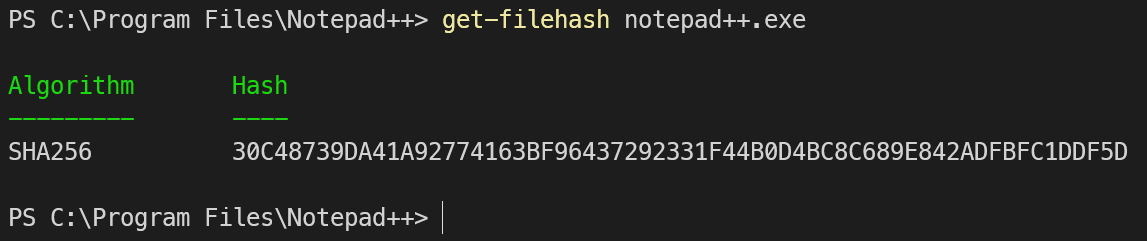 And an easy way to get the `SignerCertificate`from an executable is to use the `Get-AuthenticodeSignature` CMDlet.
 (Get-AuthenticodeSignature .\notepad++.exe).SignerCertificate | Export-Certificate -Type CERT -FilePath '.\notepad++.cer'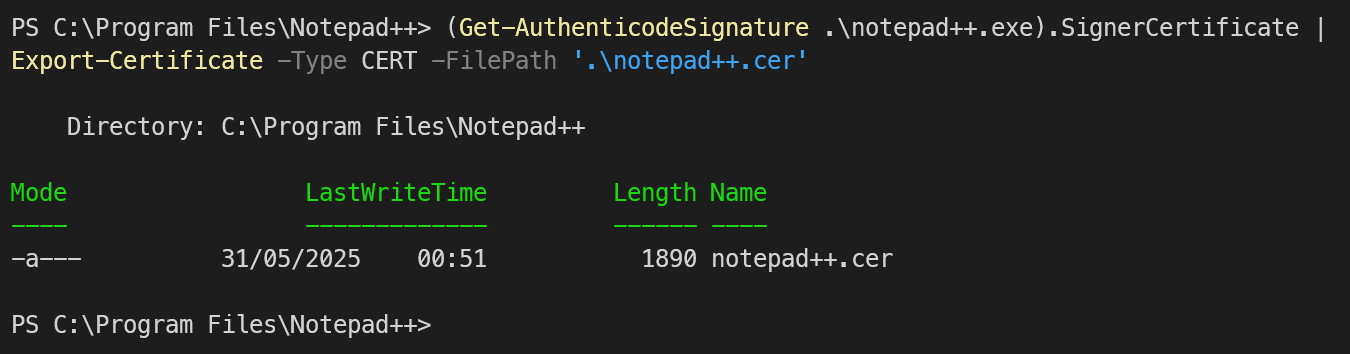
- If you now save the rule, you can either add more rules to your policy or click
Next, add the assignments and create the policy.
IMPORTANT
To support Endpoint Privilege Management, allow the following hostnames on tcp port 443 through your firewall.
For communication between clients and the cloud service:
- *.dm.microsoft.com - The use of a wildcard supports the cloud-service endpoints that are used for enrollment, check-in, and reporting, and which can change as the service scales.
- *.events.data.microsoft.com - Used by Intune-managed devices to send optional reporting data to the Intune data collection endpoint.
WARNING
SSL Inspection is not supported on endpoints required for Endpoint Privilege Management.
⌨️ Usage
Following you will find the User- and Admin-Experince for the User confirmed, Automatic and Support approved elevation types.
Like I explained in the Configuration section above (Link), with Endpoint Privilege Management the EPM Microsoft Agent gets installed on the endusers device. With that comes a new entry in the context menu. 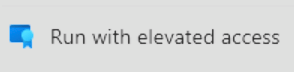
User confirmed
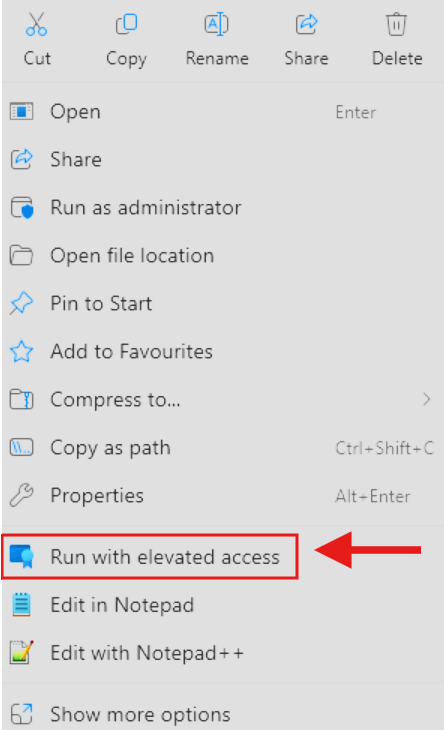
- For the User confirmed elevation type, you do a right click on your chosen file and select the newly created
Run with elevated accesspoint.
- Next, based on your rule configuration, a Windows dialog will prompt you to provide a business justification, complete a Windows authentication or both.
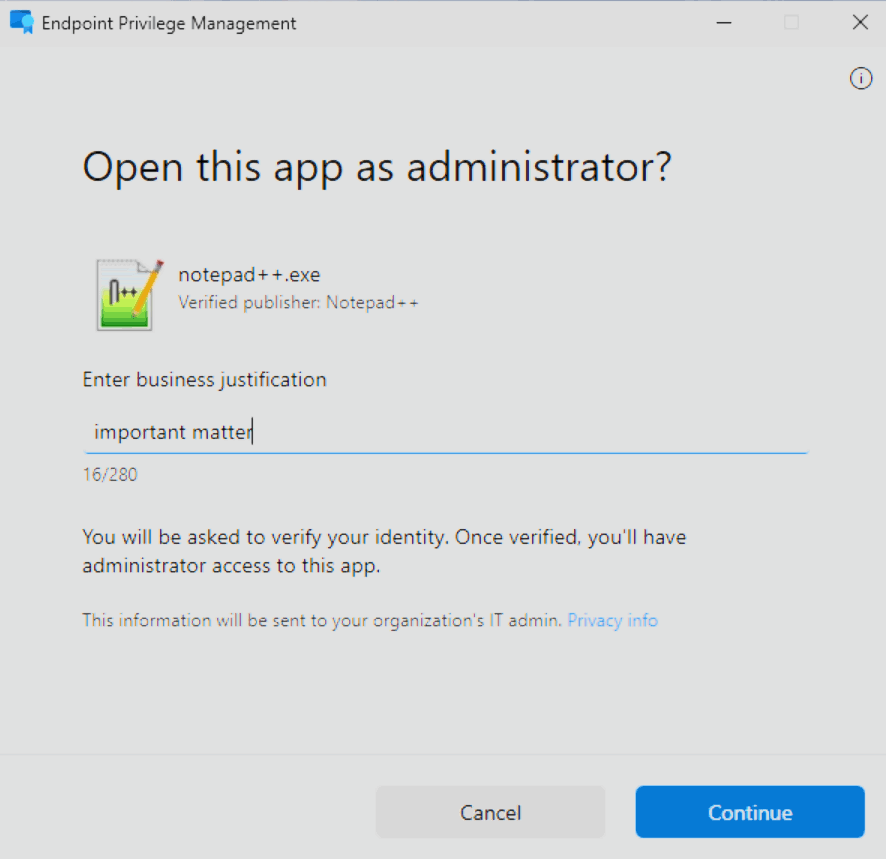 | 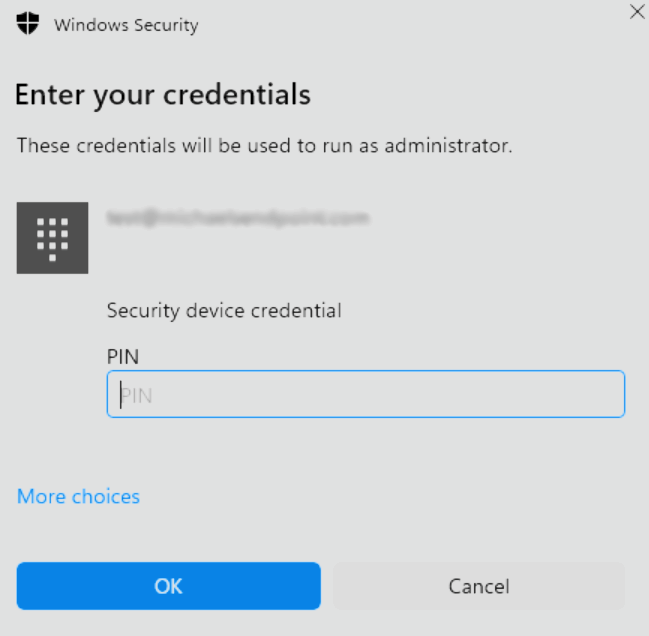 |
|---|
- Then the file will be started with elevated privileges.
INFO
If you don't have permission to elevate the file, you'll see the following error message. 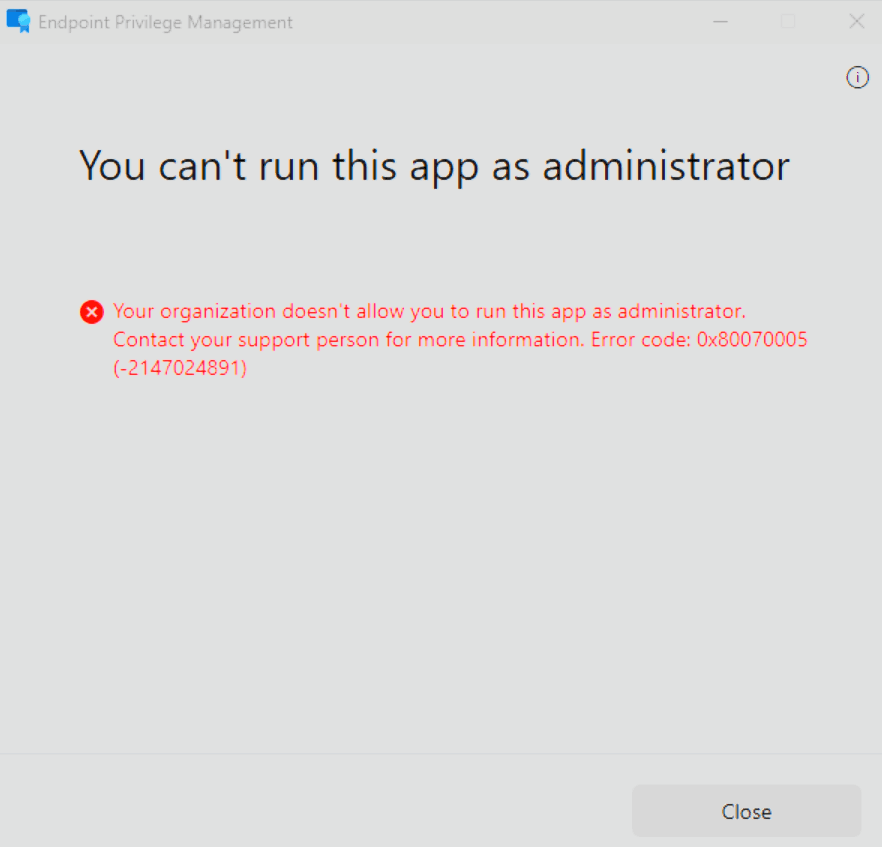
Automatic
- For the Automatic elevation type, you do a right click on your chosen file and select the
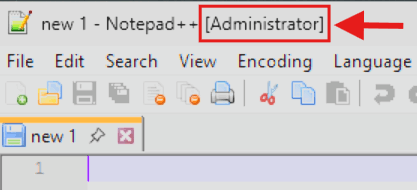
Run with elevated accesspoint. - The file will immediately open with elevated privileges, without requiring any additional user input or confirmation.
Support approved
User experience
- For the Support approved elevation type, you do a right click on your chosen file and select the
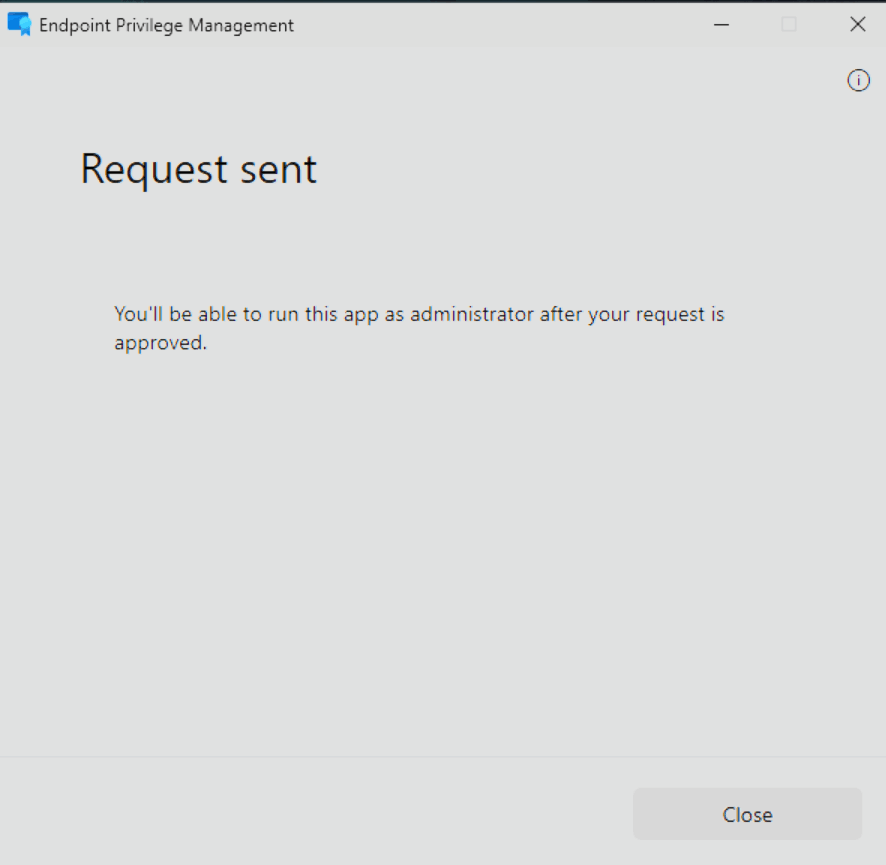
Run with elevated accesspoint. - Next, a Windows dialog will prompt you to provide a business justification.
- You'll see a confirmation that your request was sent. Just close the window, you don't need to do anything else until you get a response.
Admin experience
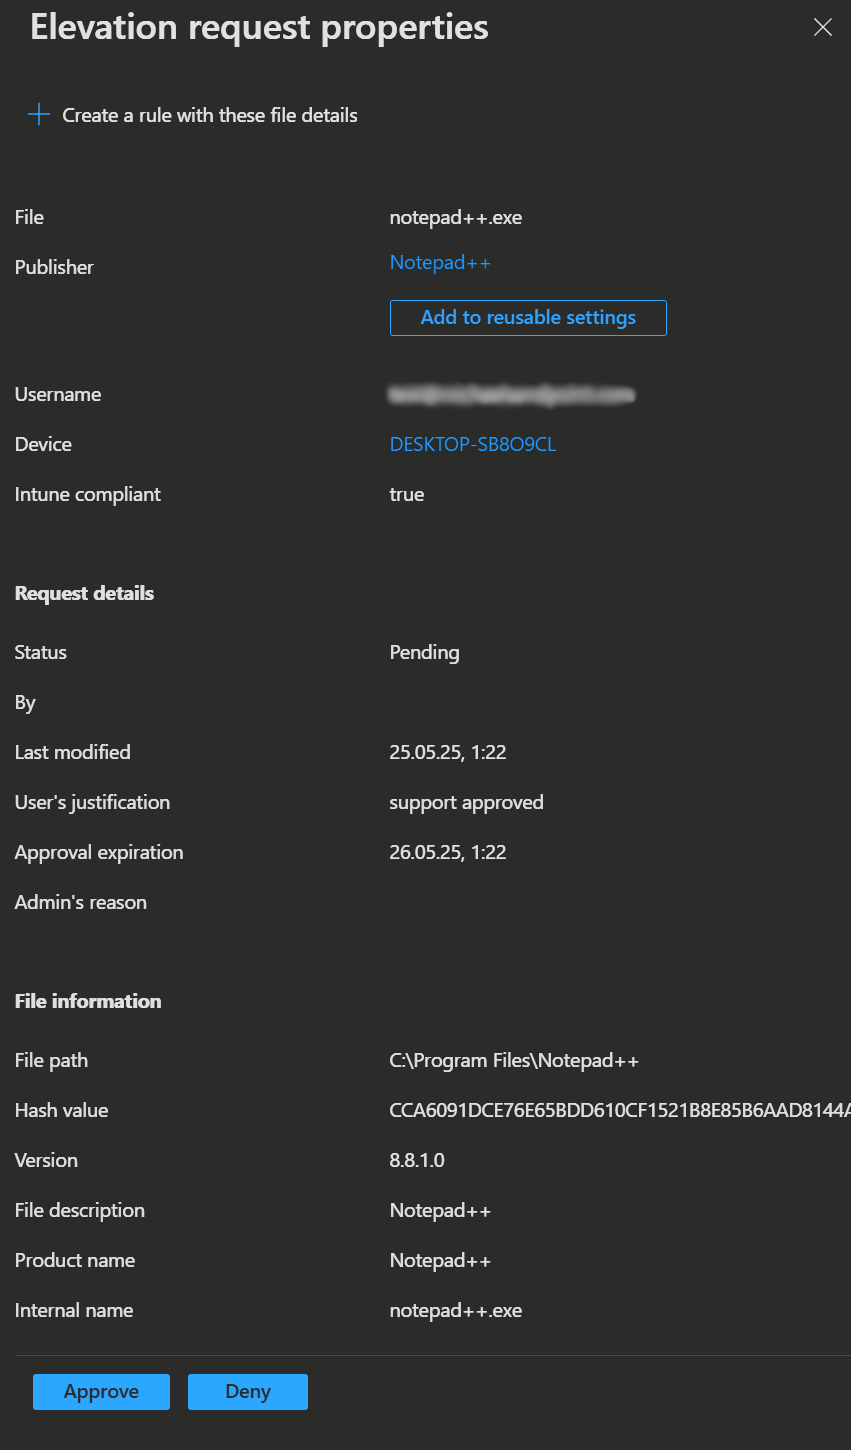
- In the Intune admin portal, you can access the above mentioned Elevation requests tab by navigating to Endpoint Security → Endpoint Privilege Management. Here you can find the requested elevation requests.
- When you select a request, a side panel opens displaying the request properties. This includes the requested file information, timestamp, compliance status, device name, username, and the submitted business justification.
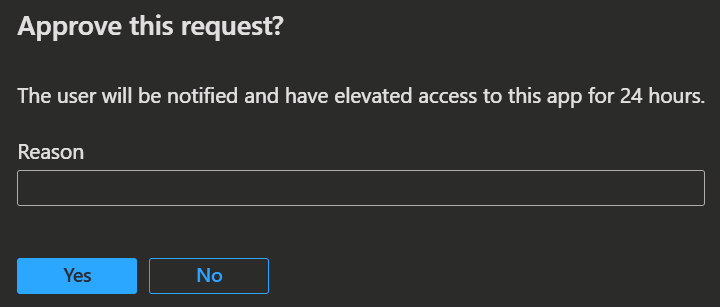
- When you choose to approve the request, a pop-up window appears prompting you to enter your own business justification.
- Once approved, the user receives elevated access to the requested file for 24 hours.
TIP
You can create a reusable setting with one click for a requested file directly from the user request by selecting the Add to reusable settings button in the request properties.
Additionally, if a user requests elevation for a file that doesn't have an existing rule, you can quickly create a new rule using the file details from the request window by selecting the Create a rule with these file details button. 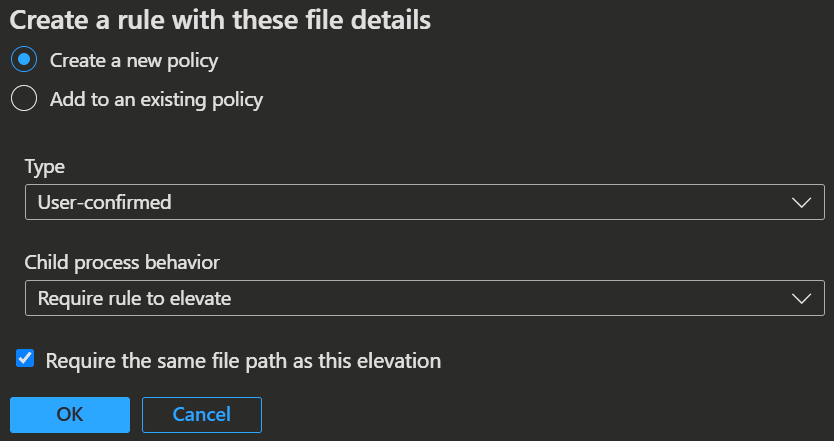
User experience
After the elevation request is approved or denied, the user will receive a Windows toast notification within a few minutes, informing them of the outcome.

- If you now start the app using the
Run with elevated accessoption in the context menu, it will immediately launch with elevated privileges.
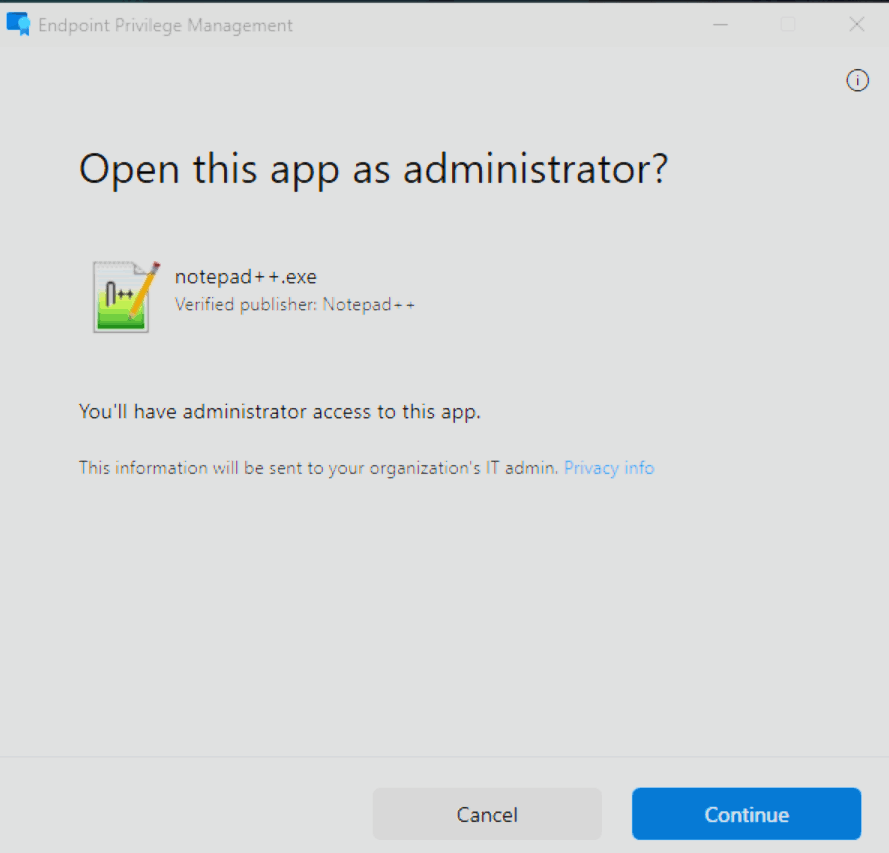
WARNING
If you launch the app by double-clicking it as usual, it will run with standard permissions and not with elevated access.
💡 Conclusion
Endpoint Privilege Management is a really useful tool for organisations trying to implement Zero Trust principles and enforce least privilege access without affecting user productivity. EPM lets you control exactly who can elevate their privileges, and it provides detailed reports and flexible approval workflows. This helps to reduce security risks associated with excessive permissions. It's an investment, obviously, either as part of the Intune Suite or as a standalone purchase, but the security, compliance and operational efficiency it brings make it a really compelling choice for modern endpoint management.
- Endpoint Privilege Management (EPM) is a key enabler for organizations pursuing Zero Trust and least privilege strategies.
- Granular control over privilege elevation ensures users get admin rights only when truly needed.
- Comprehensive reporting and audit trails support compliance and security monitoring.
- Flexible approval workflows including user confirmation and support approval balance security with productivity.
- Reusable settings and policy templates simplify ongoing management.
- Integration with Intune streamlines deployment and policy enforcement across your environment.
- Reduces risk by minimizing the attack surface associated with excessive permissions.
- Empowers IT to respond quickly to elevation requests without granting blanket admin access.
- Comes at a cost EPM is available as part of the Intune Suite or as a standalone purchase.