
PS App Deploy Toolkit 4.1
👋 Introduction
The PSAppDeployToolkit is a community tool that provides a framework for deploying applications in a Windows environment. It simplifies the process of creating complex app deployments and harmonises the installation and deferral process.
Patch My PC has recently started to support the project, but remains open source. You can find more information about this partnership here.
Features:
| Name | Description |
|---|---|
| Modular Design | The toolkit is built with a modular approach, allowing users to include only the components they need for their specific deployment scenarios. |
| Admin-Friendly | The toolkit provides a set of pre-defined functions and templates that streamline the deployment process, reducing the need for extensive scripting. |
| Logging and Reporting | The toolkit includes built-in logging and reporting features, making it easy to track deployment progress and troubleshoot issues. |
| Integration with Intune | Since the latest version, the toolkit popups work seamless with Microsoft Intune, even when deployed as SYSTEM. |
| Smart Deployment Control | Validate prerequisites, close in-use apps, prompt users for deferrals, and handle reboots gracefully. |
| Silent & Reliable Installs | Run installers silently with detailed logging, handle exit codes automatically, and uninstall old/conflicting versions. |
| Rich PowerShell Toolkit | Pre-built functions for file/registry management, shortcuts, DLL registration, policy refresh, and more. |
| MCM/3rd-Party Integration | Full support for Microsoft Configuration Manager, exit code handling, bundling apps, and efficient distribution. |
| User-Friendly Experience | Customizable UI prompts to close apps, save work, and manage installation timing with countdowns or deferrals. |
⚙️ Configuration
To get started with the PSAppDeployToolkit, you can either install the PowerShell Module or download the deployment Template from the official GitHub Page here.
Install-Module -Name PSAppDeployToolkit -Scope CurrentUserINFO
The only difference between the two methods is that installing the PowerShell Module allows you to create a new template with a simple command and having the functions readily available, instead of downloading the ZIP file and extracting it manually.
Psadt config
Now that you got the PSAppDeployToolkit template, you can start configuring it for your specific deployment needs.
INFO
All the files you’ll work with are well-commented, making it easy to understand their purpose and functionality even without extensive PowerShell knowledge.
The folder structure of the PSAppDeployToolkit template is as follows:
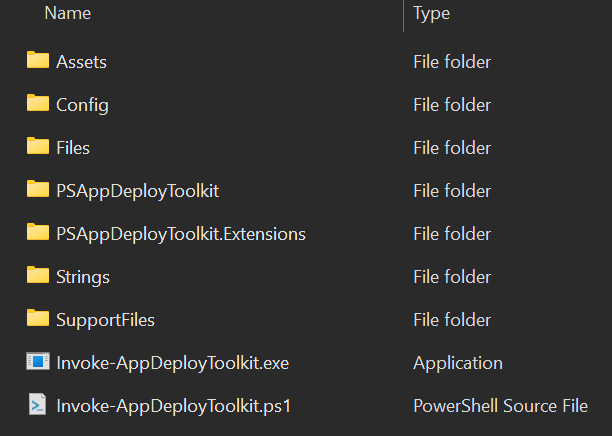
PSAppDeployToolkit
│
├── Assets
│   └── Icons
│
├── Config
│   └── In depth configurations (i.e. UI, Assets, Paths ...)
│
├── Files
│   └── Setup file folder
│
├── PSAppDeployToolkit
│   └── Main toolkit assets and functions (Do not touch! ⛔)
│
├── PSAppDeployToolkit.Extension
│   └── Extension functions
│
└── Strings
│   └── Customizable texts used in the toolkit
│
└── SupportFiles
│   └── Additional files needed for your deployment
│
└── Invoke-AppDeployToolkit.exe
└── Invoke-AppDeployToolkit.ps1
INFO
The following example shows a bare-minimum configuration for deploying an EXE file. For a simplified setup, you can use an MSI installer, place it in the Files folder, no additional configuration required. (Zero Configuration Deployment).
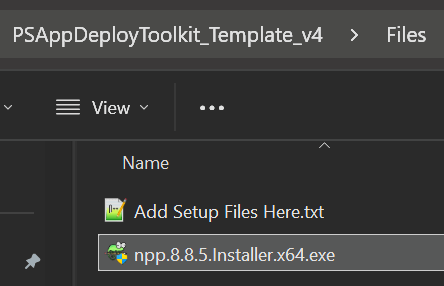
Files
The Files folder is where you place the setup files needed for your deployment.
So first you need to download the setup files for your deployment and place them here.
Invoke-AppDeployToolkit.ps1
The primary configuration is handled in the Invoke-AppDeployToolkit.ps1 file, while the Invoke-AppDeployToolkit.exe file simply provides a more convenient way to run it.
The file is sectioned into several areas, that are all well documented.
Important for the configurations are the following areas:
- Variables
- Install
- Uninstall
- Repair
Whereby the latter three areas are further sectioned into Pre-, Main and Post- stages.
- First you enter the nessecary app variables.
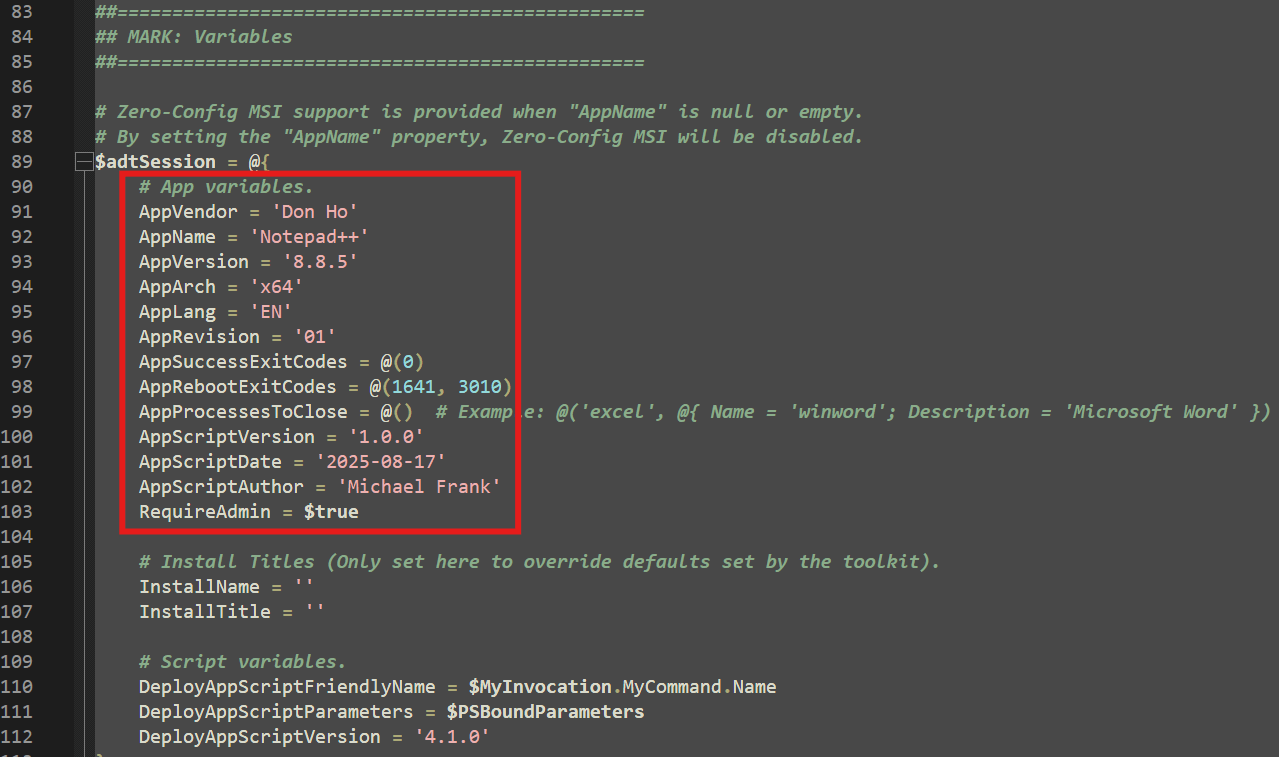
TIP
Keep in mind that the AppVendor, AppName and AppVersion are displayed in the header of the enduser installation window. 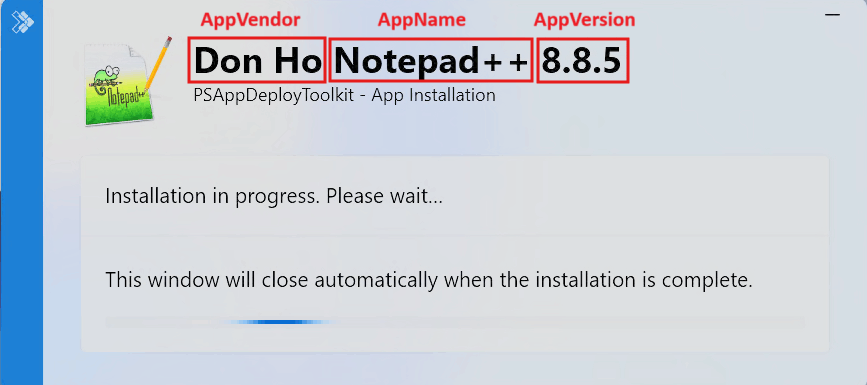
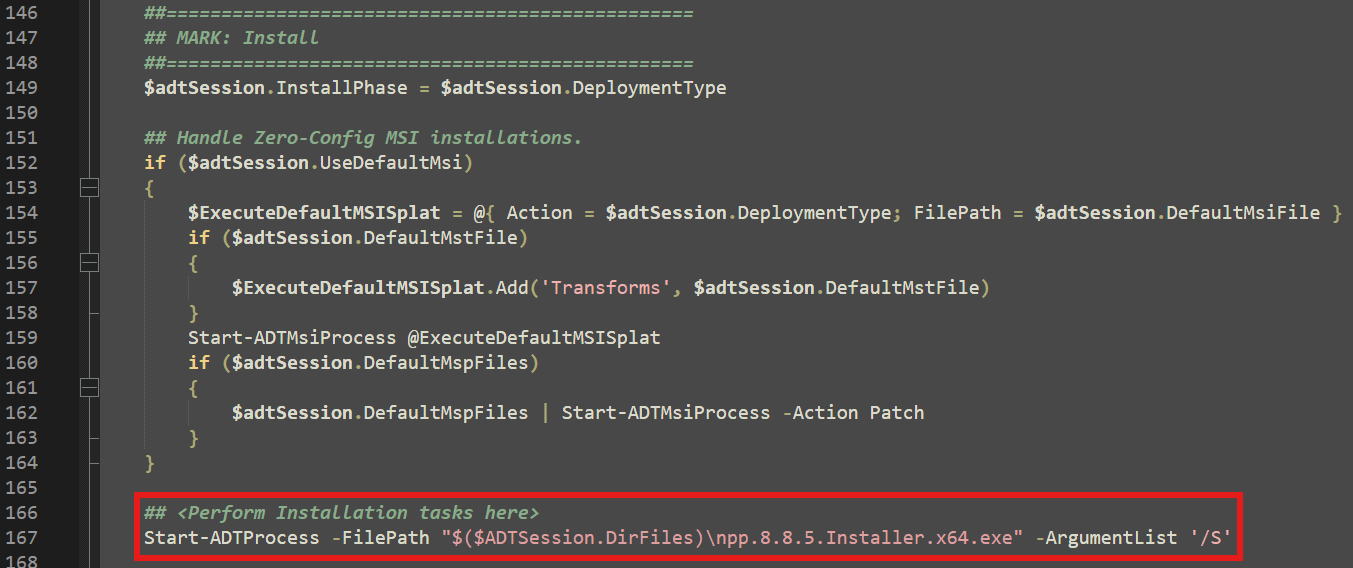
- Next, configure the installation process by adding PowerShell commands to the Pre-Install, Install and Post-Install sections.
TIP
The toolkit provides many built-in functions to handle common deployment tasks. See the Functions Reference for details.
In this example we use the main installation function Start-ADTProcess in the Install section, in which we define the installer filepath and argumentlist. This functions also automatically starts any other needed function for the installation process like Show-ADTInstallationWelcome.
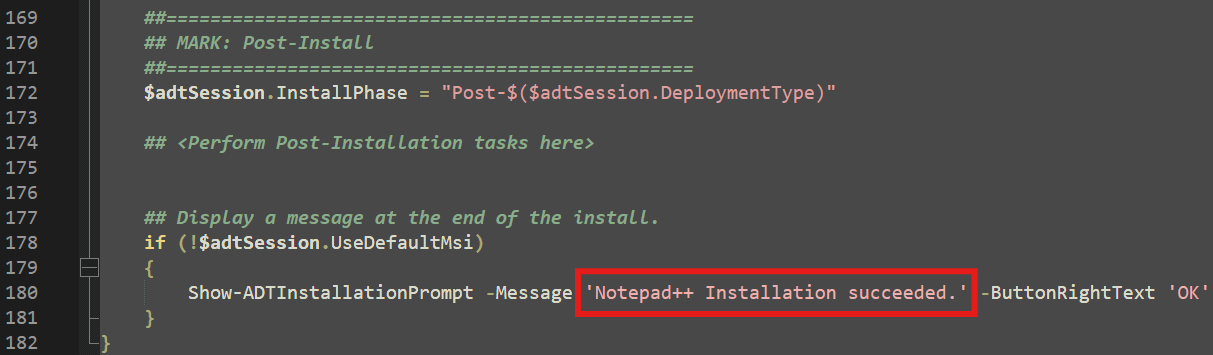
- Now, we change the standard success message in the Post-Install section, to something apropriate for our application.
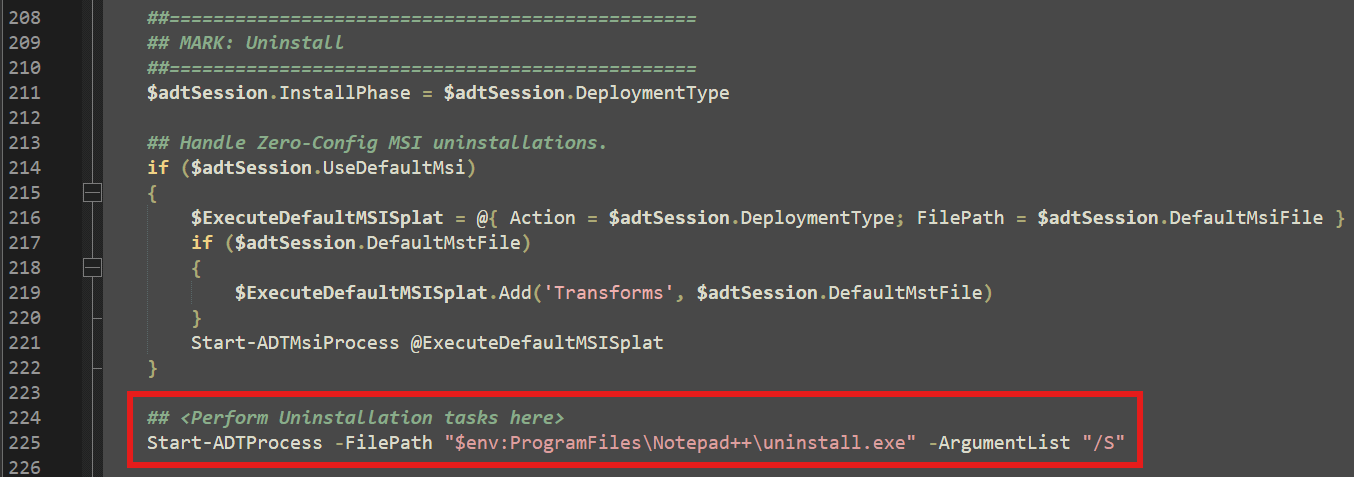
- Finally, we configure the Uninstall section to enable uninstalling the application.
Config
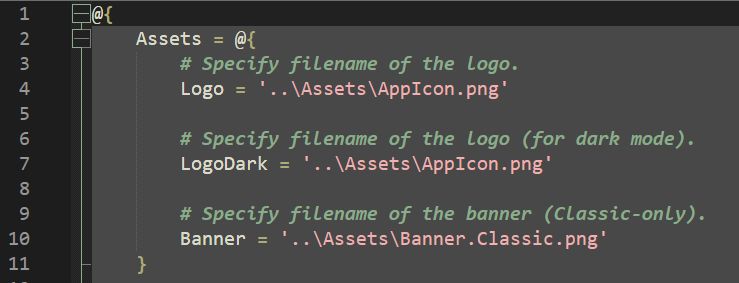
In the config section you could configure Asset Paths, MSI Installation Parameters and other settings in the config.psd1 file.
For our example we do not need to change anything here. To change the AppIcon we later just replace the image file.
Strings
To customize user-facing texts (except, for example, the installation success message), open the strings.psd1 file in the Strings folder (which contains the default English strings), or select the subfolder for your preferred language.
The available strings categories for customization are:
- BalloonTip
- BlockExecutionText
- DiskSpaceText
- InstallationPrompt
- ProgressPrompt
- RestartPrompt
- CloseAppsPrompt
For our example we do not need to change anything here.
Assets
The Assets folder contains images and icons used in the user interface of the toolkit. For our example we replace the AppIcon.png standard file with the appropriate icon for our application.

SupportFiles
In the SupportFiles folder you can put additional files that you may require during the installation process, such as configuration files or scripts.
For our example we do not need to change anything here.
Create Intune App
Prepare the Intune app package
- Download the Microsoft Win32 Content Prep Tool on the official GitHub website.
- Start the tool and follow the prompts to package your application (see screenshot).

Create the Intune app
- Open the Microsoft Intune admin center and navigate to Apps → Windows and click
Create. - Select the app type Windows app (Win32).
- In the App package file section, upload the
intunewinfile you created earlier. - Fill in the required information in the App information section.
- In the Program section, specify the install and uninstall commands.
- Install command:
Invoke-AppDeployToolkit.exe -DeploymentType Install - Uninstall command:
Invoke-AppDeployToolkit.exe -DeploymentType Uninstall
- Install command:
- Configure the app's requirements and detection rules.
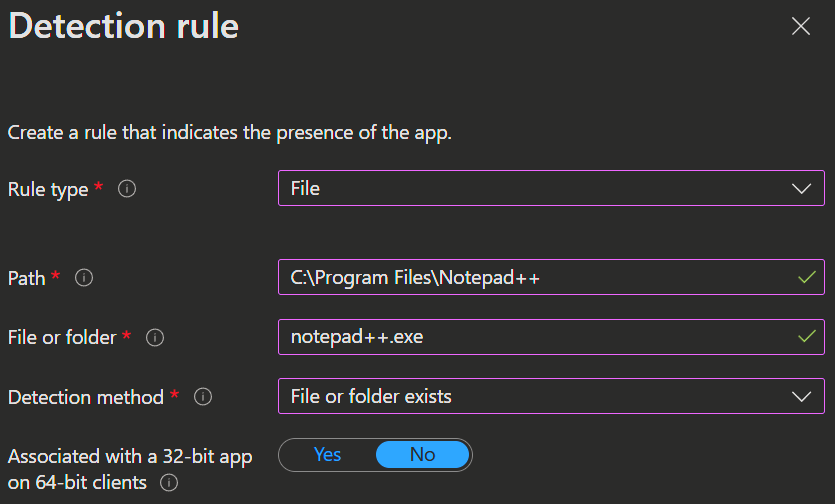
- Configure Dependencies, Supersedence and Assignments.
- Review and create the app.
INFO
You can learn more about Installation parameters here.
⭐ User experience
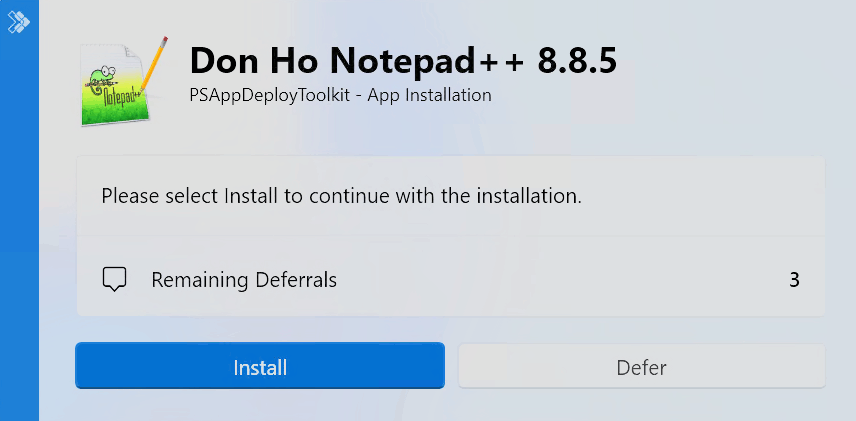
As the user in our example the installation process is straightforward and user-friendly. As soon as Intune pushed the app, the user received a notification where he can select to install the app or defer the installation.
This is the new feature in the last release of the PS App Deploy Toolkit. You do not need any additional tools anymore to display these messages for the user, even so the Installation is run as SYSTEM.
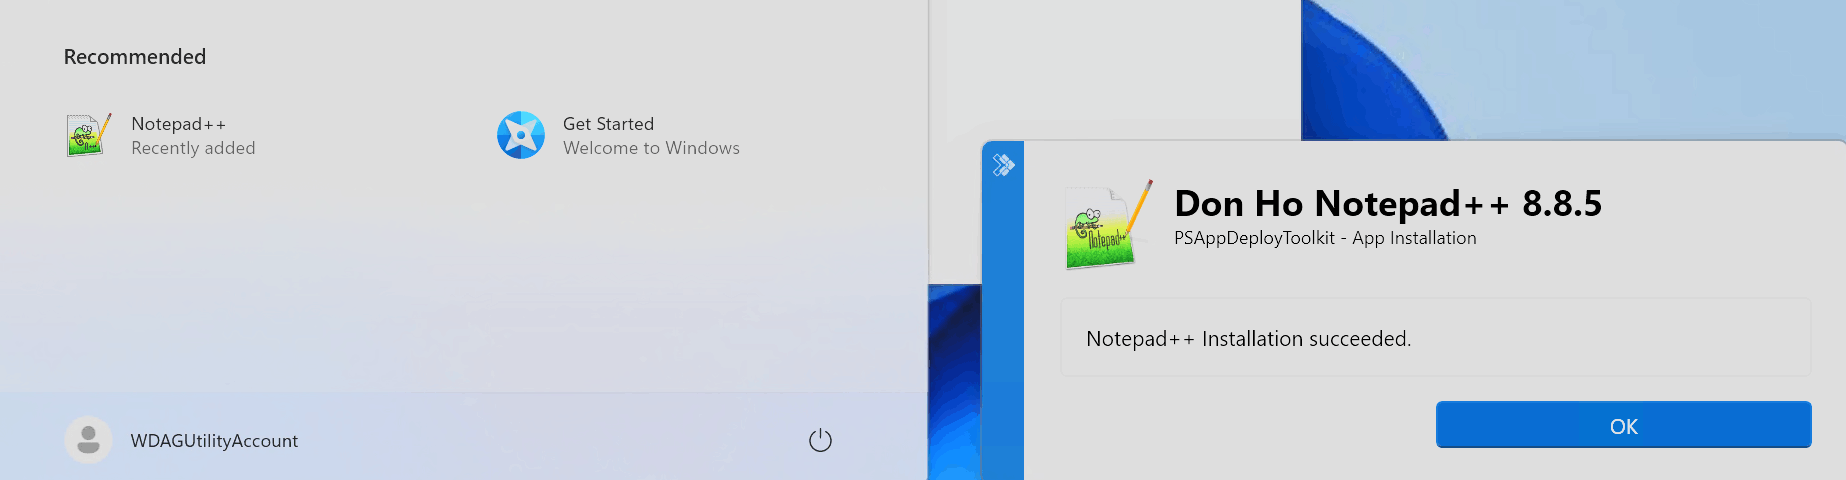
The user then sees a non interactive installation window and as soon as the installation is complete, the user will see the message we configured earlier and the app is installed.
📦 Deployment Editor
If you want a more visual approach to creating and managing your deployment packages, you can use the excellent Deployment Editor by 'tugi.ch'. You can download it from the Github Page.
When you start the Deployment Editor, you can plug the functions you want to use directly from the left pane and configure it in the middle and right side.
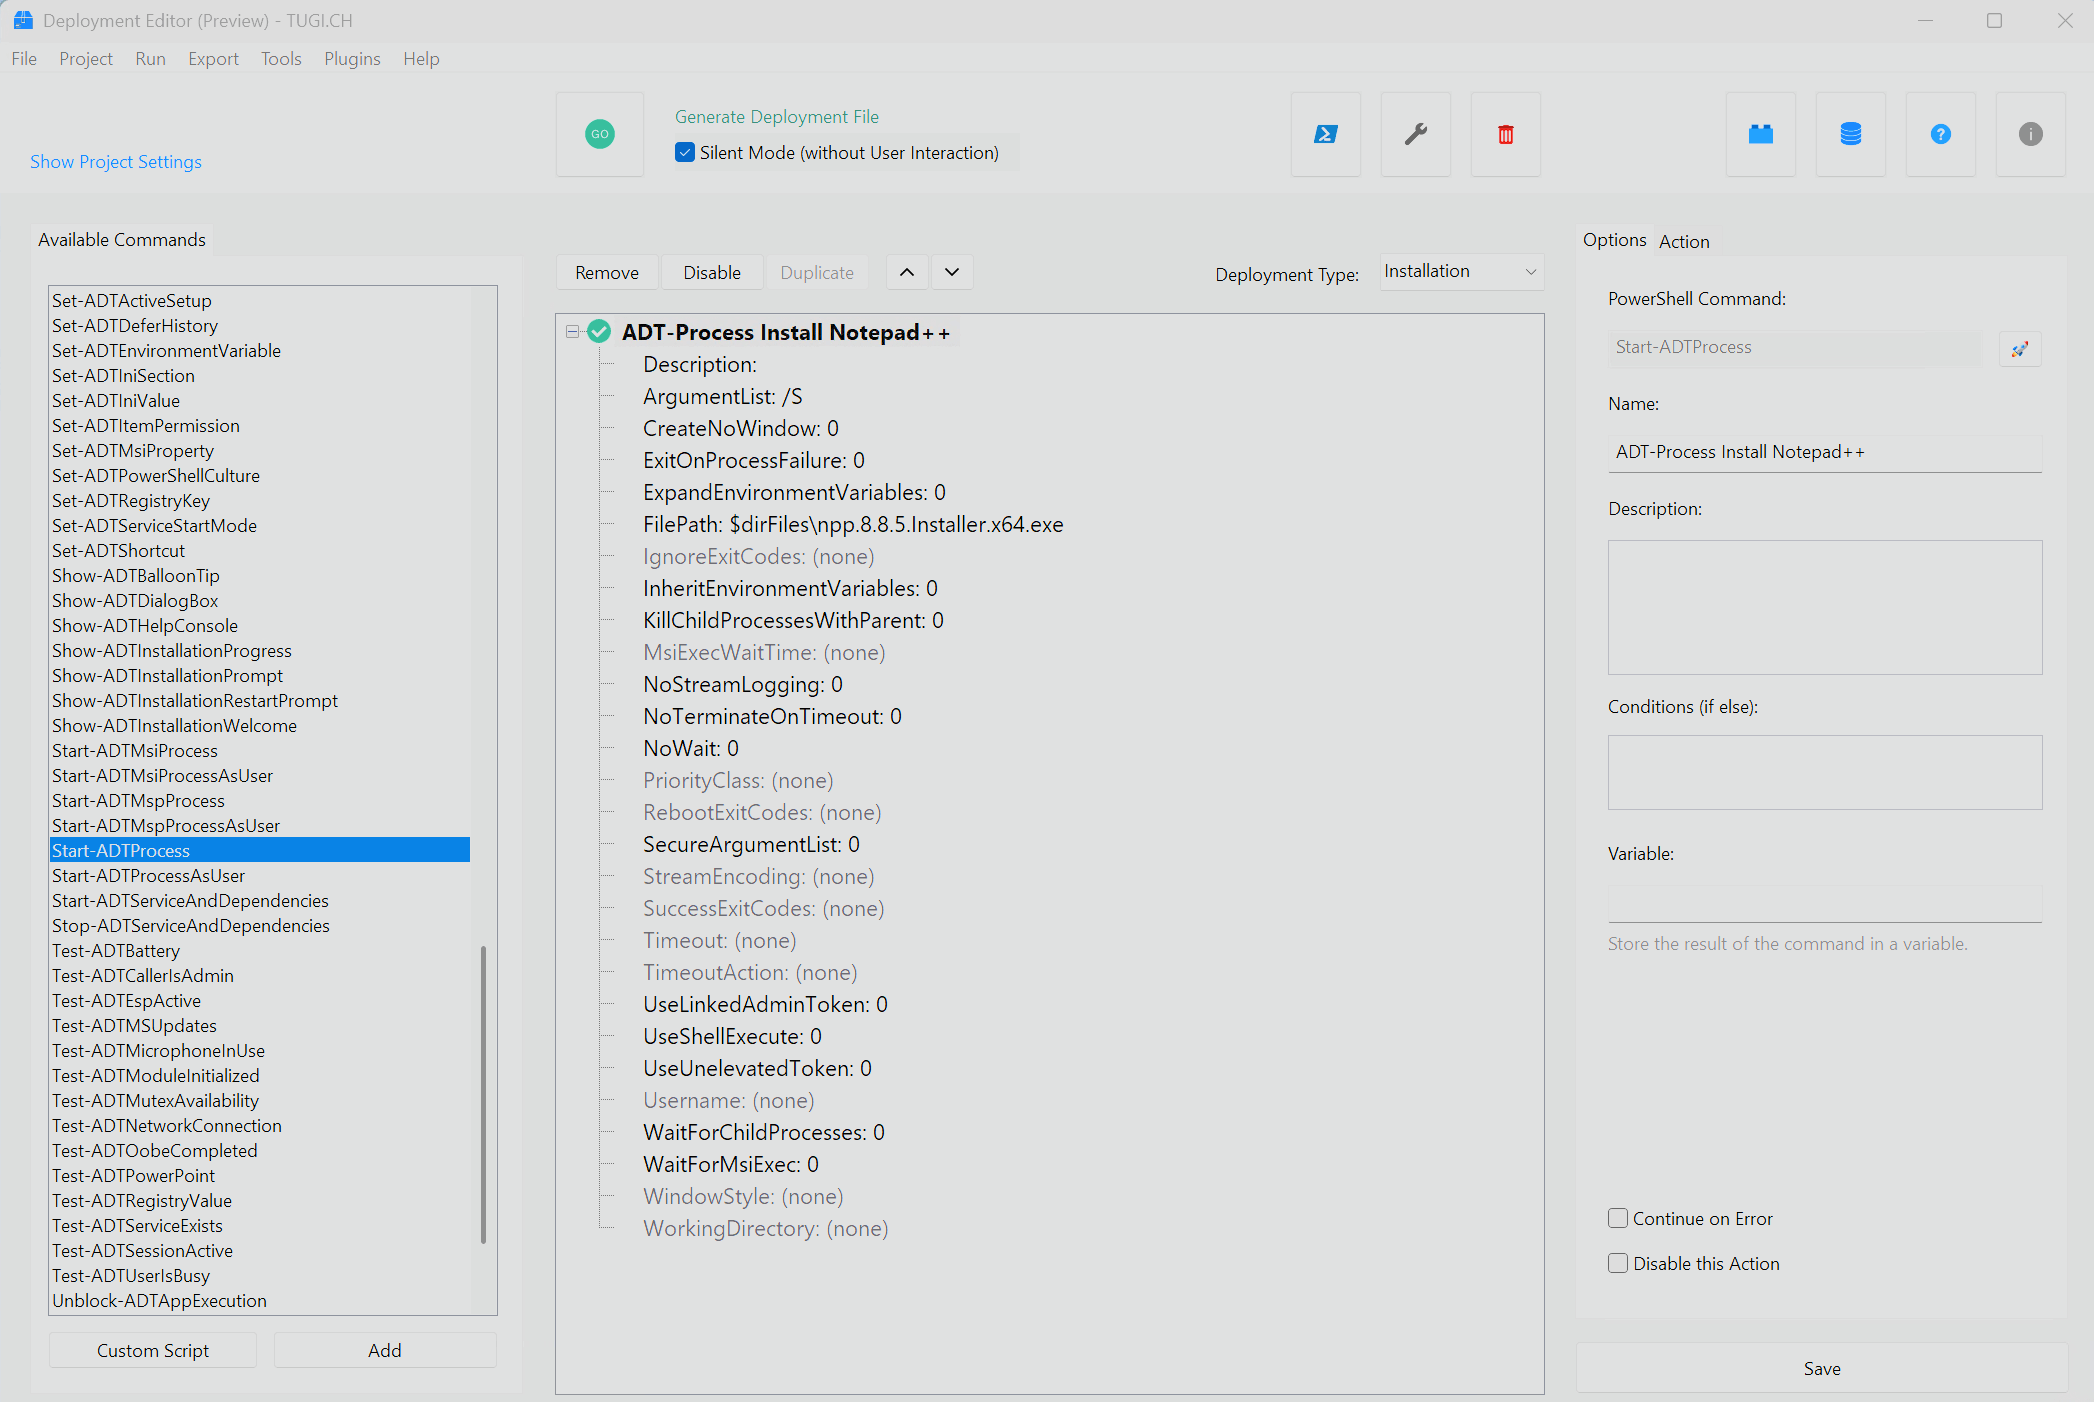
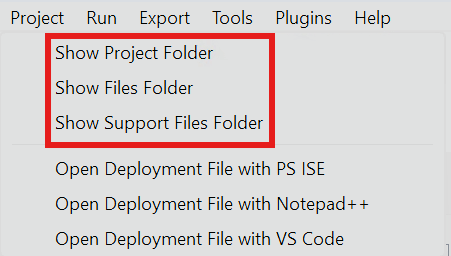
You can also directly open the project folders from the top menu, to copy your Installer there.
Once configured, clicking the "Generate Deployment" button in the center top toolbar will create a complete deployment package with the same folder structure as the official template, but with your customized configuration already applied.
INFO
If you want an in depth Guide to this tool you can find more information on the Github Page and the official Guide Video on YouTube.
💡 Conclusion
PSAppDeployToolkit can make deploying complicated apps on Windows a whole lot easier, especially when you need apps closed before starting or want to give your users the possibility to defer installations. Now with its smooth Intune integration and handy features it got even better. Whether you prefer scripting or a visual editor, you’ll find it straightforward to set up, customize, and manage your deployments.
So in the end it is a great tool in the arsenal of the Intune administrator and well worth a look.
Resources