
👋 Introduction
For enrolling and managing your Android devices into Intune, you have three different options.
Android Enterprise
Android Enterprise is a Google initiative that enables the use of Android devices and apps in the workplace. It provides APIs and tools for integrating Android support into enterprise mobility management (EMM) solutions, like Microsoft Intune.
Android Open Source Project (AOSP)
The AOSP is the published source code and documentation of Android that enables developers to build custom OS variants for their own devices.
Android device administrator
Android device administrator (DA) management is a legacy Android management option that allows organizations to manage Android devices using device administrator APIs. It has limited capabilities and relies on a local enrollment process.
WARNING
Android device administrator (DA) management is deprecated and not working on any devices with Google Mobile Services. If you are still using these devices with this enrollment method, Google recommends migrating them.
Which means, Android Enterprise is the primary enrollment method for smartphones and tablets from big brands using Android.
Android Enterprise Features include:
- 80+ management settings
- Data isolation between work and personal data
- Built-in security like Google Play Protect
Feature list
Legend:
✅ = Standard feature
⭐ = Advanced feature
➖ = Optional feature
❌ = Not applicable
Device provisioning
| Feature name | Android version | Work profile on personally‑owned device | Work profile on company‑owned device | Fully managed device | Dedicated device |
|---|---|---|---|---|---|
| DPC-first work profile provisioning | 5.1+ | ✅ | ❌ | ❌ | ❌ |
| DPC-identifier device provisioning | 6.0+ | ❌ | (12.0+) ➖ | ➖ | ➖ |
| NFC device provisioning | 6.0+ | ❌ | (12.0+) ➖ | ➖ | ➖ |
| QR code device provisioning | 7.0+ | ❌ | ⭐ | ⭐ | ⭐ |
| Zero-touch provisioning | 8.0+ | ❌ | ✅ | ✅ | ✅ |
| Google Account work profile provisioning | ❌ | ❌ | ❌ | ❌ | ❌ |
| Google Account device provisioning | ❌ | ❌ | ❌ | ❌ | ❌ |
| Direct zero-touch configuration | 8.0+ | ❌ | ⭐ | ⭐ | ⭐ |
| Work profiles on company-owned devices | 8.0+ | ❌ | ✅ | ❌ | ❌ |
| Dedicated device provisioning | 8.0+ | ❌ | ❌ | ❌ | ✅ |
Device security
| Feature name | Android version | Work profile on personally‑owned device | Work profile on company‑owned device | Fully managed device | Dedicated device |
|---|---|---|---|---|---|
| Device security challenge | 5.0+ | ✅ | ✅ | ✅ | ✅ |
| Work security challenge | 7.0+ | ✅ | ✅ | ❌ | ❌ |
| Advanced passcode management | 5.0+ | ⭐ | ⭐ | ⭐ | ➖ |
| Smart lock management | 6.0+ | ➖ | ➖ | ➖ | ➖ |
| Wipe and lock | 5.0+ | ✅ | ✅ | ✅ | ✅ |
| Compliance enforcement | 5.0+ | ✅ | ✅ | ✅ | ✅ |
| Default security policies | 5.0+ | ✅ | ✅ | ✅ | ✅ |
| Security policies for dedicated devices | 6.0+ | ❌ | ❌ | ❌ | ✅ |
| Play Integrity Support | ❌ | ⭐ | ⭐ | ⭐ | ⭐ |
| Verify Apps enforcement | 5.0+ | ⭐ | ⭐ | ⭐ | ⭐ |
| Direct Boot support | 7.0+ | ⭐ | ⭐ | ⭐ | ⭐ |
| Hardware security management | 5.1+ | ❌ | ⭐ | ⭐ | ⭐ |
| Enterprise security logging | 7.0+ | ❌ | ❌ | ➖ | ➖ |
Account and app management
| Feature name | Android version | Work profile on personally‑owned device | Work profile on company‑owned device | Fully managed device | Dedicated device |
|---|---|---|---|---|---|
| Enterprise binding | ❌ | ✅ | ✅ | ✅ | ✅ |
| Managed Google Play Account provisioning | 5.0+ | ✅ | ✅ | ✅ | ❌ |
| Managed Google Play device account provisioning | 5.0+ | ❌ | ❌ | ❌ | ✅ |
| Managed Google Play Account provisioning for legacy devices | ❌ | ❌ | ❌ | ❌ | ❌ |
| Silent app distribution | ❌ | ✅ | ✅ | ✅ | ✅ |
| Managed configuration management | 5.0+ | ✅ | ✅ | ✅ | ✅ |
| App catalog management | ❌ | ❌ | ❌ | ❌ | ❌ |
| Programmatic app approval | ❌ | ⭐ | ⭐ | ⭐ | ➖ |
| Basic store layout management | ❌ | ✅ | ✅ | ✅ | ❌ |
| Advanced store layout configuration | ❌ | ➖ | ➖ | ➖ | ❌ |
| App license management | ❌ | ❌ | ❌ | ❌ | ❌ |
| Google-hosted private app management | ❌ | ⭐ | ⭐ | ⭐ | ⭐ |
| Self-hosted private app management | ❌ | ❌ | ❌ | ❌ | ❌ |
| EMM pull notifications | ❌ | ❌ | ❌ | ❌ | ❌ |
| API usage requirements | ❌ | ✅ | ✅ | ✅ | ✅ |
| Advanced managed configuration management | 5.0+ | ⭐ | ⭐ | ⭐ | ⭐ |
| Web app management | ❌ | ⭐ | ⭐ | ⭐ | ⭐ |
| Managed Google Play Account lifecycle management | 5.0+ | ✅ | ✅ | ⭐ | ⭐ |
| Application track management | 5.0+ | ⭐ | ⭐ | ⭐ | ⭐ |
| Advanced application update management | 5.0+ | ⭐ | ⭐ | ⭐ | ⭐ |
| Provisioning methods management | ❌ | ✅ | ✅ | ✅ | ✅ |
| Upgrade Enterprise binding | ❌ | ✅ | ✅ | ✅ | ✅ |
| Managed Google Account provisioning | ❌ | ✅ | ✅ | ✅ | ❌ |
| Managed Google Play Account upgrade | ❌ | ✅ | ✅ | ✅ | ➖ |
| App Roles | 11.0+ | ⭐ | ⭐ | ⭐ | ⭐ |
| Device data transfer and restore | 8.0+ | ❌ | ❌ | ⭐ | ❌ |
Device management
| Feature name | Android version | Work profile on personally‑owned device | Work profile on company‑owned device | Fully managed device | Dedicated device |
|---|---|---|---|---|---|
| Runtime permission policy management | 6.0+ | ✅ | ✅ | ✅ | ✅ |
| Runtime permission grant state management | 6.0+ | ✅ | ✅ | ✅ | ✅ |
| Wi-Fi configuration management | 6.0+ | ⭐ | ⭐ | ⭐ | ⭐ |
| Wi-Fi security management | 6.0+ | ⭐ | ⭐ | ⭐ | ⭐ |
| Advanced Wi-Fi management | 6.0+ | ❌ | ➖ | ➖ | ➖ |
| Account management | 5.0+ | ⭐ | ⭐ | ⭐ | ➖ |
| Certificate management | 5.0+ | ⭐ | ⭐ | ⭐ | ⭐ |
| Advanced certificate management | 7.0+ | ⭐ | ⭐ | ⭐ | ⭐ |
| Delegated certificate management | 6.0+ | ➖ | ➖ | ➖ | ➖ |
| Advanced VPN management | 7.0+ | ⭐ | ⭐ | ⭐ | ⭐ |
| IME management | 5.0+ | ➖ | ➖ | ❌ | ❌ |
| Advanced IME management | 5.0+ | ❌ | ❌ | ➖ | ➖ |
| Accessibility services management | 5.0+ | ➖ | ➖ | ➖ | ➖ |
| Location Sharing management | 5.0+ | ➖ | ➖ | ❌ | ❌ |
| Advanced Location Sharing management | 5.0+ | ❌ | ❌ | ➖ | ➖ |
| Factory reset protection management | 5.1+ | ❌ | ⭐ | ⭐ | ⭐ |
| Advanced app control | 5.0+ | ❌ | ❌ | ➖ | ➖ |
| Screen capture management | 5.0+ | ➖ | ➖ | ➖ | ➖ |
| Disable cameras | Dependent | ❌ | (11.0+)➖ | (5.0+)➖ | (5.0+)➖ |
| Network statistics collection | 6.0+ | ➖ | ➖ | ❌ | ❌ |
| Advanced network statistics collection | 6.0+ | ❌ | ❌ | ➖ | ➖ |
| Reboot device | 7.0+ | ❌ | ❌ | ➖ | ⭐ |
| System radio management | 7.0+ | ❌ | ➖ | ➖ | ➖ |
| System audio management | 5.0+ | ❌ | ❌ | ➖ | ➖ |
| System clock management | Dependent | (8.0+)➖ | (11.0+)➖ | (5.0+)➖ | (5.0+)➖ |
| Advanced dedicated device features | 6.0+ | ❌ | ❌ | ❌ | ⭐ |
| Delegated scope management | 8.0+ | ⭐ | ⭐ | ⭐ | ⭐ |
| Enrollment-specific ID Support | 12.0+ | ⭐ | ⭐ | ❌ | ❌ |
| Credential manager policy | 15.0+ | ✅ | ✅ | ✅ | ✅ |
| Basic eSIM management | 15.0+ | ⭐ | ⭐ | ⭐ | ⭐ |
Device usability
| Feature name | Android version | Work profile on personally‑owned device | Work profile on company‑owned device | Fully managed device | Dedicated device |
|---|---|---|---|---|---|
| Managed provisioning customization | 7.0+ | ➖ | ➖ | ➖ | ➖ |
| Enterprise customization | 7.0+ | ➖ | ➖ | ❌ | ❌ |
| Advanced enterprise customization | 7.0+ | ❌ | ❌ | ➖ | ❌ |
| Lock screen messages | 7.0+ | ❌ | ➖ | ➖ | ➖ |
| Policy transparency management | 7.0+ | ⭐ | ⭐ | ⭐ | ⭐ |
| Cross-profile contact management | 7.0+ | ➖ | ➖ | ❌ | ❌ |
| Cross-profile data management | 7.0+ | ➖ | ➖ | ❌ | ❌ |
| System update policy | 6.0+ | ❌ | ⭐ | ⭐ | ✅ |
| Lock task mode management | 6.0+ | ❌ | ❌ | ❌ | ✅ |
| Persistent preferred activity management | 5.0+ | ➖ | ➖ | ➖ | ➖ |
| Keyguard feature management | 7.0+ | ⭐ | ⭐ | ❌ | ❌ |
| Advanced keyguard feature management | 5.0+ | ❌ | ⭐ | ⭐ | ➖ |
| MAC address retrieval | 7.0+ | ❌ | ➖ | ➖ | ➖ |
| Advanced lock task mode management | 9.0+ | ❌ | ❌ | ❌ | ⭐ |
| Advanced system update policy | 9.0+ | ❌ | ❌ | ❌ | ⭐ |
| Work profile policy transparency management | 9.0+ | ⭐ | ❌ | ❌ | ❌ |
| Connected app support | 11.0+ | ⭐ | ⭐ | ❌ | ❌ |
| Manual system update | 11.0+ | ❌ | ❌ | ❌ | ➖ |
API usage
| Feature name | Android version | Work profile on personally‑owned device | Work profile on company‑owned device | Fully managed device | Dedicated device |
|---|---|---|---|---|---|
| Standard policy controller for new bindings | 5.0+ | ⭐ | ⭐ | ➖ | ➖ |
| Standard policy controller for new devices | 5.0+ | ➖ | ➖ | ➖ | ➖ |
You can find a full list of features here.
🚀 Quick start guide
If you want to get started ASAP, here is a guide to get you going quickly. The easiest way is a personal phone with a work profile (BYOD). You don't need an enrollment profile and you don't have to factory reset anything.
Company-owned devices
For a company-owned phone, swap step 4 for a factory-reset device and a fully managed (COBO) enrollment profile: create the profile, tap the welcome screen 10 times and scan the QR code. Optionally add an enrollment time group first, so apps and policies land on the device during enrollment.
For other scenarios, see:
- Kiosk or shared devices → Dedicated devices (COSU)
- Work and personal use on a company device → Corporate-owned work profile (COPE)
- Devices without Google Mobile Services → AOSP
- Bulk deployment without touching each device → Zero-touch
🔗 Android / Intune integration
To begin deploying Android devices via Intune, you must first establish a connection between Microsoft Intune and Android Enterprise. I recommend creating a dedicated service account rather than a personal user account which ensures the connection is not dependent on any individual team member.
INFO
You can use an Enterprise Gmail account, but as of August 2024 this is no longer required. Google recommends using your corporate account for better security and management. This approach minimizes the risk of deleted accounts and streamlines your workflow with a single sign-on experience. Separate sign-ups for individual Google products are also no longer required.
- The account will manage your Google Admin console and subscriptions
- The account must have an active mailbox for validation
Bind Intune Tenant to Managed Google Play
- Open the Intune admin center -> Devices -> Android -> Device onboarding -> Enrollment and click
Managed Google Play. - Within the flyout menu, tick the first checkbox (
I agree) to consent to Microsoft communicating data with Google, then proceed by clickingConnect to Google now.

- A new window will appear. Enter the email address of the service account you created before and click
Next.

You can now choose Microsoft as identity provider with
Sign in with Microsoft.INFO
If the
Sign in with Microsoftoption doesn't appear, the Exchange Online domain most likely lacks an MX record.

- After that, you follow the Microsoft sign-in flow and then need to consent to permissions for a new Enterprise app that will be created for Google Workspace.

- Next, you need to verify your account with a code that gets sent to the mailbox of the service account.

- Enter information about your Administrator / Company and click
Continue.

- Select the Google services you want to manage. The following is cost free:
- Android Enterprise
- Google Workspace Essentials Starter
- Chrome Enterprise Core

- After clicking
Next, you get a last warning before Intune gets connected and a Google Admin console account is created.

After clicking
Allow and create account, you get a processing screen for a while and then a welcome message which you can confirm by clickingI understand.

Back in Intune, you get a success message and when opening the
Managed Google Playoption again, you can see the details of your connection with a green checkmark.


Unbind Intune Tenant from Managed Google Play
- Open the Intune admin center -> Devices -> Android -> Device onboarding -> Enrollment and click
Managed Google Play. - Within the flyout menu, click the
Disconnectbutton. This will bring you to a confirmation screen, where you can initiate the disconnection by clickingYes.
DANGER
Please be aware of the destructive nature of this action and carefully review the information from the confirmation screen before disconnecting. 
⬆️ Upgrade to managed Google domain
If you previously connected Intune with an Enterprise Google account, you can now upgrade to your corporate identity without the need to factory reset your devices. Unlike standard disconnections, this upgrade preserves your existing device enrollments.
Admin benefits
- Manage the Google Admin console with your Entra identity and SSO.
- Manage multiple Google products in one place.
- Simplified admin account recovery.
User benefits
- Only need one set of credentials.
- Access to secure and synced Google tools like Gemini or Chrome.
- To start the upgrade, open the Intune admin center -> Devices -> Android -> Device onboarding -> Enrollment and click
Managed Google Play. - In the flyout menu, click the
Upgradebutton in the top-left corner, then confirm the action in the popup by clickingUpgradeagain.


Enter the mail address of your corporate account and click
Next.TIP
I recommend creating a dedicated service account rather than a personal user account which ensures the connection is not dependent on any individual team member.

- A popup window will appear requesting consent for the permissions required by the new Enterprise app for Google Workspace. Select
Acceptto continue.

- Next the window with your information will already be prepopulated, because of the previous connection you had. Click
Continueto move forward.

- Now select the Google services you want to manage. The following is cost free:
- Android Enterprise
- Google Workspace Essentials Starter
- Chrome Enterprise Core

- After clicking
Next, you need to agree to the Google Agreements withAgree and continue.

- Then you get a last warning before upgrading your managed Google Play account to a managed Google domain.

- After clicking
Upgrade, you get a short processing screen and then a welcome message which you can confirm by clickingI understand.
- Now you get a success screen and the upgrade is done.

INFO
After the upgrade, play.google.com/work should no longer be used for management. Instead, you should use the Google Admin console (admin.google.com) for management and Intune for apps. Contact information previously entered (e.g., Data Protection Officer or EU Representative) is deleted during the upgrade and must be added again through the new console.

📱 Enrollment configuration
Entra ID and Intune enable secure device enrollment to enable access to your organizational resources. During enrollment, an MDM certificate is installed to enable device management and policy enforcement.
INFO
BYOD with MAM (Mobile Application Management) does not need your device to be enrolled, only Entra ID registered.

INFO
The MDM certificate will renew automatically as long as the device keeps communicating with Intune. The MDM certificate doesn't renew for devices that are wiped or fail to sync for an extended period of time. Intune deletes idle devices 180 days after the MDM certificate expires.
You have the following options when enrolling Android devices:
- BYOD: Android Enterprise personally owned devices with a work profile
- Android Enterprise corporate-owned dedicated devices (COSU)
- Android Enterprise corporate-owned fully managed (COBO)
- Android Enterprise corporate-owned work profile (COPE)
- Android Open Source Project (AOSP)
- Android device administrator (DA)

Info
Devices enrolled in another MDM must be unenrolled before enrolling in Intune. The following table lists devices that require a factory reset.
| Platform | Factory reset required? |
|---|---|
| Android Enterprise personally owned devices with a work profile (BYOD) | No |
| Android Enterprise dedicated devices (COSU) | Yes |
| Android Enterprise fully managed (COBO) | Yes |
| Android Enterprise corporate-owned work profile (COPE) | Yes |
| Android Open Source Project (AOSP) | Yes |
| Android device administrator (DA) | No |
Enrollment time grouping
Before starting with the enrollment methods Intune provides for Android devices, I want to explain the concept of Enrollment Time Grouping, which is supported by Android enrollment.
Enrollment Time Grouping means that you configure an Entra group as the target in your enrollment policy. During enrollment, the policy automatically adds the device to that group.
This saves you the effort of adding devices manually or waiting for a dynamic group to refresh and include the device.
The biggest benefit is that you can assign policies and apps to this group to ensure that the device receives them immediately during enrollment, even before a user signs in, where supported.
To configure this, you simply create a standard security group in Entra and add the Intune Provisioning Client service principal as the owner. To do this, just click to add an owner and search for the Service Principal ID:
f1346770-5b25-470b-88bd-d5744ab7952cIn older tenants the Intune Provisioning Client could also be called Intune Autopilot ConfidentialClient. This does not matter as long as the ID is right.

INFO
If the service principal does not yet exist in your environment, you can follow the steps outlined by Microsoft here to add it.
BYOD: Android Enterprise personally owned devices with a work profile
These devices are unmanaged with access to organizational data via an isolated work profile.
| Scenario | Use this option when |
|---|---|
| GMS (Uses Google Mobile Services) | ✅ |
| Owned by Org/school | ❌ Use COBO or COPE |
| Personal or BYOD | ✅ |
| New or existing devices | ✅ |
| Bulk enrollment | ✅ |
| Single user | ✅ |
| User-less (kiosk, dedicated, shared) | ❌ Should be org-owned; use dedicated devices |
| DEM (device enrollment manager) account | ✅ |
| Managed by another MDM | ❌ Unenroll or factory reset |
INFO
Intune is moving enrollment of personally owned work profiles from Company Portal to a web-based enrollment experience.
This is not only done to make the enrollment more convenient, but in the background Intune is moving the implementation to the newest Android Management API. This will bring it on par with the other enrollment methods and makes it possible for Intune to provide the newest Android features.
If you want to use the existing enrollment with the Company Portal, it basically works the same way for the user as web enrollment, with the exception that you always need to download the Company Portal first.
But be aware that Microsoft plans to enforce the new enrollment method from Q2 2027 onwards and you can use the Company Portal also with the new enrollment experience.
To see if devices in your environment use the old enrollment method, you can utilize the Report introduced especially for this transition (Intune admin center -> Devices -> Monitor -> Personal devices on Android Management API).
To transition your existing devices you need to deploy a special policy to them. Find it under:
Intune admin center -> Devices -> Android -> Configuration, click + Create -> + New Policy and select Android Enterprise as Platform, Templates as Profile type and Move to Android Management API as the Template name.
Next just enter a Name, assign the policy and that's it.

Admin experience
You find all enrollment options in the Intune admin center -> Devices -> Android -> Enrollment

For this option you do not create enrollment profiles, but you can opt in to use the web based enrollment without waiting for Microsoft to enforce it.
WARNING
Be aware that you should configure at least one app configuration policy with the credential provider option active, else passkeys might not work correctly.

You cannot deactivate this once it has been activated.


User experience
To begin enrollment, guide your users to one of the following work profile enrollment methods and sign-in:
- Enrollment URL (http://aka.ms/enrollmyandroid)
- Intune Company Portal
- Productivity app (like Outlook or Teams).


Now you just follow the enrollment experience to create a work profile, register the device and install the required apps.

INFO
If you click on What can my organization see and do?, you will find an overview of your organization's access. 
Enrollment experience screenshots
 |  |  |  |
|---|
 |  |  |  |
|---|
 |  |  |  |
|---|
 |  |  |  |
|---|
- When the enrollment is done, you will see a success screen and find your apps split into Personal and Work. The Work apps are marked with a small briefcase symbol.
 |  |  |
|---|
Android Enterprise corporate-owned dedicated devices (COSU)
These devices are organization-owned, dedicated kiosk devices that aren't associated with a specific user and are often used as presentation displays, checkouts or self-service terminals.
| Scenario | Use this option when |
|---|---|
| Uses GMS | ✅ |
| Owned by Org/school | ✅ |
| Personal or BYOD | ❌ Use BYOD |
| New or existing devices | ✅ |
| Bulk enrollment | ✅ |
| Single user | ❌ Not recommended, use COBO |
| User-less | ✅ |
| DEM account | ❌ |
| Managed by another MDM | ❌ Unenroll or factory reset |
Admin experience
You find all enrollment options in the Intune admin center -> Devices -> Android -> Enrollment

- To get started with this profile, open the
Corporate-owned dedicated devicestile and then click+ Create policy. - In the Basics tab, enter a Name, Description and then select your Token and Name template options. When you are done, click
Next.- Token type
Corporate-owned dedicated device (default)- Enrolls as an Android Enterprise dedicated device with no user sign-in required.Corporate-owned dedicated device with Microsoft Entra shared mode- Enrolls as a dedicated device with Microsoft Entra shared mode enabled for end users to sign in and out once across all supported apps (see Entra shared device mode).
- Token expiration date - Max 65 years duration
- Apply device name template (max 63 characters, Letters (a-z, A-Z), Numbers (0-9), Hyphens (-))
{{SERIAL}}- Device serial number{{SERIALLAST4DIGITS}}- Last four digits of the device serial number{{DEVICETYPE}}- Device type (for example, AndroidForWork or AndroidEnterprise){{ENROLLMENTDATETIME}}- Date and time the device was enrolled{{RAND:x}}- Random number, where x is the number of digits (whole number less than 10){{USERNAME}}- User's full name (user-affiliated devices only){{UPNPREFIX}}- User alias or UPN prefix (user-affiliated devices only)
- Token type

- In the Device group tab, you can select a group for Enrollment time grouping (click here for more Information), then click
Next.

- At last create the profile on the Review + create tab.

- Next, open the newly created profile, select the Token tab and click
Show token. With this QR code people can now enroll dedicated devices without the need for a sign-in.

User experience
- To begin enrollment, power on the device after a fresh start (new or factory reset).
- When the Welcome Screen appears, tap the screen 10 times to open the QR code scanner.

- Scan the token (QR code) from your enrollment profile and select your language.

Next, select a Wi-Fi network and follow the enrollment experience to register the device, apply the profile and install the required apps.


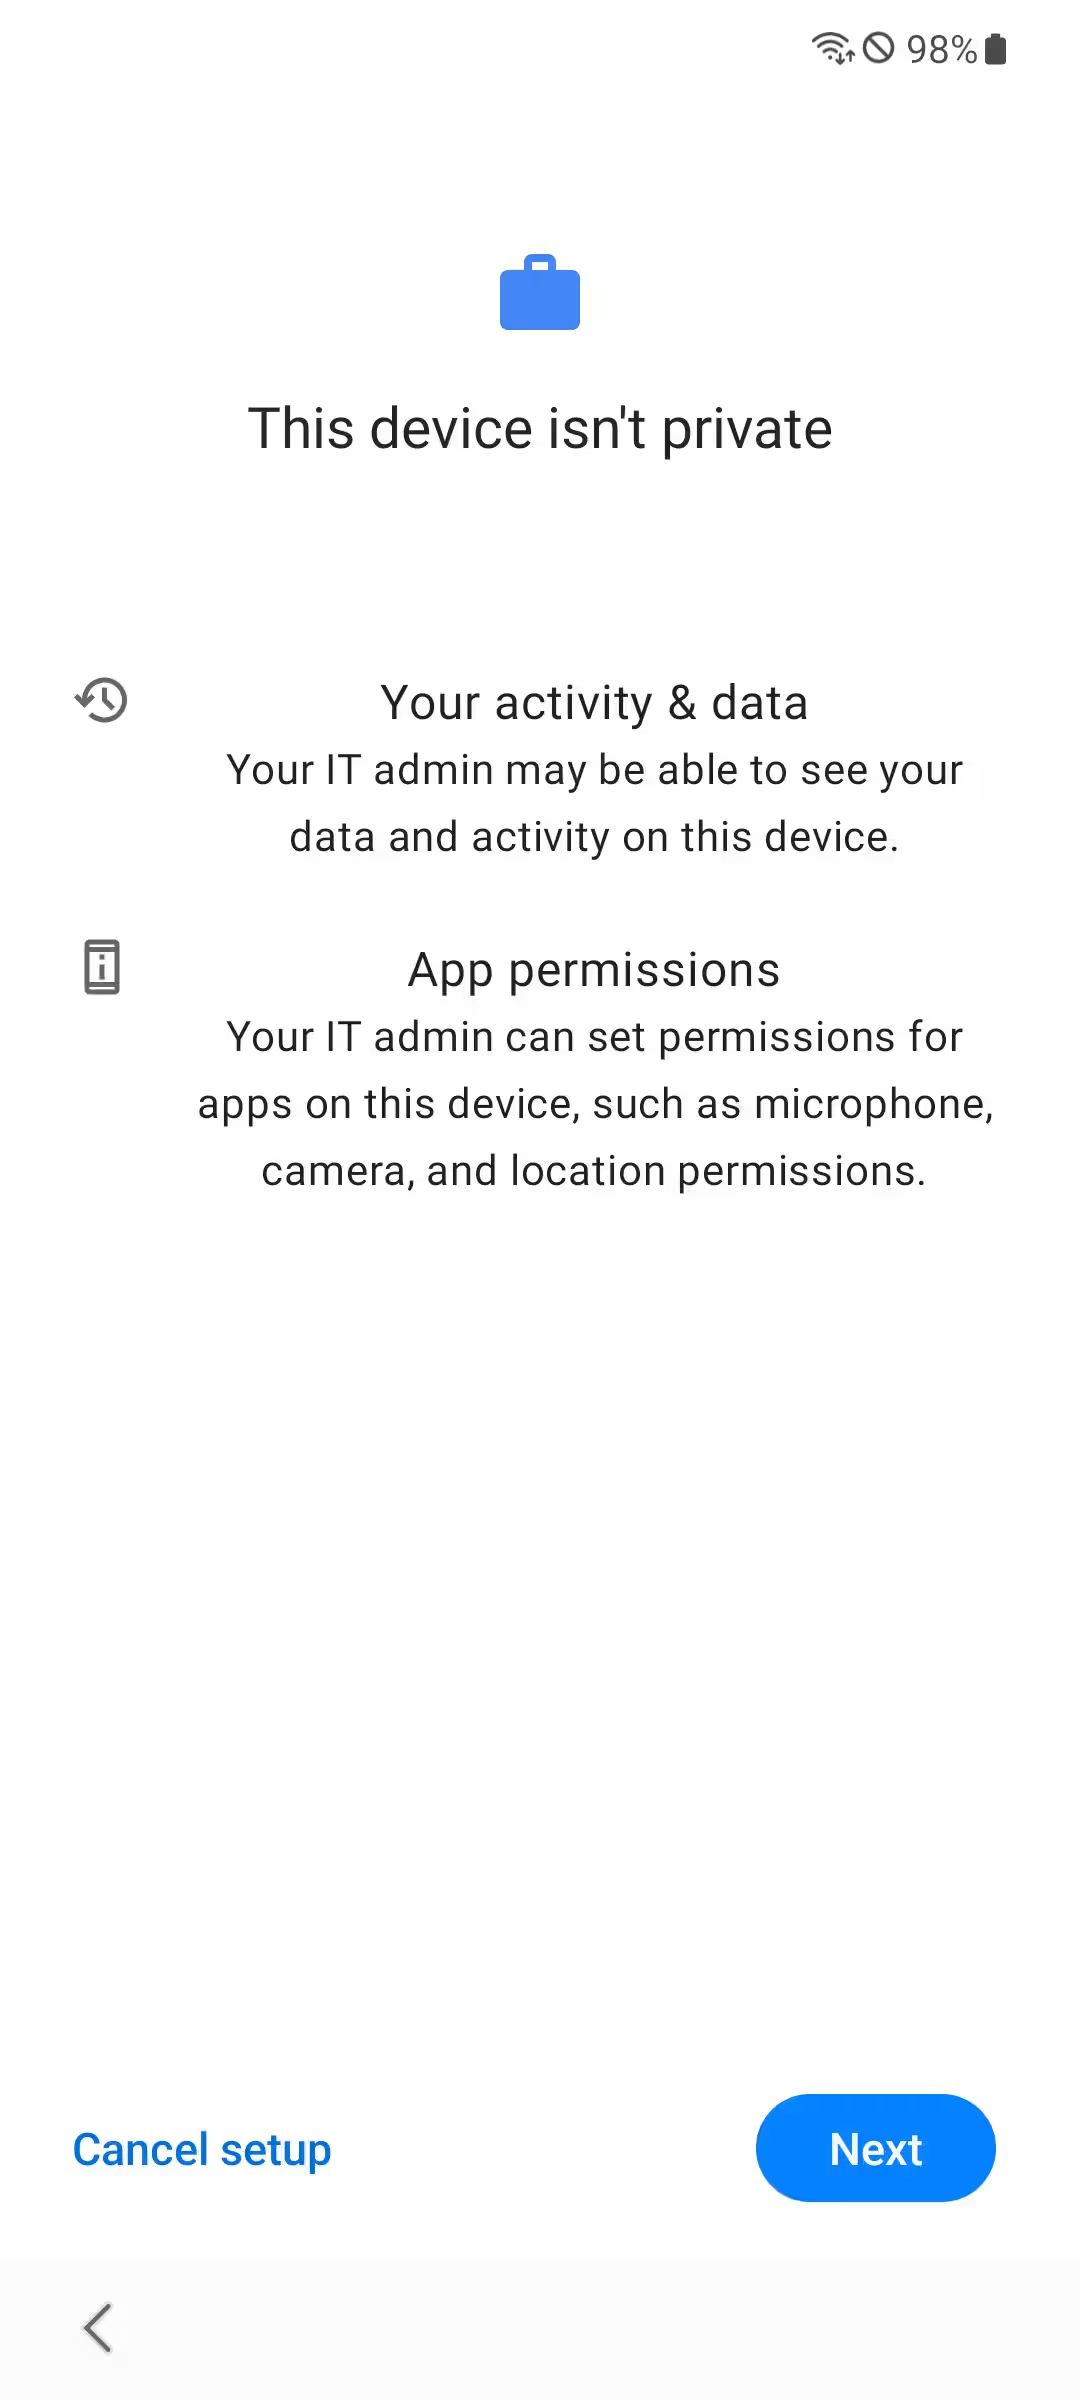


The only "decisions" you need to make during enrollment are whether to allow or disallow Google services (if not already configured via Intune) and to accept the EULA.


When the enrollment is done, you can find the devices in Intune marked as
Android (dedicated)without a primary user.

Shared devices with user sign-in
If several employees share the same device and need to sign in to apps like Teams or Outlook, use the token type Corporate-owned dedicated device with Microsoft Entra shared mode. It enrolls the device the same way, but adds single sign-in and sign-out across apps. You find the complete setup in the Entra shared device mode section.
Android Enterprise corporate-owned fully managed (COBO)
These devices are organization-owned and each one is assigned to a single user.
| Scenario | Use this option when |
|---|---|
| Uses GMS | ✅ |
| Owned by Org/school | ✅ |
| Personal or BYOD | ❌ Use BYOD |
| New or existing devices | ✅ |
| Bulk enrollment | ✅ |
| Single user | ✅ |
| User-less | ❌ Use COSU |
| DEM account | ❌ |
| Managed by another MDM | ❌ Unenroll or factory reset |
Admin experience
You find all enrollment options in the Intune admin center -> Devices -> Android -> Enrollment

- To get started with this profile, open the
Corporate-owned, fully managed user devicestile and then click+ Create policy. - In the Basics tab, enter a Name, Description and then select your Token and Name template options. When you are done, click
Next.- Token type
Corporate-owned, fully managed (default)- Enrolls as an Android Enterprise fully managed device, with the user signing in during enrollment.Corporate-owned, fully managed, via staging- Pre-provisions as an Android Enterprise fully managed device, with the user signing in at any time after enrollment.
- Token expiration date - Max 65 years duration
- Apply device name template (max 63 characters, Letters (a-z, A-Z), Numbers (0-9), Hyphens (-))
{{SERIAL}}- Device serial number{{SERIALLAST4DIGITS}}- Last four digits of the device serial number{{DEVICETYPE}}- Device type (for example, AndroidForWork or AndroidEnterprise){{ENROLLMENTDATETIME}}- Date and time the device was enrolled{{RAND:x}}- Random number, where x is the number of digits (whole number less than 10){{USERNAME}}- User's full name (user-affiliated devices only){{UPNPREFIX}}- User alias or UPN prefix (user-affiliated devices only)
- Token type

In the Device group tab, you can select a group for Enrollment time grouping (click here for more Information), then click
Next.Staging Group
If you selected the staging token type, you need to create a dynamic group to target devices (No enrollment time grouping).


(device.enrollmentProfileName -eq "Corporate-owned devices with work profile - Staging")

- At last create the profile on the Review + create tab.
- Next, open the newly created profile and select the Token tab. With this QR code you can pre-provision your devices.

User experience
The specific steps deviate slightly, depending on the Token type you selected in the enrollment profile.
To begin enrollment, power on the device after a fresh start (new or factory reset).
When the Welcome Screen appears, tap the screen 10 times, select your language and scan the token (QR code) from your enrollment profile.


Next, select a Wi-Fi network and follow the enrollment experience to register the device, apply the profile and install the required apps.


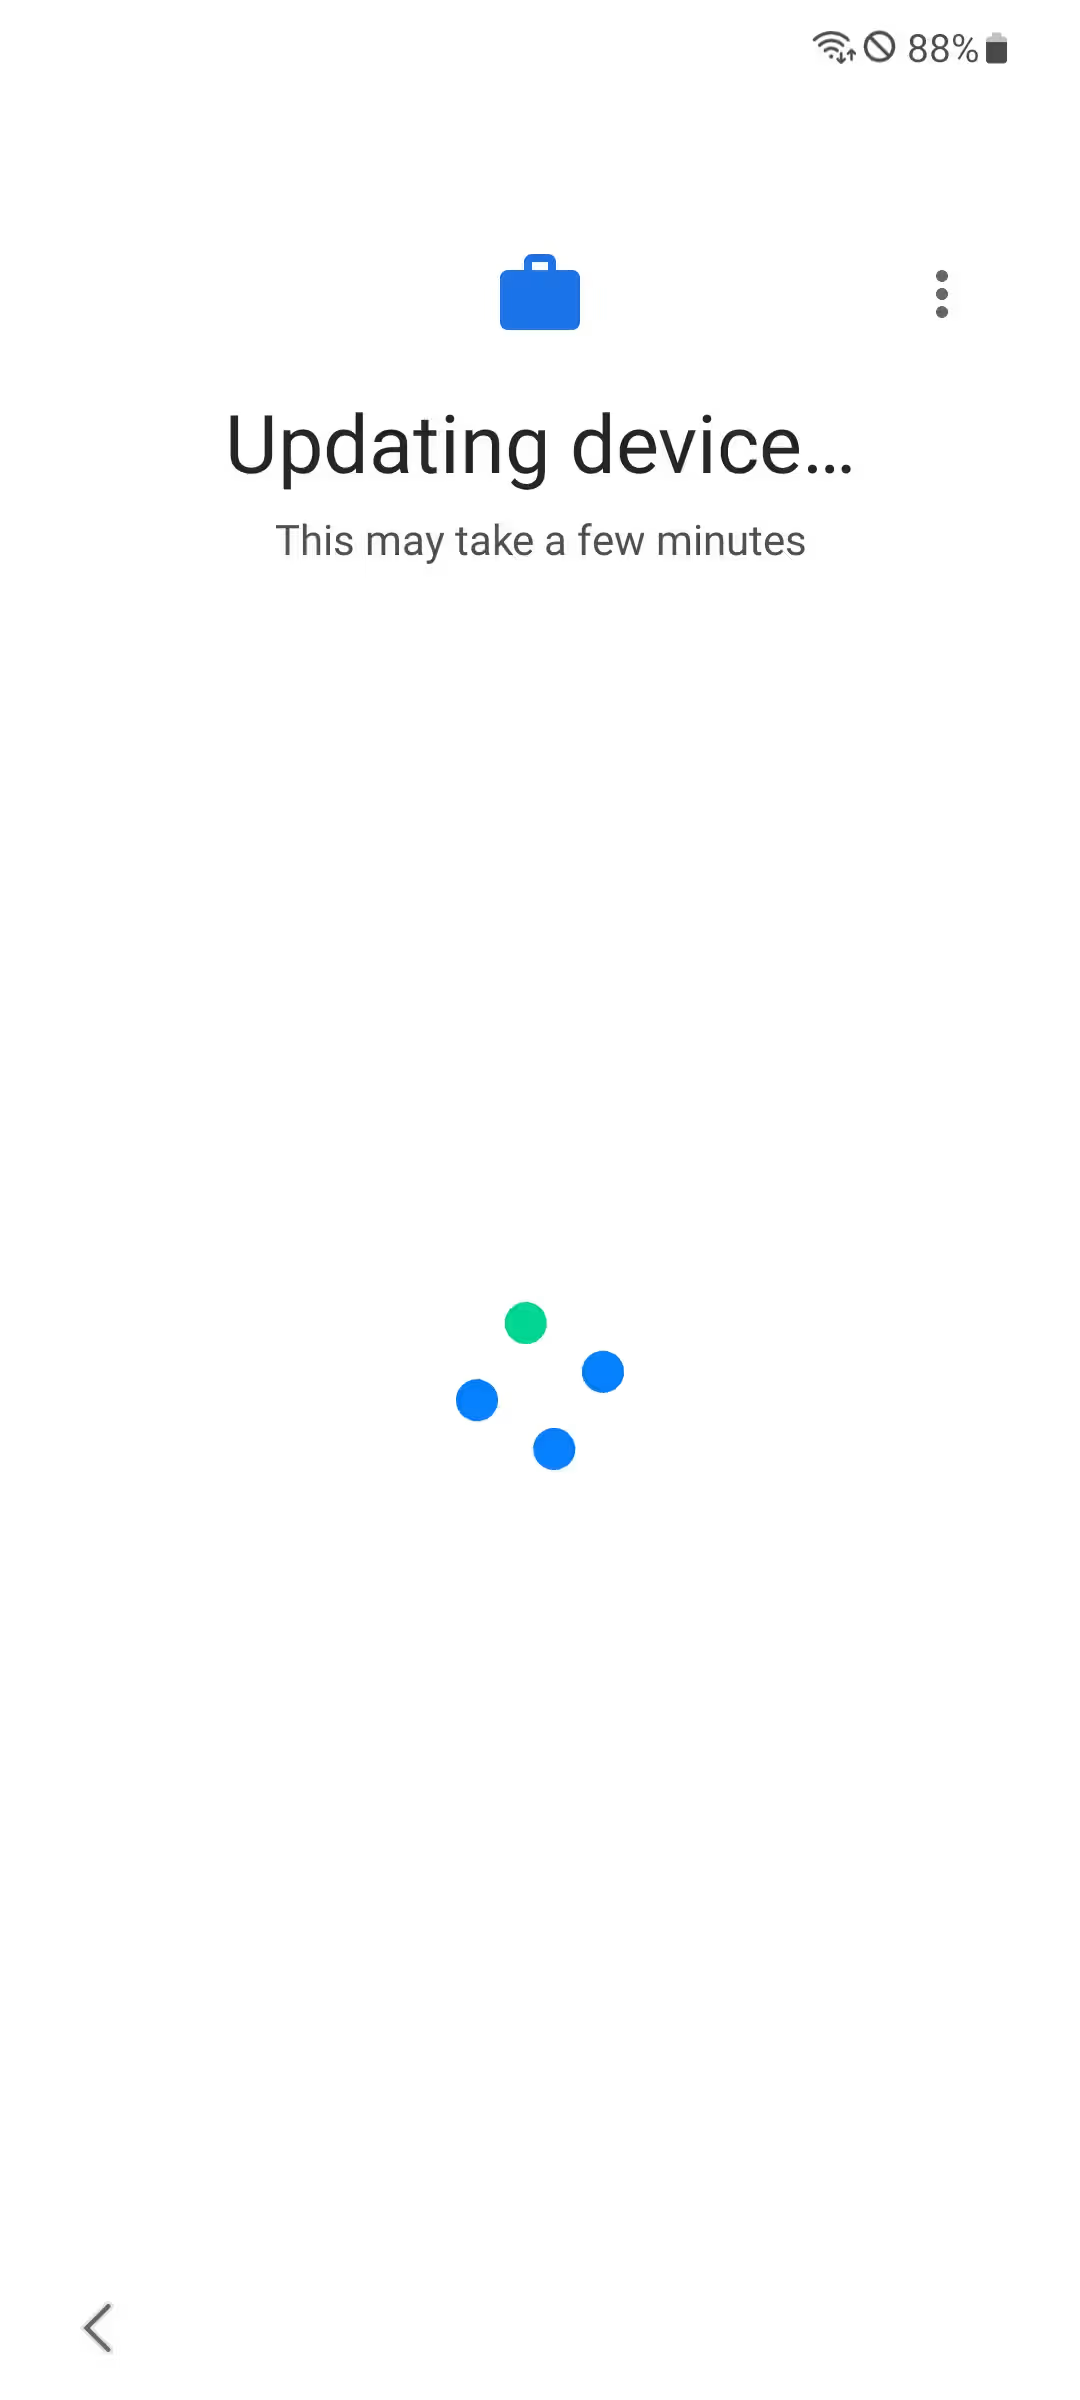
The first deviation comes in when the non-staged enrollment needs to sign in and the staged one doesn't.
Non-staged enrollment
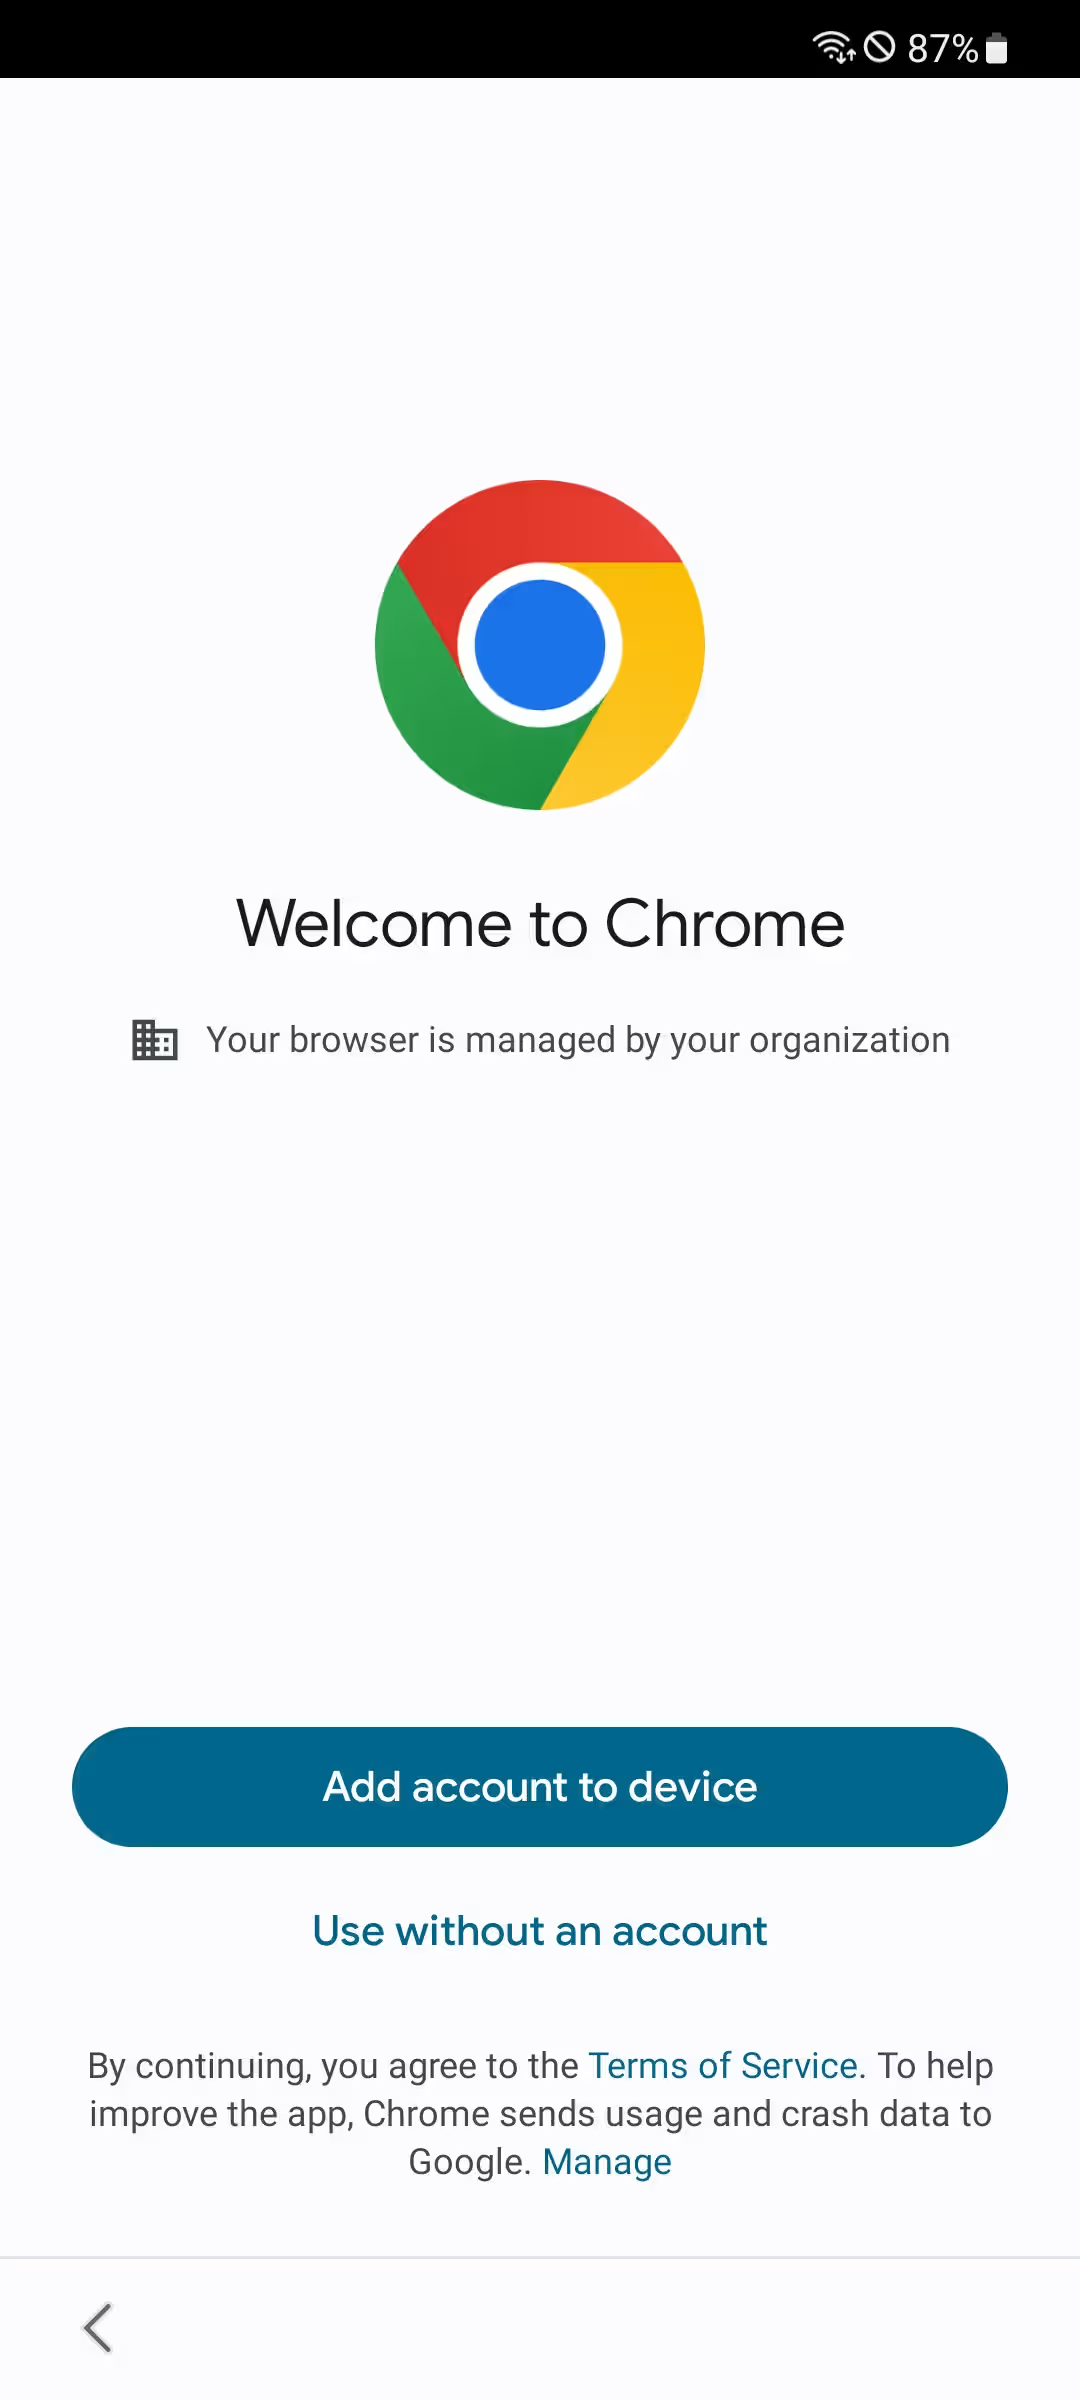

Additionally, the staged enrollment doesn't need to confirm to install the apps and register the device; it happens automatically.


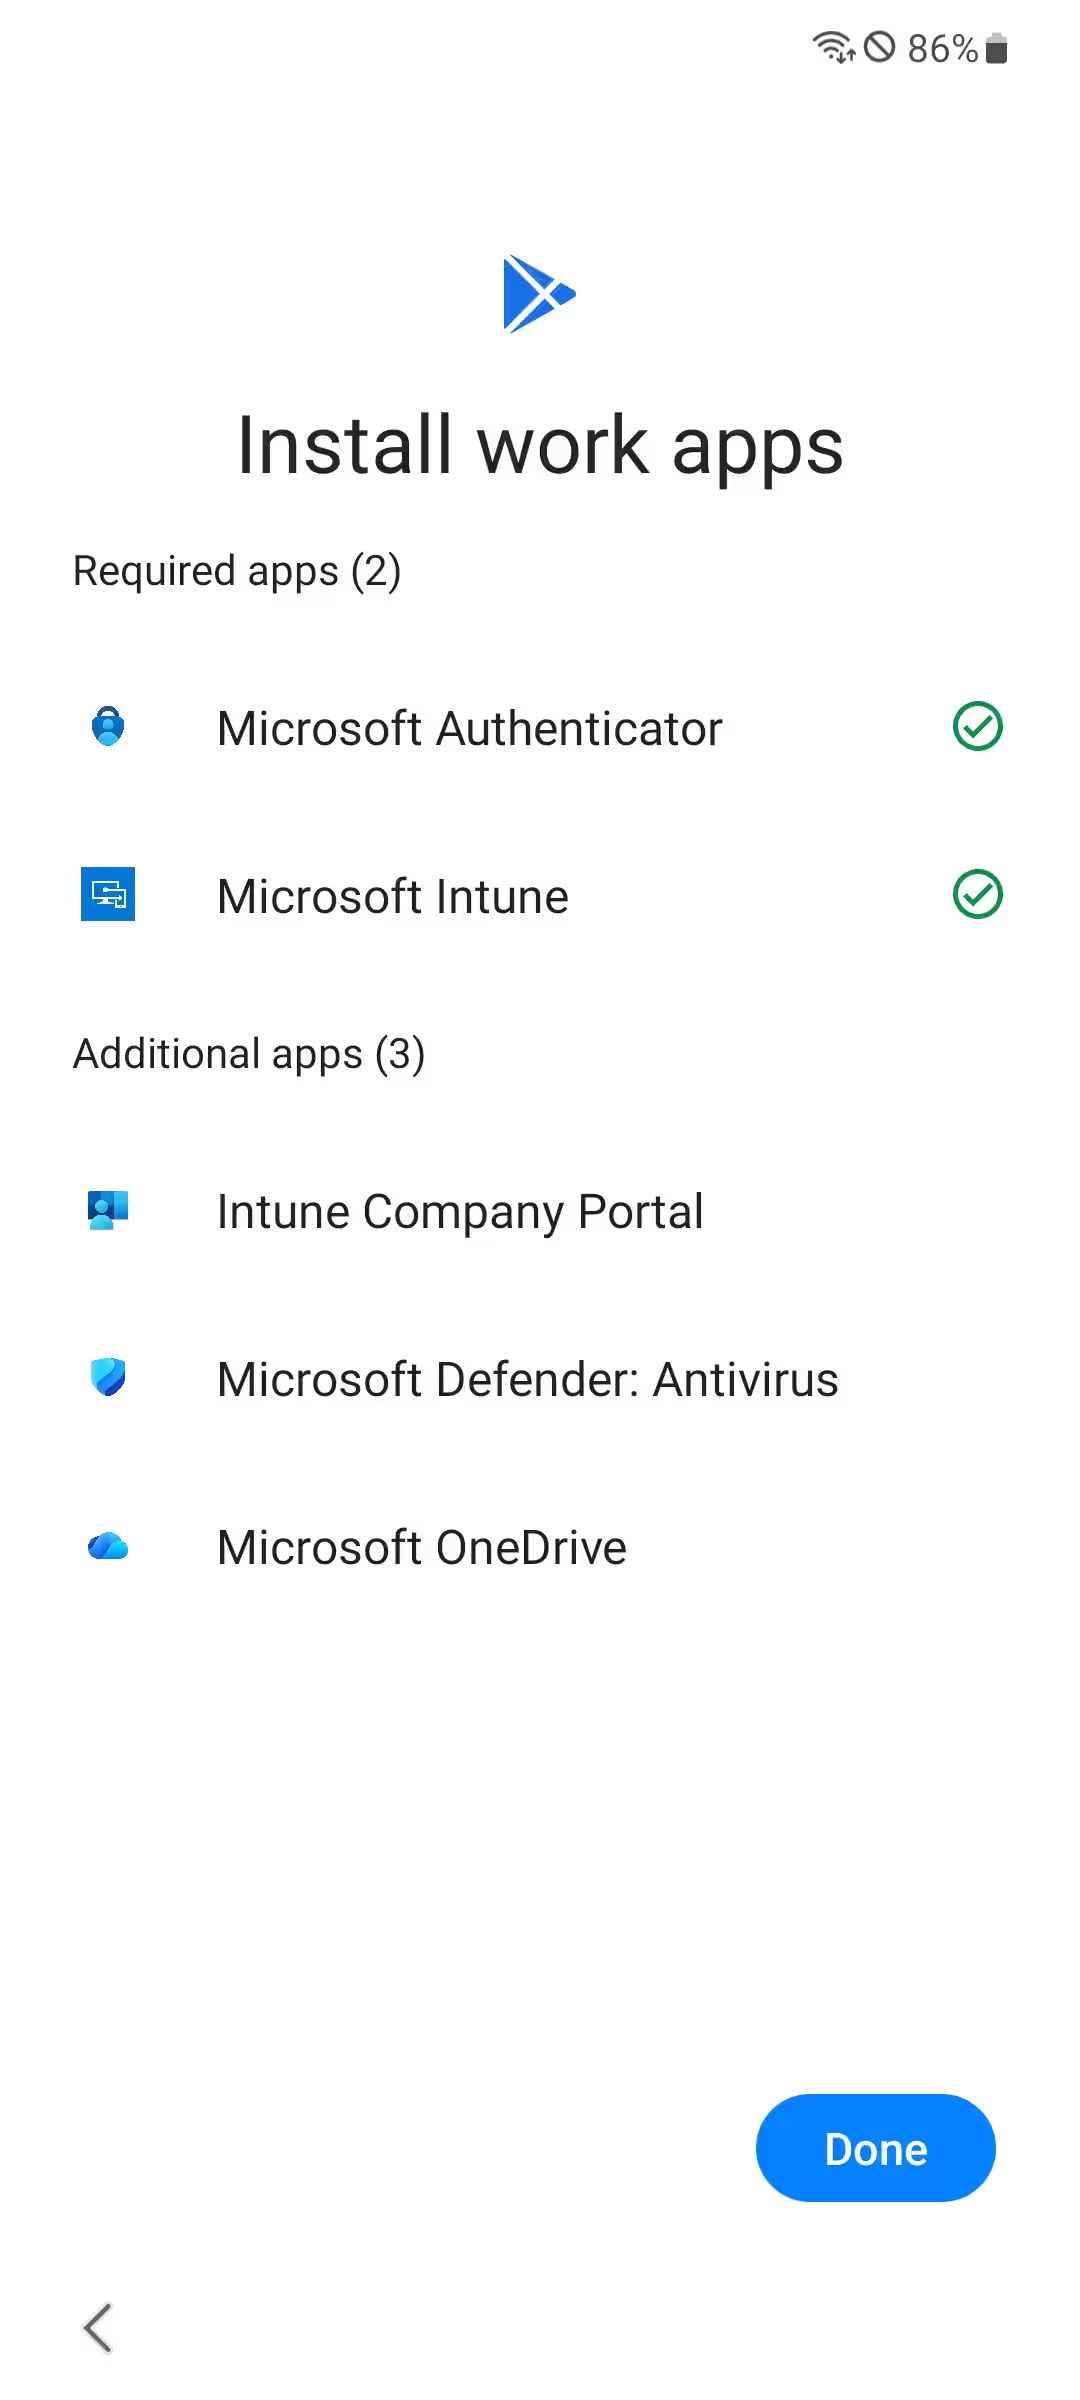

After the apps are installed, the non-staged enrollment needs to sign in to make the registration possible.
Non-staged enrollment

After the device registration the enrollments come together again and both profiles need to select whether to allow or disallow Google services (if not already configured via Intune) and to accept the EULA.


Android Enterprise corporate-owned work profile (COPE)
These devices are owned by the organization and are intended for use by one person for both work and personal use.
| Scenario | Use this option when |
|---|---|
| Uses GMS | ✅ |
| Owned by Org/school | ✅ |
| Personal or BYOD | ❌ Use BYOD |
| New or existing devices | ✅ |
| Bulk enrollment | ✅ |
| Single user | ✅ |
| User-less | ❌ Use a dedicated device or assign a dedicated device profile |
| DEM account | ❌ |
| Managed by another MDM | ❌ Unenroll or factory reset |
Admin experience
You find all enrollment options in the Intune admin center -> Devices -> Android -> Enrollment

- To get started with this profile, open the
Corporate-owned devices with work profiletile and then click+ Create policy. - In the Basics tab, enter a Name, Description and then select your Token and Name template options. When you are done, click
Next.- Token type
Corporate-owned with work profile (default)- Enrolls as an Android Enterprise with work profile device, with the user signing in during enrollment.Corporate-owned with work profile, via staging- Pre-provisions as an Android Enterprise with work profile device, with the user signing in at any time after enrollment.
- Token expiration date - Max 65 years duration
- Apply device name template (max 63 characters, Letters (a-z, A-Z), Numbers (0-9), Hyphens (-))
{{SERIAL}}- Device serial number{{SERIALLAST4DIGITS}}- Last four digits of the device serial number{{DEVICETYPE}}- Device type (for example, AndroidForWork or AndroidEnterprise){{ENROLLMENTDATETIME}}- Date and time the device was enrolled{{RAND:x}}- Random number, where x is the number of digits (whole number less than 10){{USERNAME}}- User's full name (user-affiliated devices only){{UPNPREFIX}}- User alias or UPN prefix (user-affiliated devices only)
- Token type

In the Device group tab, you can select a group for Enrollment time grouping (click here for more Information), then click
Next.Staging Group
If you selected the staging token type, you need to create a dynamic group to target devices (No enrollment time grouping).
(device.enrollmentProfileName -eq "Corporate-owned devices with work profile - Staging")

- At last create the profile on the Review + create tab.

- Next, open the newly created profile and select the Token tab. With this QR code you can pre-provision your devices.

User experience
The specific steps deviate slightly, depending on the Token type you selected in the enrollment profile.
To begin enrollment, power on the device after a fresh start (new or factory reset).
When the Welcome Screen appears, tap the screen 10 times, select your language and scan the token (QR code) from your enrollment profile.
Next, select a Wi-Fi network and follow the enrollment experience to register the device, apply the profile and install the required apps.


The first deviation comes in when the non-staged enrollment needs to sign in and the staged one doesn't.
Non-staged enrollment
Additionally, the staged enrollment doesn't need to confirm to install the apps and register the device; it happens automatically.
After the apps are installed, the non-staged enrollment needs to sign in to make the registration possible.
Non-staged enrollment
After the device registration the enrollments come together again and both profiles need to select whether to allow or disallow Google services (if not already configured via Intune), settings for the private profile and to accept the EULA.


Android Open Source Project (AOSP)
These devices are organization-owned, run without Google Mobile Services (GMS) and are used for work only. The enrollment profile decides whether they're userless or assigned to a single user. OEM support is still limited, so check that your hardware is on Microsoft's list of supported devices first.
| Scenario | Use this option when |
|---|---|
| Uses GMS | ❌ Not supported (with GMS choose COSU or COBO) |
| Owned by Org/school | ✅ |
| Personal or BYOD | ❌ |
| New or existing devices | ✅ |
| Bulk enrollment | ❌ |
| Single user | ✅ |
| User-less | ✅ |
| DEM account | ❌ |
| Managed by another MDM | ❌ Unenroll or factory reset |
Admin experience
You find all enrollment options in the Intune admin center -> Devices -> Android -> Enrollment

To get started with this profile, open the
Corporate-owned, user-associated devicesor theCorporate-owned, userless devicestile in the Android Open Source Project (AOSP) section and then clickCreate profile.In the Basics tab, enter a Name, Description and then select your Token, Wi-Fi and Name template options. When you are done, click
Next.- Token expiration date
Userless- Max 90 days durationUser-associated- Max 65 years duration
- Wi-Fi - Select
Configureif the device has no option to join a network by itself, otherwise leave it onNot configured.- SSID - The network the device connects to during enrollment.
- Hidden network - Whether the network hides its SSID.
- For Microsoft Teams devices (user-associated only) - Enable this only for Teams Android devices (You can enable it only in one enrollment profile per tenant).
- Apply device name template (Letters, Numbers, Hyphens)
{{SERIAL}}- Device serial number{{SERIALLAST4DIGITS}}- Last four digits of the device serial number{{DEVICETYPE}}- Device type (for example, AndroidAOSP){{ENROLLEDDATETIME}}(userless) or{{ENROLLMENTDATETIME}}(user-associated) - Date and time the device was enrolled{{RAND:x}}- Random number, where x is the number of digits (between 1 and 9){{USERNAME}}- User's full name (user-associated only){{UPNPREFIX}}- User alias or UPN prefix (user-associated only)
Userless User-associated 

- Token expiration date
At last create the profile on the Review + create tab.
Next, open the newly created profile, select the Token tab and click
Show token. With this QR code you can now enroll your devices. Here you can alsoReplace token,Revoke tokenorExportthe token.Userless User-associated 

Wi-Fi credentials
If you've configured Wi-Fi in the profile, the QR code will contain those credentials in plain text. Just treat it like a password and set up a staging network with limited permissions for the enrollment.
To target these devices, create a dynamic device group based on the profile name.
(device.enrollmentProfileName -eq "Your AOSP enrollment profile name")
User experience
The specific steps deviate slightly, depending on the enrollment profile you created and the device you use. Admins can also complete the enrollment themselves and then hand the device over to the user.
- To begin enrollment, power on the device after a fresh start (new or factory reset).
- Scan the QR code during the enrollment.
- Follow the on-screen prompts to install the app and register the device.
- A userless device finishes without a sign-in and is ready to use. A user-associated device asks for the user's work credentials first.
Android device administrator (DA)
DANGER
Android device administrator (DA) management is deprecated and no longer available for devices with access to GMS. If you currently use DA management, I recommend switching to another Android management option. Support and help documentation remain available for some Android 15 and earlier devices without GMS. For more information, see Ending support for Android device administrator on GMS devices.
📲 Enrollment settings
You find all of the following settings in the Intune admin center -> Devices -> Android -> Enrollment
Enrollment notifications
With enrollment notifications, users get an email or push notification after a device was enrolled with their account. This way they notice if someone else enrolled a device with their credentials and you can also use it to send a welcome message or onboarding information. On Android they're supported for BYOD scenarios and they only work with user-driven enrollments, so userless devices don't get them.
- To get started, open the
Enrollment notificationstile, stay on the Android Enterprise Notifications tab and click+ Create notifications. - In the Basics tab, enter a Name and Description, then click
Next. The Platform is already set toAndroid Enterprise.

- In the Notification settings tab, select what you want to send and click
Next. You can use both options.- Push Notification: Turn on Send Push Notification and enter a Subject and Message (max 2000 characters). It shows up in the Company Portal app.
- Email Notification: Turn on Send Email Notification and enter a Subject and Message (max 2000 characters). It lands in the user's inbox. You can format it with the Raw HTML editor and add your company logo, company name, contact information, a Company Portal website link and device details.

- Optionally select your Scope tags, assign the notification to your groups in the Assignments tab and create it on the Review + create tab.
- The new notification then appears in the list with its priority and type.

Enrollment restrictions
With enrollment restrictions, you decide how many devices a user can enroll and which devices can enroll at all. For both types, a device has to comply with the highest priority restriction assigned to its user. You can drag & drop a restriction to change its priority. The default restriction always has the lowest priority and is the one enforced for enrollments that aren't user-driven.
Device limit restrictions define how many devices each user can enroll, from 1 to 15. To change this, open the Device limit restriction tile and either edit the default restriction or click + Create restriction. Users who reach their limit get a message during enrollment and have to unenroll a device first.

Device platform restrictions define which platforms, OS versions, manufacturers and ownership types can enroll.
- To get started, open the
Device platform restrictiontile, select the Android restrictions tab and click+ Create restriction.

- In the Basics tab, enter a Name and Description and click
Next.

- In the Platform settings tab, select your restrictions and click
Next.- Platform:
AlloworBlockenrollment for the platform. - Allow min/max range: The minimum and maximum OS version allowed to enroll. This only applies to devices enrolled with the Company Portal.
- Personally owned devices:
AlloworBlockenrollment as a personal device.Blockdoesn't apply to devices on the Android Management API (web-based enrollment) and isn't reliable on Android 12 and later. - Device manufacturer: A comma-separated list of manufacturers you want to block.
- Platform:

- Optionally select your Scope tags, assign the restriction to your groups in the Assignments tab and create it on the Review + create tab.
0️⃣ Enable Android zero-touch
Zero-touch enrollment provisions corporate-owned devices straight out of the box. When a user turns on a registered device, it connects to Google, finds its assigned configuration and enrolls into Intune without anyone scanning a QR code or typing a token. If you know Apple Business Manager, the idea is the same, but you can't create the account yourself or add devices manually. Adding devices goes through the reseller.
Requirements
- Reseller: Devices must be bought from an authorized zero-touch reseller or carrier. Existing devices can only be added by the reseller they were bought from.
- Android version: Android 10.0 or later for fully managed and corporate-owned work profile devices and Android 8.0 or later for dedicated devices.
- Google Mobile Services: GMS and Google Play services must stay enabled.
Get your zero-touch account
Your reseller creates the account the first time you buy zero-touch devices, so this has to happen before you can configure anything.
- Give your reseller the email address of the Google account you connected to Intune and your full company name. Carriers may have their own process for this, such as a form that lists existing devices by IMEI.
- The reseller creates the customer with this account as its owner. Check the spelling of the company name beforehand, because resellers can't edit a customer afterwards. You can also name other employees who need access to the portal.
- Wait for the welcome email from Google.
- Sign in to the zero-touch portal and accept the terms if prompted.
- Check the Devices tab once the reseller has registered your devices.
Google Admin console
You don't need the Google Admin console for zero-touch with Intune. You manage the account in the zero-touch portal.
Choose a setup method
With the devices in your account, connect them to Intune. There are two ways to do this and they support different device types.
| Link account in Intune | Zero-touch portal | |
|---|---|---|
| Fully managed (COBO) | ✅ | ✅ |
| Dedicated (COSU) | ❌ | ✅ |
| Corporate-owned work profile (COPE) | ❌ | ✅ |
| Multiple enrollment profiles | ❌ | ✅ |
| Configuration created | Automatically | Manually |
WARNING
The default configuration created by linking uses a fully managed token and it overrules the default configuration set in the zero-touch portal. If you also enroll dedicated or corporate-owned work profile devices, don't link your account.
Link your account in Intune
Enrollment for corporate-owned, fully managed devices must be enabled, as described in the COBO section above.
In the Intune admin center go to Devices -> Android -> Enrollment and select
Zero-touch enrollment.The zero-touch page to link your account opens, click
Nextand sign in with the mail you gave to your reseller.

Select the zero-touch account and click
Link. A default configuration is created and applied to all devices without a configuration and to future devices added by your reseller.
Click
Next, add your support information and clickSave.
You can later come back to the same page to view configurations, edit the support information or unlink the account.
Create a configuration in the zero-touch portal
To create a manual configuration in the zero touch portal, you need to start by exporting the enrollment token from Intune. To do this, open the Intune admin center -> Devices -> Android -> Enrollment and select the
Tokentab. ClickExport tokento get a JSON file.In the zero-touch portal, add a new configuration on the Configurations tab.
Fill out the configuration:
Field Value Configuration name A short name, like the enrollment profile it belongs to EMM DPC Microsoft IntuneDPC extras The exported JSON, or the JSON below with your token Company name Your organization's name, shown to users during setup, so keep it short Support email address Shown to users before setup. Users can't click it, so keep it short and easy to type on another device Support phone number Shown to users before setup. Users call it from another device Custom message Optional, one or two sentences If you use the Example JSON below, replace
YourEnrollmentTokenwith your token and keep the double quotes around it.JSON{ "android.app.extra.PROVISIONING_DEVICE_ADMIN_COMPONENT_NAME": "com.google.android.apps.work.clouddpc/.receivers.CloudDeviceAdminReceiver", "android.app.extra.PROVISIONING_DEVICE_ADMIN_SIGNATURE_CHECKSUM": "I5YvS0O5hXY46mb01BlRjq4oJJGs2kuUcHvVkAPEXlg", "android.app.extra.PROVISIONING_DEVICE_ADMIN_PACKAGE_DOWNLOAD_LOCATION": "https://play.google.com/managed/downloadManagingApp?identifier=setup", "android.app.extra.PROVISIONING_ADMIN_EXTRAS_BUNDLE": { "com.google.android.apps.work.clouddpc.EXTRA_ENROLLMENT_TOKEN": "YourEnrollmentToken" } }Optional extras
Microsoft only documents the JSON above. Other options exist, which may need EMM support, so test them first. They go before the
PROVISIONING_ADMIN_EXTRAS_BUNDLEline, not inside it. Setting the first one totrueleaves all preinstalled system apps enabled.json"android.app.extra.PROVISIONING_LEAVE_ALL_SYSTEM_APPS_ENABLED": true, "android.app.extra.PROVISIONING_LOCALE": "en_GB", "android.app.extra.PROVISIONING_USE_MOBILE_DATA": true,Click
Addand repeat these steps for every other enrollment profile.Optionally set a default on the Configurations tab. Click the edit icon, select the configuration in the Default configuration panel and click
Save. New devices from your reseller get it automatically.On the Devices tab, you can check the assignments and change the Configuration of a single device, which you find by its IMEI or serial number.
WARNING
The configuration holds a copy of the token. If you replace or revoke the token in Intune, or it expires, update the DPC extras as well. Treat the token like a password and revoke it if it reaches anyone it shouldn't.
Device experience
Once you set everything up in the portal, you can ship the devices directly to your users. They enroll on first boot and again after every factory reset for as long as they stay registered.
Recommendation
I would recommend testing the enrollment with a single device first, before shipping them to your users.
- The user turns on the device, starts the setup wizard and connects it to Wi-Fi, Ethernet or a mobile network.
- The device contacts Google, shows your company and support details and installs Android Device Policy.
- The device enrolls into Intune with the profile from the configuration and the user signs in with their work account when prompted (except on Dedicated devices).
INFO
- No connection during setup: A device with a configuration will reset itself after its first connection to Google.
- Devices already in use: Assigning a default configuration to an account with existing devices will apply the profile on the next factory reset.
- Samsung devices: Don't register a device in both zero-touch and Knox Mobile Enrollment. Knox will take precedence.
- Dual-SIM devices: Have your reseller register both IMEIs if possible, else register the numerically lowest one.
- Removing devices: Deregister a device before transferring its ownership with
Deregisteron the Devices tab.
⚙️ Device settings
Defender for Endpoint
Defender for Endpoint on Android adds mobile threat defense to your devices with anti-phishing, web protection, network protection, malware scanning and a device risk level. Intune uses that risk level in compliance and app protection policies, so Conditional Access can block a compromised device.
Requirements
- Licenses: Every user needs an Intune and a Defender for Endpoint license.
- Enrollment: Personally-owned work profile (BYOD), corporate-owned work profile (COPE) or fully managed (COBO). Device administrator is deprecated on GMS devices.
- Roles: Endpoint Security Manager in Intune, plus Security Administrator in Entra for the Defender side.
- No silent onboarding: Unlike Windows and supervised iOS, a device only counts as onboarded once the user has opened the Defender app and finished its setup. Low-touch onboarding (step 12) cuts this down to a few taps.
Connect Defender and Intune
- Open the Microsoft Defender portal -> Settings -> Endpoints -> Advanced features and turn on
Microsoft Intune connection.
INFO
In some tenants this page shows up as Optional features.
- Open the Intune admin center -> Endpoint security -> Microsoft Defender for Endpoint (or Tenant administration -> Connectors and tokens -> Microsoft Defender for Endpoint).
- Turn on the toggles you need for Android:
- Compliance policy evaluation:
Connect Android devices version 6.0.0 and above to Microsoft Defender for Endpoint(for enrolled devices). - App protection policy evaluation:
Connect Android devices to Microsoft Defender for Endpoint(for MAM / unenrolled devices). - Mobile Threat Defense role:
Grant MTD role permissions to Microsoft Defender for Endpoint on enrolled Android COBO and COPE devices(see Mobile Threat Defense role below). - Auto launch:
Automatically launch Microsoft Defender for Endpoint during setup on Android COBO and COPE devices.
- Compliance policy evaluation:

- Click
Save.
Deploy the Defender app
- Open the Intune admin center -> Apps -> Android, click
+ Createand selectStore appas Category ->Managed Google Play appas App type (see Store Apps). - Search for Microsoft Defender, open
Microsoft Defender: Antivirus, clickSelectand thenSyncon the top left.

- Click
Refreshin the Android app list until Microsoft Defender: Antivirus shows up. - Open the app -> Properties -> Assignments ->
Editand add your user group under Required.
INFO
If you use the MTD role or the auto-launch toggle, assign Defender to user groups or All devices before enrollment. A device group assignment might not finish in time during setup.
App configuration policy
This policy grants Defender its permissions and turns on low-touch onboarding.
- Open the Intune admin center -> Apps -> Configuration, click
+ Createand selectManaged devices. - On the Basics tab, enter a Name and Description and select:
- Platform:
Android Enterprise & AOSP - Profile Type:
All Profile Types,Corporate Owned DevicesorPersonally-Owned Work Profile Only - Targeted app:
Microsoft Defender: Antivirus
- Platform:

INFO
Use either one All Profile Types policy or separate per-type policies, never both for the same app, as the settings can conflict.
On the Settings tab, under Permissions click
Addand set:Permission Permission state Why Location access (fine) Auto grantNeeded for web and network protection (Wi-Fi threat detection) Location access (background) Auto grantWi-Fi detection needs location "all the time" POST_NOTIFICATIONS Auto grantSo threat alerts reach the user

Directly beneath the permissions, set the Configuration settings format to
Use configuration designer, clickAddand configure these keys:Configuration key Value type Configuration value Disable sign out integer 1(default on Android Enterprise)Automatic Remediation of Network Protection Alerts integer 1(default)Enable Users to Trust Networks and Certificates integer 0(default)Manage Network Protection Detection for Certificates integer 1(audit) first, then2(enable)Enable Network Protection in Microsoft Defender integer 1VPN integer 1Anti-Phishing integer 1User UPN variable User principal name (UPN)
(shows as{{userprincipalname}})Low touch onboarding integer 1

- Assign the policy to the same user group as the app and click
Create.
WARNING
- Network protection: Network protection is on by default, but as soon as you add the key Enable Network Protection in Microsoft Defender it defaults to
0and turns it off. Always set it to1. All other network protection keys only work when it's1. - Certificate detection is off by default. Start in audit mode (
1), so the SOC sees events without users getting notified, then switch to2. - Global Secure Access: Some guides set the key Global Secure Access to
0. Only do that if you don't use Global Secure Access, as the GSA client on Android is built into Defender. - Private CAs: If you use your own root CA, add its SHA-1 thumbprints to Trusted CA certificate list for Network Protection or Defender flags it as a rogue certificate.
INFO
- Keys that only repeat the default (marked above) are optional, but setting them makes your intent visible in the policy.
- On Android 12 and later, Auto grant isn't supported for some permissions on COPE and dedicated devices, so users still get prompted.
- Low-touch onboarding fits COBO and COPE best. On BYOD you can skip the keys and keep the permissions only.
- Intune app configuration cannot automatically grant Accessibility, as this is a special permission and not a runtime permission. The user must enable it in Settings.
Always-on VPN for web protection
Defender's web protection runs as a local loopback VPN on the device (no traffic is sent to a VPN server). Android only lets an app inspect network traffic through its VPN interface, so this is how Defender needs to do it to check URLs and block sites. Deploying it as always-on VPN saves the user from setting it up during onboarding.
- Open the Intune admin center -> Devices -> Configuration, click
+ Create->New Policy. - Select Android Enterprise as platform, Templates as profile type and
Device restrictionsfor Fully Managed, Dedicated and Corporate-Owned Work Profile or Personally-Owned Work Profile, then clickCreate. - On the Basics tab, enter a Name and Description, then click
Next. - On the Configuration settings tab, go to the Connectivity section and set:
- Always-on VPN (work profile-level) =
Enable - VPN client =
Custom - Package ID =
com.microsoft.scmx - Lockdown mode =
Not configured
- Always-on VPN (work profile-level) =
- After that, assign it to the same user group and create the policy.

WARNING
Only one always-on VPN client per device. If you already deploy another always-on VPN (e.g. Microsoft Tunnel), don't roll out this part.
Optional: Grant the remaining permissions with OEMConfig
Defender also asks for Appear on top, All files access and a battery optimization exemption. These are special app access permissions, not runtime permissions, so Intune can't grant them (Google gives MDMs no API for it, because malware often abuses them). Only OEM APIs can. On Samsung devices (Android 13+) the Knox Service Plugin can do this via OEMConfig (You can find a complete walkthrough further down here):
- Device-wide policies -> Application management policies: Add
com.microsoft.scmxto the Battery optimization allowlist.

- Permission Configuration: Grant
Appear on topandAll files accesstocom.microsoft.scmx.

- Device-wide policies:
Enable device policy controls=true, otherwise the controls above aren't applied.

IMPORTANT
Be aware that you can only apply one OEMConfig profile per device.
INFO
On COBO and COPE with Android 14+, the Mobile Threat Defense role already exempts Defender from battery optimization.
Mobile Threat Defense role
Since 2026 Android Enterprise has a Mobile Threat Defense role, which gives one security app per tenant extra protection on COBO and COPE devices (not BYOD):
- Users can't force stop Defender or clear its data.
- Defender can't be suspended or put into hibernation and is exempt from power restrictions (on Android 14+ without a user prompt).
It requires enrollment through Android Management API and Defender assigned as Required. Existing devices get the role at the next sync, without re-enrollment. To check it on a device: Settings -> Apps -> Microsoft Defender shows battery as Unrestricted and Force stop and Clear data are greyed out.
Unenrolled devices (MAM)
Defender also works on unenrolled devices or devices managed by another MDM, through Intune MAM.
- Turn on the connector: In Endpoint security -> Microsoft Defender for Endpoint (step 3), under App protection policy evaluation, set Connect Android devices to Defender for Endpoint =
On. - Block risky devices: In Apps -> Protection -> Create -> Android, on the Conditional launch tab under Device conditions, add Max allowed device threat level:
- Value = the highest threat level you allow (
Secured,Low,MediumorHigh) - Action =
Block accessorWipe data
- Value = the highest threat level you allow (
- Configure Defender: In Apps -> Configuration -> Create -> Managed apps (not Managed devices), select the public app Microsoft Defender Endpoint Android.
- On the Settings tab, under General configuration settings, add:
- Name =
DefenderMAMConfigs - Value =
1
- Name =
WARNING
- Every Managed apps policy for Defender needs
DefenderMAMConfigs=1. Only a policy meant to disable end-user onboarding uses0. - Never add this key to a Managed devices policy.
See Configure Microsoft Defender for Endpoint on Android using mobile application management.
User experience
- When the user signs in for the first time, the device registers itself in Entra and Intune and starts the Defender setup automatically. On Set up <Company> access, the user taps
Nextfor the registration andNextagain for the Defender enrollment to start. - Defender opens and shows the Permissions it still needs. Add VPN configurations already has a green check, because the always-on VPN profile granted it. The user taps
Begin.
 |  |
|---|
- Android opens All files access and then Appear on top. As soon as the user turns on the Microsoft Defender setting, the page closes and Defender comes back for the next step.
 |  |
|---|
INFO
At the moment OEMConfig takes a while to arrive on the device. So the user may still need to grant them by hand if the timing is wrong. So I recommend testing it for your particular vendor and model, to see how it behaves. Also Microsoft is at the moment in the process of updating the OEMConfig experience (November 2026).
- For web protection, Defender needs to read the web addresses opened in the browser through the Android accessibility service, which needs to be approved by the user with
Agree.

- On the Accessibility settings page, the user goes to
Installed apps->Microsoft Defender Accessibility Service, sets the toggle toOnand confirms the full control pop-up withAllow.
 |  |
|---|---|
 |  |
- Defender is now set up. The user finds it in the app list and its notification Your Device Protection is Active stays permanently in the notifications.
 |  |
|---|
- The first time the user opens Defender, it will scan the device automatically.

INFO
If Defender asks for location access (used to detect unsafe Wi-Fi networks), the user should select Allow all the time.
OEMConfig
OEMConfig is a standard defined by Google to configure OEM-specific device settings that aren't built into Android Enterprise or Intune. Instead of waiting for Intune to support every vendor feature, the OEM embeds a settings schema in its own OEMConfig app and publishes it on the Google Play store. Intune reads that schema and shows it as an OEMConfig device configuration profile. On the device, the OEMConfig app (not Intune) applies the settings.
Typical use cases:
- Samsung Knox features via the Knox Service Plugin (e.g. advanced restrictions, firmware update control, hardware key remapping)
- Barcode scanner, button and audio settings on rugged devices (Zebra, Honeywell, Datalogic, Spectralink etc.)
- Device settings beyond the standard Intune profiles (e.g. advanced Wi-Fi, display, power or keyboard settings)
- Automatically granting permissions to apps, e.g. to the Managed Home Screen
IMPORTANT
- OEMConfig requires the OEMConfig app of your device's OEM, onboarded by Google and Intune. You find the current list on Microsoft Learn.
- One profile per device: Multiple profiles can cause conflicts.
- Max. 500 KB: Larger profiles aren't deployed.
- No validation: Intune does not check the configured values and will just pass them through to the OEM app.
Add the OEMConfig app
- Open the Intune admin center -> Apps -> Android, click
+ Createand selectStore appas Category andManaged Google Play appas App type (see Store Apps). - Search for the OEMConfig app of your OEM (e.g. Knox Service Plugin), open it, click
Selectand thenSyncon the top left.

- Open the app in the app overview and assign it as Required to the device group.
INFO
Some OEMs ship their devices with the OEMConfig app preinstalled. It still needs to be added to Intune to be selectable in the profile.
Create the OEMConfig profile
- Open the Intune admin center -> Devices -> Configuration, click
+ CreateandNew Policy. - Select Android Enterprise as platform, Templates as profile type and
OEMConfigas Template name, then clickCreate.

- In the Basics tab, enter a Name and Description, click
Select an OEMConfig app, choose your OEMConfig app and clickNext.

In the Configuration settings tab, choose:
Configuration designer: Shows the settings of the app schema.JSON editor: Shows a template of the full schema.

Add optional Scope tags, assign the profile to the device group and click
NextandCreate.
Managed Home Screen (MHS)
The Managed Home Screen app is designed for fully managed Android Enterprise devices enrolled in Intune and run in multi-app kiosk mode. It serves as a launcher for approved apps while allowing IT admins to customize the device and limit user access to specific features and functionality.
Managed Home Screen natively supports passwordless authentication with Entra ID, using a QR code and PIN. No need for users to enter Username or password.
You can configure MHS in 3 different ways, each with its own pros and cons:
- Device configuration profile (Device restrictions > Device experience)
- Recommended by Microsoft, but has the least amount of settings (November 2026).
- App Configuration profile - Configuration Designer
- Easy-to-use UI, but no
BundleArraysettings (apps, web links, folders, app order).
- Easy-to-use UI, but no
- App Configuration profile - JSON data
- All settings available. Designer settings convert to JSON automatically.
Complete settings list with method details
Configuration to customize applications, folders and general appearance of Managed Home Screen:
| Name | Device Profile | Config Designer | JSON data |
|---|---|---|---|
| Set allow-listed applications | ✅ | ❌ | ✅ |
| Set pinned web links | ✅ | ❌ | ✅ |
| Create Managed Folder for grouping apps | ✅ | ❌ | ✅ |
| Set Grid Size | ✅ | ✅ | ✅ |
| Lock Home Screen | ✅ | ✅ | ✅ |
| Application order enabled | ✅ | ✅ | ✅ |
| Application order | ✅ | ❌ | ✅ |
| Apps in folder are ordered by name | ❌ | ✅ | ✅ |
| Set app icon size | ✅ | ✅ | ✅ |
| Set app folder icon | ✅ | ✅ | ✅ |
| Set screen orientation | ✅ | ✅ | ✅ |
| Set device wall paper | ✅ | ✅ | ✅ |
| Define theme color | ❌ | ✅ | ✅ |
| Block pinning browser web pages to MHS | ❌ | ✅ | ✅ |
| Top Bar Primary Element | ❌ | ✅ | ✅ |
| Top Bar Secondary Element | ❌ | ✅ | ✅ |
| Top Bar User Name Style | ❌ | ✅ | ✅ |
| Widget | ❌ | ❌ | ✅ |
Configurations for device peripherals and Managed Home Screen settings:
| Name | Device Profile | Config Designer | JSON data |
|---|---|---|---|
| Show Managed Setting | ✅ | ✅ | ✅ |
| Show Wi-Fi setting | ✅ | ✅ | ✅ |
| Enable Wi-Fi allowlist | ✅ | ✅ | ✅ |
| Wi-Fi allowlist | ✅ | ❌ | ✅ |
| Show Bluetooth setting | ✅ | ✅ | ✅ |
| Show volume setting | ✅ | ✅ | ✅ |
| Show call volume control | ❌ | ✅ | ✅ |
| Show ring volume control | ❌ | ✅ | ✅ |
| Show notification volume control | ❌ | ✅ | ✅ |
| Show alarm volume control | ❌ | ✅ | ✅ |
| Show flashlight setting | ✅ | ✅ | ✅ |
| Show brightness slider | ❌ | ✅ | ✅ |
| Show adaptive brightness toggle | ❌ | ✅ | ✅ |
| Show autorotate toggle | ❌ | ✅ | ✅ |
| Show ringtone selector | ❌ | ✅ | ✅ |
| Show device info setting | ✅ | ✅ | ✅ |
| Show device's name on MHS | ❌ | ✅ | ✅ |
| Show serial number for all supported OS version on MHS | ❌ | ✅ | ✅ |
| Show device name for all supported OS version on MHS | ❌ | ✅ | ✅ |
| Enable virtual home button | ✅ | ✅ | ✅ |
| Type of virtual home button | ✅ | ✅ | ✅ |
| Enable notifications badge | ✅ | ✅ | ✅ |
| Battery and Signal Strength indicator bar | ❌ | ✅ | ✅ |
| Type of virtual app switcher button | ❌ | ✅ | ✅ |
Configurations for a custom screensaver:
| Name | Device Profile | Config Designer | JSON data |
|---|---|---|---|
| Enable screen saver | ✅ | ✅ | ✅ |
| Screen saver image | ✅ | ✅ | ✅ |
| Screen saver show time | ✅ | ✅ | ✅ |
| Inactive time to enable screen saver | ✅ | ✅ | ✅ |
| Media detect before showing screen saver | ✅ | ✅ | ✅ |
Configurations to help with troubleshooting issues on the device:
| Name | Device Profile | Config Designer | JSON data |
|---|---|---|---|
| Exit lock task mode password | ✅ | ✅ | ✅ |
| Maximum number of attempts to exit lock task mode | ❌ | ✅ | ✅ |
| Time before exit lock task password can be retried | ❌ | ✅ | ✅ |
| Enable easy access debug menu | ✅ | ✅ | ✅ |
| Enable MAX inactive time outside of MHS | ❌ | ✅ | ✅ |
| MAX inactive time outside MHS | ❌ | ✅ | ✅ |
| Enable MAX time outside MHS | ❌ | ✅ | ✅ |
| MAX time outside MHS | ❌ | ✅ | ✅ |
Configurations to customize Managed Home Screen experience when device is set up with Microsoft Entra shared device mode:
| Name | Device Profile | Config Designer | JSON data |
|---|---|---|---|
| Enable sign in | ✅* | ✅ | ✅ |
| Sign in type | ✅ | ✅ | ✅ |
| Domain name | ❌ | ✅ | ✅ |
| Sign in hint text | ❌ | ✅ | ✅ |
| Set to the url of wallpaper | ✅ | ✅ | ✅ |
| Enable show organization logo on sign in page | ✅ | ✅ | ✅ |
| Organization logo on sign in page | ✅ | ✅ | ✅ |
| Enable session PIN | ✅* | ✅ | ✅ |
| Complexity of session PIN | ✅** | ✅ | ✅ |
| Minimum length for session PIN | ❌ | ✅ | ✅ |
| Maximum number of attempts for session PIN | ❌ | ✅ | ✅ |
| Customer facing folder | ❌ | ✅ | ✅ |
| Require PIN code after returning from screensaver | ✅ | ✅ | ✅ |
| Minimum inactive time before session PIN is required | ❌ | ✅ | ✅ |
| Enable auto sign out | ✅ | ✅ | ✅ |
| Auto sign out time | ✅ | ✅ | ✅ |
| Count down time on auto sign out dialog | ✅ | ✅ | ✅ |
| Privacy statement title | ❌ | ✅ | ✅ |
| Privacy statement link | ❌ | ✅ | ✅ |
| Configure offline app access | ✅ | ❌ | ✅ |
| Offline work time before required sign-in | ❌ | ✅ | ✅ |
| Configure app access without sign in | ✅ | ❌ | ✅ |
| Silence apps while Managed Home Screen requires authentication | ❌ | ✅ | ✅ |
| Exclude these apps from the silence setting | ❌ | ❌ | ✅ |
* Sign in / session PIN can be skipped if Home, Overview or system notifications are shown. Prevent with Silence apps.
** Complex PIN options are only available in the App Configuration profile.
Install the app
- Open the Intune admin center -> Apps -> Android, click
+ Createand selectStore appas Category andManaged Google Play appas App type (see Store Apps). - Search for Managed Home Screen, open it, click
Selectand thenSyncon the top left.

- A few seconds later the app appears in the app overview. Open it and assign it as Required to the device group of your kiosk devices.
INFO
On dedicated devices only Required apps can be installed. The same applies to all apps you want to show on the Managed Home Screen.
Device configuration profile
Create a multi-app kiosk profile that locks the device to the Managed Home Screen:
- Open the Intune admin center -> Devices -> Manage devices -> Configuration, click
+ CreateandNew Policy. - Select Android Enterprise as platform and Templates -> Device restrictions (under Fully managed, dedicated and corporate-owned work profile) as profile type, then click
Create.

- In the Basics tab, enter a Name and Description, then click
Next. - In the Configuration settings tab, open Device experience and set:
- Device experience type:
Kiosk mode (dedicated and fully managed) - Kiosk mode:
Multi-app
- Device experience type:
- Under Apps in kiosk mode, click
Addand select the apps that should be shown on the Managed Home Screen.
INFO
The Managed Home Screen itself only needs to be assigned as an app and not added here.

- In the same Device experience section, configure the remaining MHS settings you want (e.g. folders, grid size, wallpaper, screen saver or sign-in). All settings marked with ✅ in the Device Profile column of the list above can be found here.

- In the Assignments tab, select the device group of your kiosk devices, then click
NextandCreate.
- Open the Intune admin center -> Devices -> Manage devices -> Configuration, click
DANGER
Every app you add to the kiosk must be assigned as Required to the same devices. If an app is missing or only available, the device can lock users out with the message Contact your IT admin. This phone will be erased.
App configuration policy
For all settings not available in the device configuration profile, you create an additional App configuration policy.
Open the Intune admin center -> Apps -> Configuration, click
+ CreateandManaged devices.In the Basics tab, enter a Name and Description and set:
- Platform:
Android Enterprise & AOSP - Profile Type:
All Profile Types - Targeted app:
Managed Home Screen
Then click
Next.- Platform:

In the Settings tab, choose your Configuration settings format:
Use configuration designer: ClickAdd, select the settings you want and set their values.Enter JSON data: Paste your JSON script. Needed for allBundleArraysettings (e.g. apps, web links, folders, widgets).

Example: JSON data
These settings aren't available in the device configuration profile and harden a kiosk device:
- block_pinning_browser_web_pages_to_MHS: Users can't pin web pages from a browser to the home screen.
- enable_max_inactive_time_outside_MHS / max_inactive_time_outside_MHS: MHS relaunches after 180 seconds of inactivity outside of MHS (requires an Exit lock task mode password).
json{ "kind": "androidenterprise#managedConfiguration", "productId": "app:com.microsoft.launcher.enterprise", "managedProperty": [ { "key": "block_pinning_browser_web_pages_to_MHS", "valueBool": true }, { "key": "enable_max_inactive_time_outside_MHS", "valueBool": true }, { "key": "max_inactive_time_outside_MHS", "valueInteger": 180 } ] }You find the JSON script with all available keys on Microsoft Learn.
In the Assignments tab, select the same device group as for the device configuration profile, then click
NextandCreate.
WARNING
Avoid configuring the same setting in both the device configuration profile and the app configuration policy.
Grant permissions with OEMConfig
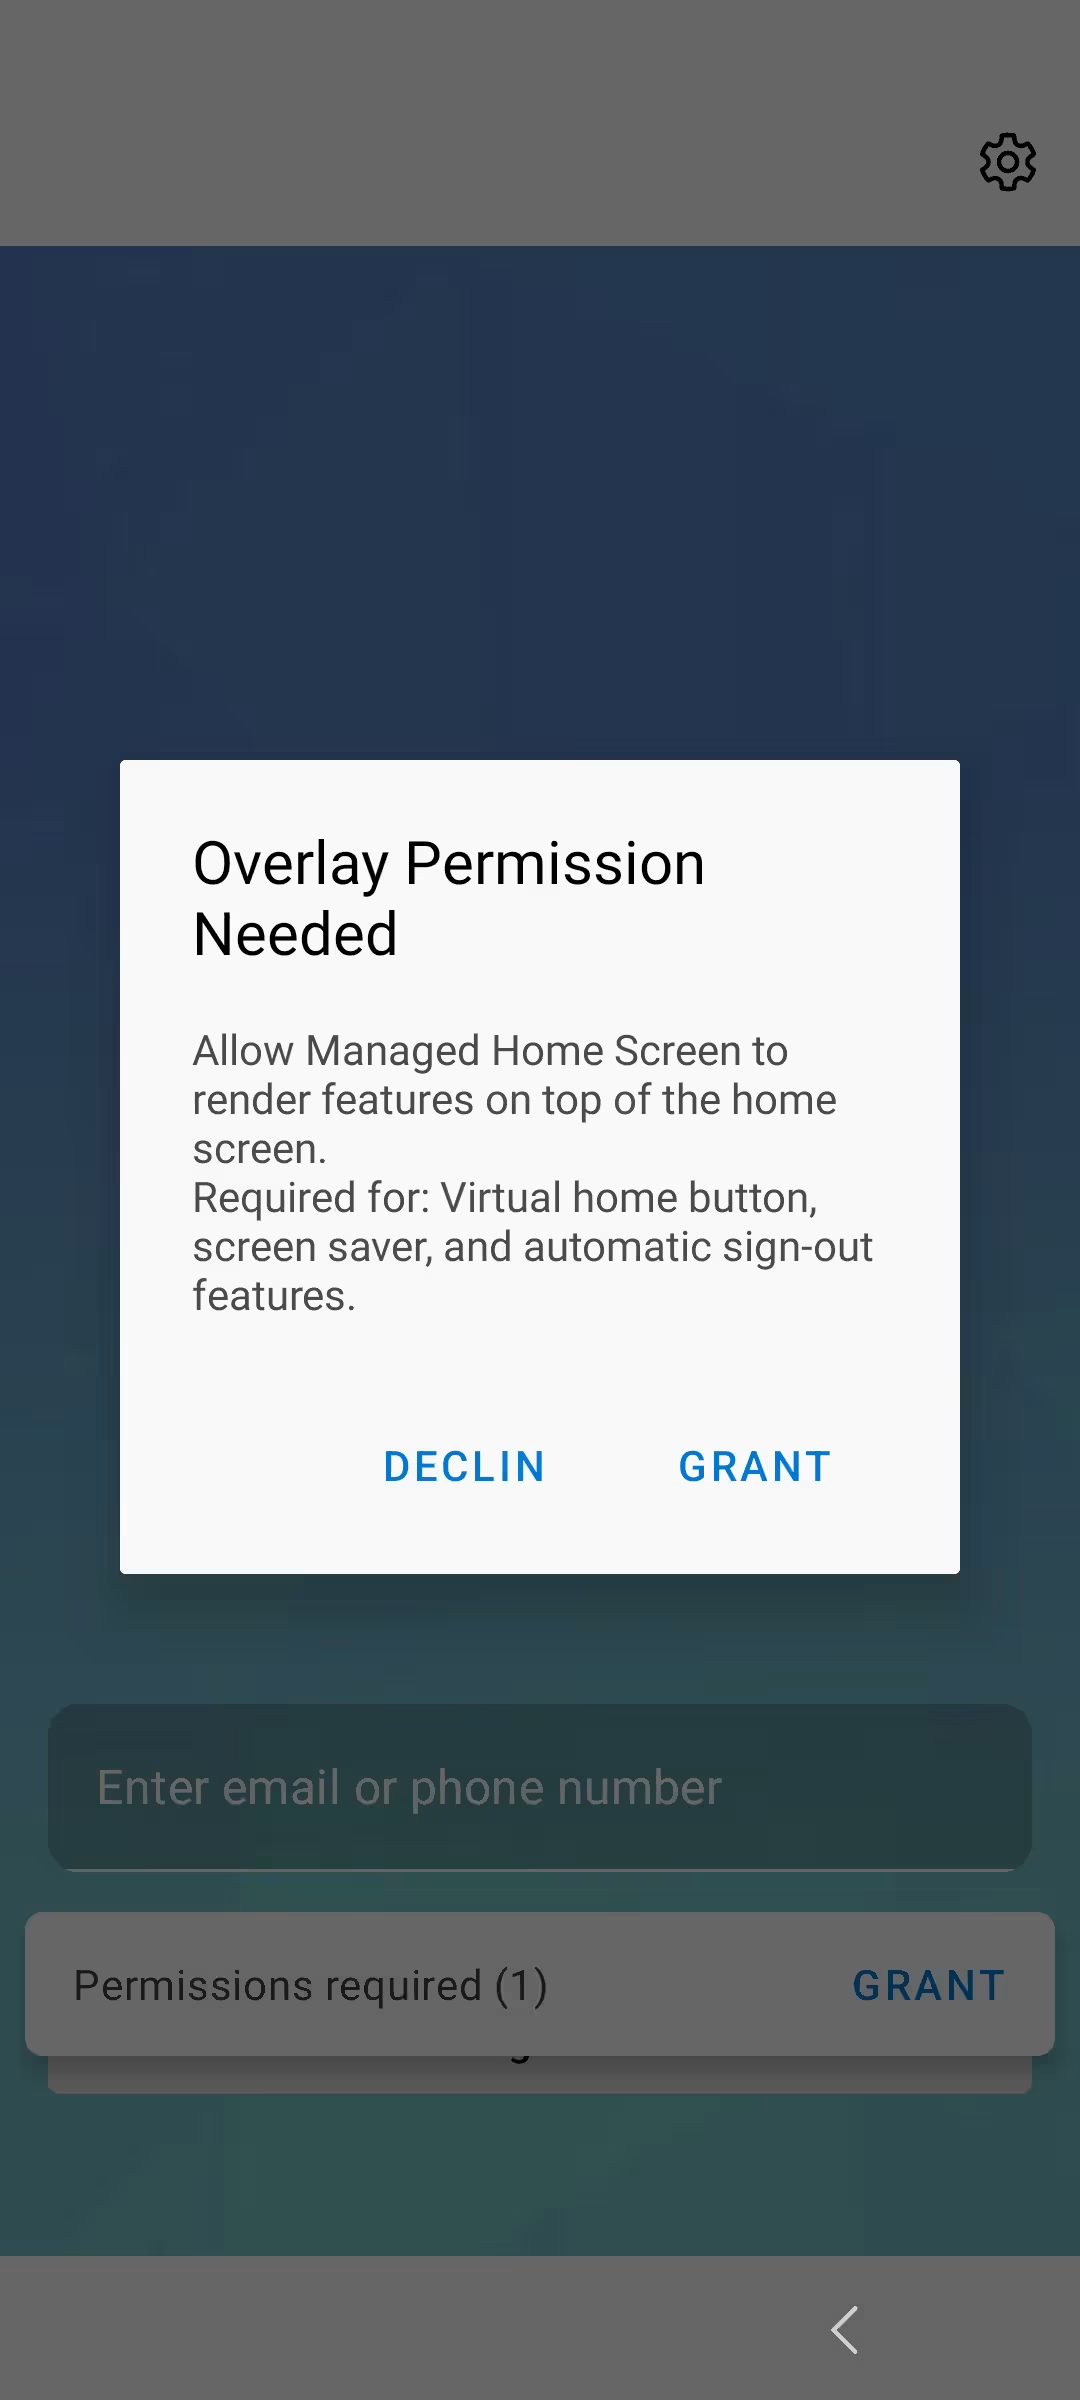
Many MHS features need permissions that users otherwise have to grant manually in the Settings app, which can open a way out of the kiosk. Grant them automatically with an OEMConfig profile: add the OEMConfig app and create the profile as described in the OEMConfig section, then configure the permissions in the Configuration settings tab.
Samsung Managed Home Screen permissions
Requires Android 13+ and Knox Service Plugin 24.03+. MHS must be installed on the device before the permissions can be granted.
Categories open with
Configure. Use the tree on the left to navigate back.Enable the permission controls
- Open Device-wide policies with
Configureand set Enable device policy controls totrue. - In the same section, open Application management policies with
Configureand set Enable application management controls and Enable permission controls totrue.
Without these three switches, the permissions are ignored.
Grant the permissions
- Go back to the top level and open Permission Controls with
Configure. In the first Permission Configuration set:- Permission Policy:
Appear on top,Change system settings,Alarms & Reminders - Package Name:
com.microsoft.launcher.enterprise
- Permission Policy:
- Notification access needs the package and component name, so it needs its own configuration. In the tree, click
...next to Permission Controls ->Add setting. In the new Permission Configuration 1 set:- Permission Policy:
Notification access - Package Name:
com.microsoft.launcher.enterprise/com.microsoft.launcher.homescreen.next.model.notification.AppNotificationService
- Permission Policy:

INFO
Right after enrollment or a profile change, the profile can show Failed or MHS can still ask for the permissions until the next sync.
INFO
The MHS permission settings for other OEMs (Zebra, Honeywell) are listed in Microsoft's OEMConfig permissions for Managed Home Screen documentation.
- Open Device-wide policies with
Debug screen
You can open the Managed Home Screen debug screen by pressing the back button repeatedly (15+ times). From there, you can launch the Android Device Policy app, view or upload logs or temporarily pause kiosk mode to update the device.
For easier access, enable Quick access to debug menu in settings catalog or set Enable easy access debug menu to True in app configuration policies.
Limitations
Many MHS features (virtual home button, screen saver, auto sign out, brightness/autorotate toggles etc.) need permissions. Without OEMConfig (step 9), users have to grant them manually in the Settings app on first launch. This can open a breakout path out of the kiosk.
You find the complete list of limitations on Microsoft Learn.
User experience
The device is enrolled as a dedicated device with Microsoft Entra shared mode (see Entra shared device mode).
- To begin enrollment, power on the device after a fresh start (new or factory reset).
- When the Welcome Screen appears, tap the screen 10 times to open the QR code scanner.
- Scan the token (QR code) from your enrollment profile and select your language.
Next, select a Wi-Fi network and follow the enrollment experience to apply the profile and update the device.
On Your work checklist, tap
Installto install the required apps, including the Managed Home Screen, then tapDone.
Next, tap
Set upunder Register shared device. The Microsoft Authenticator registers the device in shared device mode without a user sign-in, then tapDone.

The only "decisions" you need to make during enrollment are whether to allow or disallow Google services (if not already configured via Intune) and to accept the EULA.
When the enrollment is done, the device starts in the Managed Home Screen. Users sign in with their work account, set a session PIN (if enabled) and then only see the apps you added to the MHS. With the sign-out button on the top right, you and all your apps get logged out and the device is ready for the next user.


🤝 Entra shared device mode
Shared device mode (SDM) is a Microsoft Entra ID feature that lets multiple employees securely share one Android device, for example frontline workers handing over a device at the end of their shift. With SDM, employees sign in once and get single sign-on (SSO) to all supported apps, without access to other employees' data. When they sign out, they're automatically signed out of the device and all supported apps, so the device is ready for the next user.
In Intune, SDM isn't a separate enrollment type. It's an optional token type of the dedicated device enrollment profile. The device is still a userless dedicated device, with SDM layered on top.
| Dedicated device (default) | Dedicated device with Entra shared mode | |
|---|---|---|
| User sign-in | ❌ Never | ✅ Users sign in to apps |
| Primary user in Intune | ❌ | ❌ |
| Microsoft Authenticator | Optional | ✅ Installed automatically, in shared mode |
| Single sign-in / single sign-out | ❌ | ✅ Across all SDM-supported apps |
| Apps with user data (Teams, Outlook,...) | ❌ Not intended | ✅ |
| Entra Conditional Access per user | ❌ | ✅ |
| App protection policies (MAM) | ❌ | ✅ |
| Typical scenario | Kiosk, digital signage, self-service terminal | Shift workers sharing a pool of devices |
Requirements
- Android 8.0 or later with GMS and Android Enterprise support
- Factory reset device (or all SDM apps uninstalled and reinstalled before switching to shared mode)
- Apps that support SDM. Apps must use the Microsoft Authentication Library (MSAL) as single-account apps to take part in global sign-in and sign-out
Microsoft apps that support shared device mode
- Microsoft Teams
- Outlook
- Microsoft 365 Copilot
- Microsoft Edge
- Viva Engage
- Power Apps
- Power BI Mobile
- Managed Home Screen.
Microsoft apps don't need any extra configuration to deploy.
WARNING
If a user signs into an app that doesn't support shared device mode, they don't get single sign-in and single sign-out for that app. On Android 9 and later, the Managed Home Screen can clear the local data of these apps when the user signs out (see the MHS shared device mode settings).
Checklist
| Step | What | Where |
|---|---|---|
| 1 | Enrollment profile with the SDM token type | Admin experience |
| 2 | Device group for apps and policies | Enrollment time grouping |
| 3 | SDM-supported apps as Required | App deployment |
| 4 | Multi-app kiosk mode with Managed Home Screen sign-in | Managed Home Screen |
| 5 | Compliance policy and Conditional Access (optional) | Intune / Entra admin center |
| 6 | App protection policies (optional) | App protection |
| 7 | Enroll the devices | User experience |
Admin experience
You find all enrollment options in the Intune admin center -> Devices -> Android -> Enrollment
Enrollment profile
- Open the
Corporate-owned dedicated devicestile and then click+ Create policy. - In the Basics tab, enter a Name and Description and set Token type to
Corporate-owned dedicated device with Microsoft Entra shared mode. Then choose a Token expiration date (max 65 years) and, if you want, a Name template (same variables as for dedicated devices). When you are done, clickNext.

- In the Device group tab, select your prepared device group for Enrollment time grouping (click here for more Information), then click
Next. - At last create the profile on the Review + create tab.
- Open the newly created profile, select the Token tab and click
Show token. With this QR code you can pre-provision your devices.

INFO
Microsoft Intune, Microsoft Authenticator and Company Portal are installed automatically during enrollment with this token and can't be uninstalled. You don't need to deploy the apps yourself.
Apps, kiosk mode and Managed Home Screen
- Assign your SDM-supported apps (for example Teams, Edge, Outlook and the Managed Home Screen) as Required to the device group.
- Set up the Managed Home Screen in multi-app kiosk mode as described in the Managed Home Screen section. For shared device mode, also set MHS Sign-in screen to
Enablein the Device experience section of the device configuration profile.
- Configure the Managed Home Screen sign-in experience. These are the settings that matter most for shared device mode:
| Setting | Recommended value | Why |
|---|---|---|
| Enable sign in | True | Shows the MHS sign-in page. Signing in there signs the user in to all SDM apps |
| Sign in type | Microsoft Entra ID | With Other, users still sign in to MHS but get no single sign-on |
| Domain name | Your domain, e.g. contoso.com | Users only type their username |
| Enable session PIN | True | Users unlock their running session with a short PIN instead of their password |
| Complexity of session PIN | Numeric complex or stronger | No simple PINs like 1111 or 1234 |
| Require PIN code after returning from screensaver | True | Protects a session the user left unattended |
| Enable auto sign out | True | Forgotten sessions end automatically, so the next user doesn't see their data |
| Auto sign out time | Whatever fits best with the patience of your users | Too short annoys users, too long leaves sessions open |
| Silence apps while MHS requires authentication | True | No notifications from the previous user's apps on the sign-in or PIN screen |
Some settings (Domain name, Sign in hint text, Privacy statement, Silence apps) only exist in an App configuration policy for the Managed Home Screen. You find the complete list and where each setting can be configured in the Managed Home Screen section.
INFO
- On Android 14 and later, MHS needs the exact alarm permission for auto sign out. Users are prompted for it on first launch, or you grant it automatically with OEMConfig.
- After enrollment, the devices show up in Intune as
Android (dedicated)without a primary user, just like normal dedicated devices.
User experience
- Power on the device after a fresh start (new or factory reset), tap the Welcome Screen 10 times and scan the QR code of your SDM enrollment profile (or use zero-touch / Knox Mobile Enrollment).
- Follow the enrollment like on a normal dedicated device. The difference is that Authenticator and Company Portal are installed in addition and the device registers itself in Microsoft Entra ID. No user signs in during enrollment.
- When the enrollment is done, the employee opens the first SDM-supported app, like Teams, Outlook or Edge and signs in once with their Entra ID account (plus MFA, if required).
- Every other SDM-supported app is now signed in with the same account automatically.
- When the shift ends, the employee signs out in any SDM-supported app. They're signed out of all supported apps, their data is removed and the device is ready for the next user.
Managed Home Screen
With the Managed Home Screen, the sign-in and sign-out move to the home screen itself, with an optional session PIN and auto sign-out. You find a detailed walkthrough with screenshots in the Managed Home Screen user experience.
🛒 App deployment
There are several different methods of deploying apps through Intune. All of them can be chosen through the app blade in Intune and you do not need any additional tokens or settings to make use of any of them.
Store apps
Android store apps come in two different flavors.
- Android Store app: Deploys apps via a Google Play store URL for Device Administrator enrollments only, users install the app themselves from the Play Store and Intune doesn't report installation status.
- Managed Google Play app: Lets you find and approve apps from the embedded Managed Google Play store, or upload a private .apk/.aab (up to 100MB, with a unique package name) and supports all Android Enterprise enrollment modes.
- To get started deploying apps, you open the Intune admin center -> Apps -> Android and click
+ Create. - Next, you select
Store appas Category, the App type of your choosing and clickSelect. Android Store app Managed Google Play app Enter the app details, including the Appstore URL and click Next.Search for the app you want in the Google Play Store, open it, click Selectand thenSyncon the top left.


Android Store app Managed Google Play app Add your assignments, click Nextand create the app.After the sync the store and app creation will close automatically and the app will appear a few seconds later in the app overview. There you can open it and create your assignments as usual.


INFO
When creating a Managed Google Play app, you also have the possibility to upload your own Private apps, Web apps or create App collections.

Private app
LOB apps are published to Managed Google Play by uploading an APK file of up to 100 MB with a unique name. These apps are private and available only to your Intune tenant.

Web app
Web links with custom icons that can be deployed to Android Enterprise devices. These links appear in the device app list just like regular apps.

App Collection
Collections group Managed Google Play apps and control their order in the end users' Play Store. Apps not assigned to a collection won't appear on the front page, but users can still search for and install them. The same app can be added to multiple collections and each collection can contain up to 100 apps.

Line-of-business app
LoB apps also come in two different flavors.
- Intune: Uploads an .apk package (up to 2GB) directly to Intune, allows multiple apps with the same package name and works with AOSP, Device Administrator, Android Enterprise dedicated and fully managed enrollments, but not with personally-owned or corporate-owned work profile devices. With this app type it is finally possible to deploy multiple versions of the same app in your environment without the conflict potential as before.
- Managed Google Play app: Starts the same app deployment flow to add a private app, already described in the info box directly above.
- To get started deploying apps, you open the Intune admin center -> Apps -> Android and click
+ Create. - Next, you select
Line-of-Business Appas Category,Intuneas App type (for Managed Google Play app see here) and clickSelect. - Select your .apk file, enter the app details and click
Next. - Add your assignments, click
Nextand create the app.


Built-in app
Built-in apps make it easy to deploy Microsoft curated managed apps to iOS/iPadOS and Android devices.
IMPORTANT
This app type does not support Android Enterprise
- To get started deploying apps, you open the Intune admin center -> Apps -> Android and click
+ Create. - Next, you select
Built-in appas Category and clickSelect.

- Click
+ Select appto search and select the app you want to deploy, clickNextand create the app.


- In the overview, these apps will be shown as Built-in Android app. To assign it, open it after creation and add an assignment as usual.

Other app categories
There are two additional Android app categories:
- Referenced app (Android Enterprise system app): Enables or disables OEM apps that are already part of Android (e.g.
com.google.android.aicore= on-device AI service). Supported on all Android Enterprise enrollment modes and since service release 2610 (October 2026), also on AOSP devices. On AOSP you identify an OEM, preloaded or externally deployed app by its package name instead of uploading an APK.Requiredunhides the app andUninstallhides it. You can also target these apps with JSON-based app configuration policies, but the Configuration designer and Connected Apps aren't supported.

- Web link (Web apps): Adds a shortcut to a web page on the device's home screen using the web app's URL and is supported for Device Administrator enrollments only. Once the app is deployed, the App URL can't be changed.

🔒 App configuration (MAM)
App configuration and protection in Microsoft Intune (also called Mobile Application Management (MAM)) helps secure corporate data inside mobile apps without the need to manage the entire device. App configuration policies can be used to configure mobile apps on both managed and unmanaged devices.
With Intune, you can:
- Protect work data in approved apps on managed and personal devices
- Enforce app protection policies such as PINs, app restrictions and data-sharing controls
- Configure app settings for supported apps through app configuration policies, including on managed devices
- Remove only company data when needed (selective wipe)
MAM is especially useful when you want to manage app access and security while keeping personal device privacy intact.
App configuration
With app configuration policies, you can configure app settings on company-managed Android devices for both Play Store and LoB apps. Which settings can be configured is set by the individual app developer. The policy is applied when the app checks for its settings, usually on first launch.
Configuration policies can be set up as Managed devices or Managed apps. This choice is the delivery channel for the policy and decides how the settings reach the app. If you manage devices with MDM, choose Managed devices. If you only manage the apps on users' devices without enrolling them, choose Managed apps.
| Managed devices | Managed apps | |
|---|---|---|
| Applies to | Enrolled Android devices | Managed apps on devices |
| Enrollment | Required | Not required |
| How settings reach the app | OS app configuration | Intune App SDK or App Wrapping Tool |
| Typical scenario | Company-owned or enrolled devices | BYOD devices with managed apps only |
| Targeting | One app on Android Enterprise devices | Selected apps, all apps, or Microsoft apps |
Create an app configuration policy
- To get started, open the Intune admin center -> Apps -> Configuration, click
+ Createand chooseManaged devicesorManaged apps, depending on the delivery channel you need. - On the Basics page, enter a Name and Description. The Device enrollment type is set automatically based on your choice in step 1.
Also select the Platform, Profile and App you want to configure settings for, then clickNext.Managed devices Managed apps Platform: - Android Enterprise
Profile Type:- All Profile Types
- Fully Managed, Dedicated,
and Corporate-Owned Work Profile Only - Personally-Owned Work Profile Only
- Your synced Managed Google Play apps
- Your created LoB apps
Target policy to: - Selected apps
- public apps
- custom apps
- All Apps
- All Microsoft Apps
- Core Microsoft Apps


IMPORTANT
- Policies for LoB apps are always set for this specific version of the app. If you update the LoB app, the existing policy won't apply automatically. You'll need to create a new policy.
- Settings for LoB apps are only supported on fully managed (COBO) and dedicated (COSU) devices. Personally owned work profile or Corporate-owned work profile (COPE) is not supported.
- On the Settings catalog / Settings pages, you can configure a multitude of settings depending on the apps and profile type you selected. When you are done, click
Nextagain.Managed devices Managed apps On the Settings page, you can configure Permissions, Configuration settings, Connected apps and Credential provider. - Permissions: Here you can give the apps permissions on your Android devices, so the user does not get asked about it (e.g. push notifications or location access).
- Configuration settings format: If the app has settings exposed you can set them here with the Use configuration designer option or configure in Intune undocumented settings via the Enter JSON data option (see cell below).
- Connected apps: With this option you can allow data exchange for the app between Work Profile and Private Profile.
- Credential provider: If the app supports it, you can set the app as credential provider for other apps (Enable single sign-on).
On the Settings catalog page, you will find only settings when Microsoft apps were selected. Because these already stand ready in the same settings catalog format you already know from Configuration profiles in Intune. 

When you want to use JSON settings, you need a Name and a Value for each setting. You can use tokens like {{mail}}to fill in values dynamically.On the Settings page, you can now configure all settings exposed by the developer. These can be found on the Microsoft Learn pages or by contacting your 3rd Party vendor. For each setting the app supports, enter a Name and a Value. Use tokens such as
{{mail}}to fill in values dynamically.

What can be configured?
Options by delivery channel
Managed devices Managed apps - Settings the app exposes through Android's managed configuration, set with the configuration designer or the JSON editor
- Permission grant state
- Allowed organization accounts
- Connected apps
- Credential provider
- Key/value pairs for apps that integrate the Intune App SDK
- Tokens that Intune fills in dynamically
- The
LocalDocsMLExemptkey, which stops managed apps from opening documents from local storage and personal cloud storage
Dynamic values
Both channels can fill in user or device data automatically.
Managed devices (variables) Managed apps (tokens) Select variable as the value type for string values: - User: Mail, User Principal Name, Partial UPN, User name, User ID, Employee ID
- Device: Device name, Serial number, Last four digits of serial number, IMEI, MEID
- IDs: Intune Device ID, Microsoft Entra Device ID, Account ID, Account name
Enter the name the app expects in the Name field and the token in the Value field: {{userprincipalname}}{{mail}}{{partialupn}}{{accountid}}{{userid}}{{username}}{{PrimarySMTPAddress}}
Tokens
The characters
{{and}}are reserved for tokens and must not be used for anything else. Other custom key/value pairs aren't supported as tokens.Managed devices: Additional options
- JSON editor: Use it for settings the designer can't handle (e.g., Bundle types).
- Permission grant state: Preconfigure permissions (camera, microphone, location) to skip user prompts.
- Android 12+: Auto grant isn't supported on corporate-owned work profile or dedicated devices for SMS (read), location, camera, record audio and body sensors.
- Android 16+: Auto grant isn't supported for the HEALTH permission group.
- Allowed organization accounts: Restrict Microsoft apps (Outlook, Teams, Edge, OneDrive, OneNote, Copilot, Office apps) to organization accounts with the key
com.microsoft.intune.mam.AllowedAccountUPNs, using;-separated UPNs.represents the enrolled user. Each app has a minimum version requirement. - Connected apps: Lets work and personal app instances share data on work profile devices (Android 11+). Requires Google's connected apps SDK, so support is limited.
- ⚠️ Work data in personal apps isn't covered by app protection policy and some OEM apps (e.g., keyboards) may connect automatically.
- ⚠️ If policies conflict (only one enables it), Intune reports a conflict and the device disallows connected apps.
- Setting it to Not configured doesn't remove it, unassign the policy instead.
- Credential provider: Android blocks third-party credential providers by default. Use this to allow apps like password managers (Microsoft Authenticator is allowed automatically).
- ⚠️ Google Password Manager is blocked on corporate-owned and personally owned work profile devices.
INFO
Not every app supports app configuration, because the developer decides which settings are exposed. Where you look depends on the channel you use.
Managed devices
Ask the app developer whether the app supports managed app configuration.
Email apps are a special case. On fully managed, dedicated and corporate-owned work profile devices, you can configure Gmail and Nine Work with an app configuration policy as described above. On personally owned work profile devices, use an email device configuration profile instead.
Managed apps
The app must integrate the Intune App SDK or be wrapped with the Intune App Wrapping Tool. The vendor documentation tells you which configuration settings are available and how they affect the app.
- Microsoft Intune protected apps: apps that integrate the Intune App SDK
- Edge: available configuration settings
- Office: available configuration settings
- Teams: available configuration settings
Example: Defender - managed device config
Configuration key Value type Configuration value WebProtection String true DefenderNetworkProtectionEnable String true DefenderOpenNetworkDetection Integer 2 DefenderEndUserTrustFlowEnable String false DefenderNetworkProtectionAutoRemediation String true DefenderNetworkProtectionPrivacy String true DefenderTVMPrivacyMode String false DisableSignOut String true DefenderFeedbackData String false Example: Outlook Mobile - managed device config
Configuration settings
Email account configuration
Name Value Configure email account settings Yes Authentication type ModernAuth Username attribute from Microsoft Entra ID User Principal Name Email address attribute from Microsoft Entra ID Primary SMTP Address Allow only work or school accounts Enabled General app configuration
Name Value Focused Inbox Not configured Require Biometrics to access app Off Allow user to change setting Yes Save Contacts On Allow user to change setting Yes Discover Feed Not configured Suggested replies Not configured Allow user to change setting Yes External recipients MailTip Not configured Default app signature Not configured Block external images On Allow user to change setting Yes Organize mail by thread Not configured Play My Emails Not configured Themes enabled Not configured Text Predictions Not configured Allow user to change setting Yes Configuration key Value type Configuration value IntuneMAMUPN String Example: Authenticator - managed device config
Configuration key Value type Configuration value IntuneMAMAllowedAccountsOnly String Enabled Example: Edge Mobile - managed device config
Configuration key Value type Configuration value com.microsoft.intune.mam.managedbrowser.PasswordSSO String true com.microsoft.intune.mam.managedbrowser.disableShareUsageData String true com.microsoft.intune.mam.managedbrowser.cookieControlsMode Integer 3 com.microsoft.intune.mam.managedbrowser.SmartScreenEnabled String true com.microsoft.intune.mam.managedbrowser.EnableInteractiveModeForWebSSO String true - On the Assignments page you can assign your app group, click
Nextand create the configuration.

Example from the OneDrive Managed Device policy above
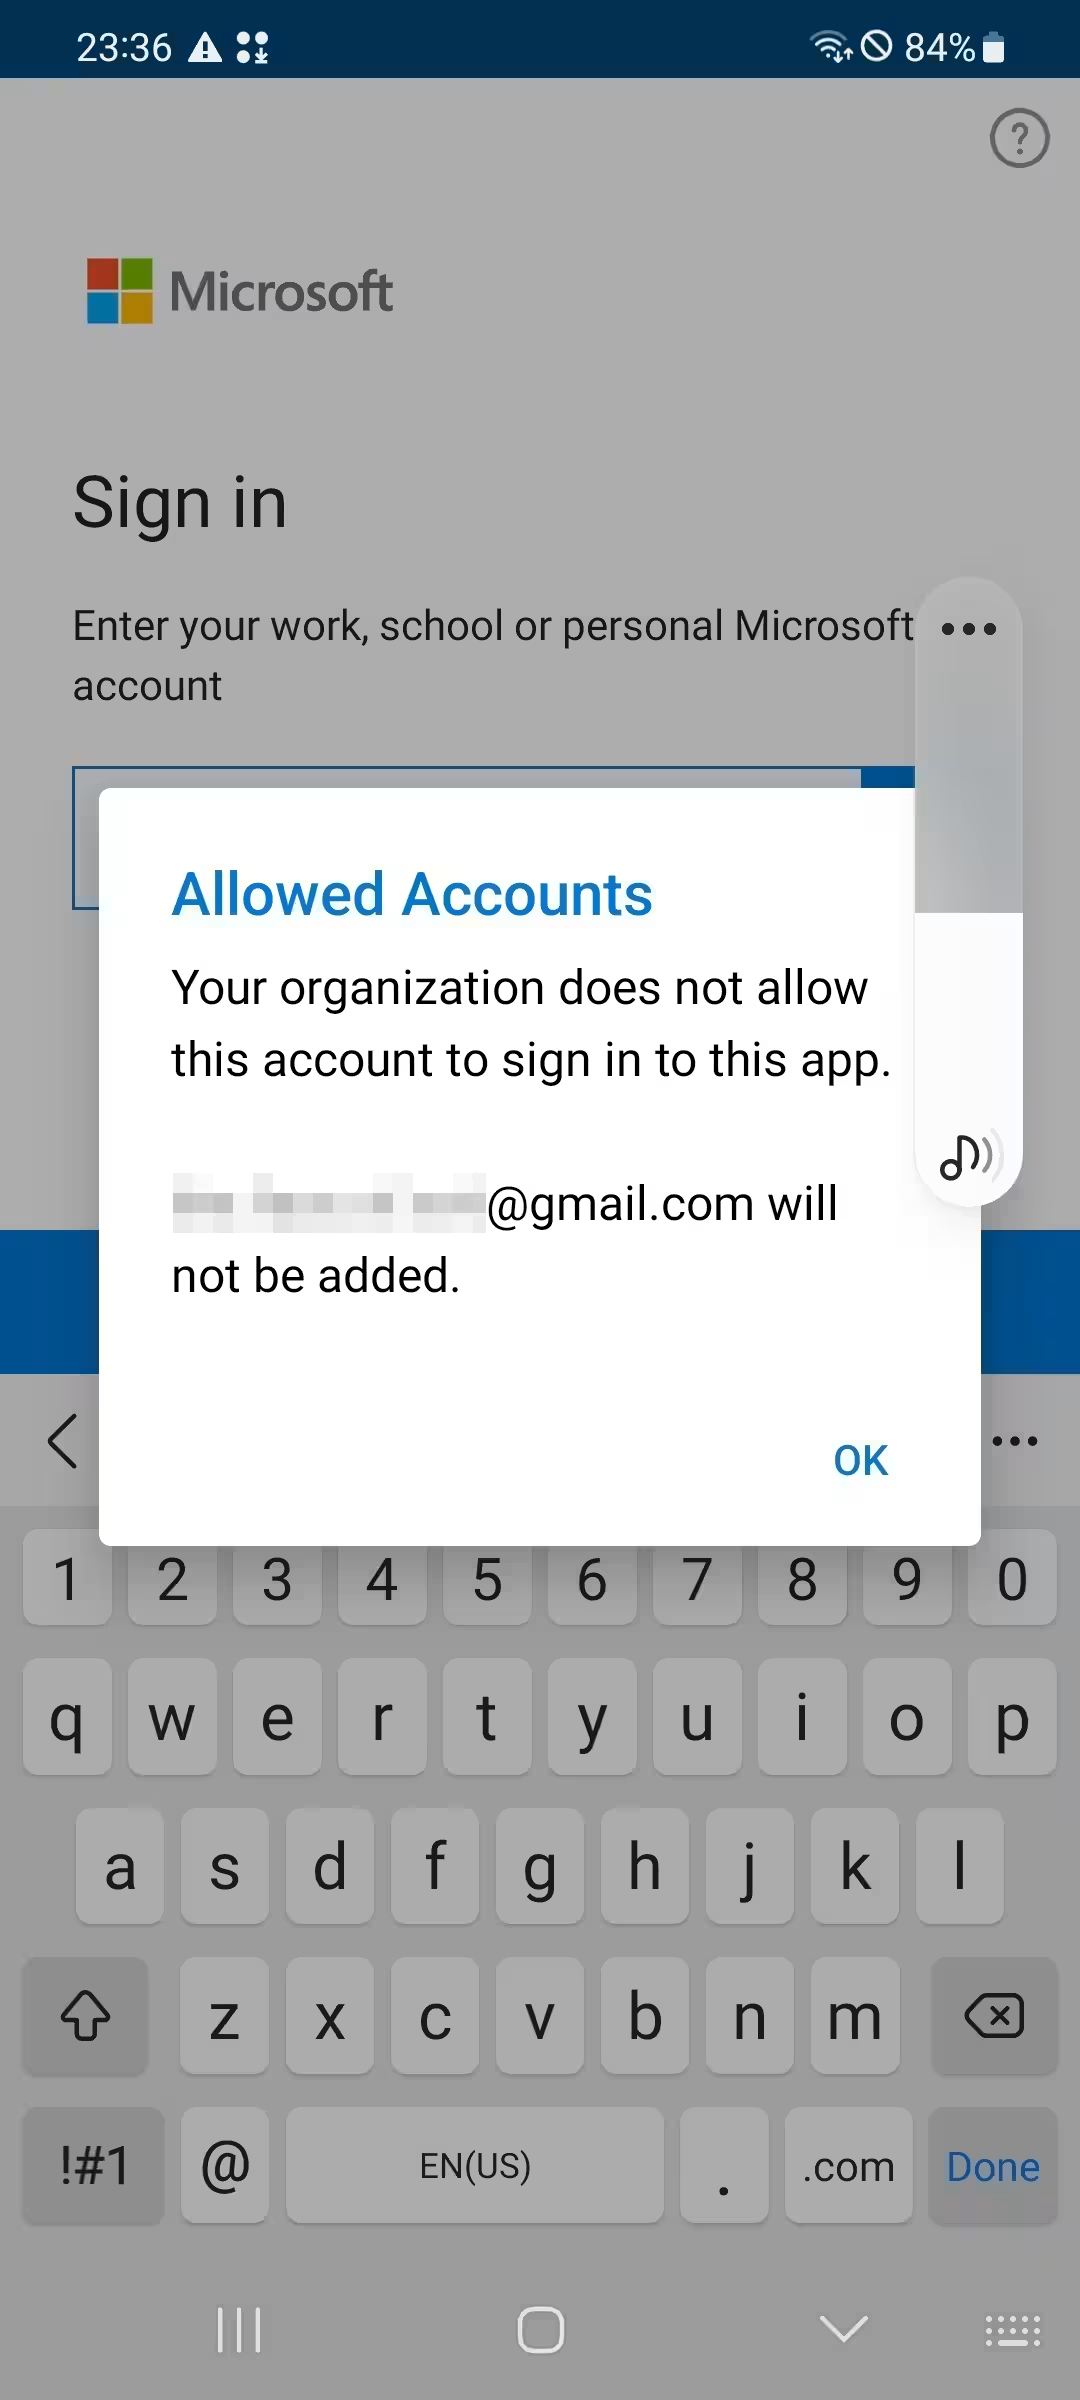
App protection
With app protection policies, you can keep your company data safe inside a managed app. They control how data is accessed and shared, for example by requiring a PIN, blocking copy and paste into personal apps or limiting access to approved apps. This lets you protect company data on both company-owned and personal (BYOD) devices.
| Enrolled devices (MDM + app protection) | Unenrolled devices (app protection only) | |
|---|---|---|
| Typical scenario | Enrolled company-owned devices | Not enrolled employee-owned devices |
| What the device management adds | Enrolls the device, deploys apps and provides ongoing compliance and management | - |
| What the app protection policy adds | Protects company data from leaking outside the designated app, by applying restrictions | Protects company data from leaking outside the designated app, by applying restrictions |
| Limitations | None specific to app protection | No certificate profiles and no company Wi-Fi or VPN settings provisioned |
Any app that integrates the Intune App SDK or is wrapped with the Intune App Wrapping Tool can be managed with app protection policies. A user must have a Microsoft Entra account and an Intune license, belong to a security group targeted by the policy and sign in to the app with their Entra account.
INFO
- Company Portal: Must be installed on the device to receive app protection policies, even if the device isn't enrolled.
- Microsoft 365: Devices must be registered with Entra ID to receive app protection policies.
- Dedicated devices: App protection policies aren't supported on Android Enterprise dedicated devices unless Entra shared device mode is used.
Create an app protection policy
Select this option to associate settings with an app and help protect the company data it uses.
- Open the Intune admin center -> Apps -> Protection, click
+ CreateandAndroid. - On the Basics tab, enter the Name and Description for your policy and click
Next.

- On the Apps tab, you can select a Public/Custom apps, All Apps, All Microsoft Apps and Core Microsoft Apps (Intune Protected Apps list).
- 365Pay
- 4CEE Connect
- Achievers
- Acronis Access
- Adobe Acrobat Reader
- Akumina EXP
- Align for Intune
- ANDPAD
- ANDPAD Blueprint
- ANDPAD CHAT
- ANDPAD Inspection
- Appian for Intune
- Applications Manager - Intune
- ArcGIS Indoors for Intune
- ArchXtract (MDM)
- Asana: Work in one place
- AssetScan For Intune
- Atom Edge
- AventX Mobile Work Orders
- Beakon Mobile App
- Ben for Intune
- Blackberry Enterprise BRIDGE
- Board Papers
- Board.Vision
- Bob HR
- Box - Cloud Content Management
- Box for EMM
- BuddyBoard
- Caju AI
- Calven
- CAPTOR™ for Intune
- CellTrust SL2™ for Microsoft Intune
- Cerby
- ChatGPT for Intune
- CiiMS GO
- Cinebody
- Cisco Jabber for Intune
- Citrix Secure Mail
- Clarity Express for Intune
- Comfy
- Condeco
- Confidential File Viewer
- Continia Expense App
- Datadog
- Datasite for Intune
- DealCloud
- DeepL for Intune
- Dialpad
- Dialpad Meetings
- Diligent Boards
- Dooray! for Intune
- Dynamics 365 Sales
- Dynamics 365 for phone
- ePRINTit SaaS
- EasyPlant QC Inspections
- Egnyte for Intune
- Egress Secure Mail for Intune
- Enterprise Files for Intune
- EVALARM
- eYACHO Viewer 7 Intune
- eYACHO for Biz 7 Intune
- F2 Manager Intune
- F2 Touch Intune
- FacilyLife
- FactSet 3.0
- Fellow.app
- Field Service (Dynamics 365)
- FileOrbis for Intune
- FleetSafer
- Freshservice for Intune
- Fuze Mobile for Intune
- Global Relay
- Hearsay Relate for Intune
- Heijmans
- Hey DAN for Intune
- HowNow
- HP Advance for Intune
- iAnnotate for Intune/O365
- iBabs for Intune
- Idenprotect Go
- Intapp
- IntraActive
- ISEC7 MAIL for Intune
- Island Browser for Intune
- ixArma 6
- Jump AI
- Kofax Power PDF Mobile
- Leap Work for Intune
- Lemur Pro for Intune
- LiquidText
- LumApps for Intune
- M-Files for Intune
- MangoApps - Work from Anywhere
- Meetings by Decisions
- MentorcliQ
- Microsoft 365 Admin
- Microsoft Azure
- Microsoft Azure Information Protection Viewer
- Microsoft Copilot
- Microsoft Designer
- Microsoft Dragon Copilot
- Microsoft Dynamics CRM
- Microsoft Dynamics 365 for phone
- Microsoft Edge
- Microsoft Excel
- Microsoft Launcher
- Microsoft Loop
- Microsoft OneDrive
- Microsoft OneNote
- Microsoft Outlook
- Microsoft Planner
- Microsoft PowerPoint
- Microsoft PowerApps
- Microsoft Power Automate
- Microsoft Power BI
- Microsoft SharePoint
- Microsoft Skype for Business
- Microsoft Teams
- Microsoft To-Do
- Microsoft Viva Engage
- Microsoft Whiteboard
- Microsoft Windows App
- Microsoft Word
- MoveInSync
- MultiLine for Intune
- MURAL - Visual Collaboration
- myBLDNG
- My Portal By MangoApps
- MyITOps for Intune
- MyQ Roger: OCR scanner PDF
- Naso Mobile
- Nexis Newsdesk™ Mobile
- Nine Work for Intune
- Notate for Intune
- Notion
- Notta for Intune
- Now Mobile - Intune
- OfficeMail Go
- Omega 365
- Omnipresence Go
- Outreach Mobile
- PagerDuty for Intune
- PenPoint
- PK Protect for Intune
- Power Apps
- Power Automate
- PrinterOn for Microsoft
- PrinterOn Print
- Qlik Analytics
- Qlik Sense Mobile
- Re:Work Enterprise
- Recruitment.Exchange
- RICOH Spaces
- RingCentral for Intune
- Riskonnect Resilience
- Seismic | Intune
- Senses
- ServiceNow Agent - Intune
- Singletrack for Intune
- Slack for Intune
- SMART TeamWorks
- Speaking Email
- Space Connect
- Superhuman Mail
- Symphony Messaging Intune
- Tableau Mobile for Intune
- Talent.Exchange
- Tier1 for Intune
- Total Triage
- Unique Moments
- Varicent
- Vbrick Mobile
- Voltage SecureMail
- VPSX Print for Intune
- Webex for Intune
- Workvivo
- Workspace ONE Send
- Zero for Intune
- Zoho Projects - Intune
- Zoom for Intune
- Dynamics 365 Sales
- Dynamics 365 for phone
- Field Service (Dynamics 365)
- Microsoft 365 Admin
- Microsoft Azure
- Microsoft Azure Information Protection Viewer
- Microsoft Copilot
- Microsoft Designer
- Microsoft Dragon Copilot
- Microsoft Dynamics CRM
- Microsoft Edge
- Microsoft Excel
- Microsoft Launcher
- Microsoft Loop
- Microsoft OneDrive
- Microsoft OneNote
- Microsoft Outlook
- Microsoft Planner
- Microsoft PowerPoint
- Microsoft PowerApps
- Microsoft Power Automate
- Microsoft Power BI
- Microsoft SharePoint
- Microsoft Skype for Business
- Microsoft Teams
- Microsoft To-Do
- Microsoft Viva Engage
- Microsoft Whiteboard
- Microsoft Windows App
- Microsoft Word
- Microsoft Azure
- Microsoft Designer
- Microsoft Edge
- Microsoft Excel
- Microsoft Launcher
- Microsoft Loop
- Microsoft Copilot
- Microsoft OneDrive
- Microsoft OneNote
- Microsoft Outlook
- Microsoft Planner
- Microsoft PowerPoint
- Microsoft Windows App
- Microsoft SharePoint
- Microsoft Teams
- Microsoft To-Do
- Microsoft Word
- Microsoft Viva Engage
All Apps (October 2026)
All Microsoft Apps (October 2026)
Core Microsoft Apps (October 2026)

- On the Data protection tab, you can set up data loss prevention (DLP) controls. Here you can find all the available settings.

- On the Access requirements tab, you can configure the credentials required to access work apps. Here you can find all the available settings.

- On the Conditional launch tab, you can set sign-in security requirements for your app protection policy. Here you can find all the available settings.

- After that, you can assign your app group on the next page and create the policy on the last page.

🧑💻 Management & Reporting
In the Intune admin portal you have several possibilities to manage, control or see reporting for your devices, depending on the enrollment profile.
Management
You find the device actions when selecting a device on the Devices -> Android page. At the top of the device overview, you will find the action bar.

Device actions
| Menu | Action | What it does |
|---|---|---|
| - | 🔄 Sync | Forces the device to check in with Intune and pick up new policies and apps. |
| 🔒 Secure | Remote lock | Locks the device if a passcode is set. |
| 🔒 Secure | Reset passcode | Sets a new temporary passcode, shown in the admin center. |
| 📍 Locate | Locate device | Shows the device's location on a map. |
| 📍 Locate | Play lost device sound | Plays a sound on the device, even if it's on silent. |
| 🛠️ Remote actions | Restart | Restarts the device. |
| 🛠️ Remote actions | Begin a remote assistance session | Starts a Remote Help or TeamViewer session to view or control the device (if set up). |
| 🛠️ Remote actions | Suspend Managed Home Screen | Temporarily turns off the Managed Home Screen. |
| 🛠️ Remote actions | Restore Managed Home Screen | Turns the Managed Home Screen back on. |
| - | 🔔 Send custom notifications | Sends a push message to the user through the Company Portal / Intune app. |
| 🧹 Remove data | Retire | Removes the work profile & company data and unenrolls the device. Does not touch data in a personal profile. |
| 🧹 Remove data | Wipe | Factory resets the device. You can choose to keep or remove the eSIM data plan. |
| 🧹 Remove data | Remove apps and configurations | Temporarily removes selected apps and profiles for troubleshooting. They can be restored later. |
| - | 🗑️ Delete | Removes the device from Intune and also sends a Retire (BYOD) or Wipe (corporate-owned) command. |
INFO
Be aware that the Entra ID object does not get removed automatically.
Device actions per enrollment type
| Action | BYOD | COPE | COBO | COSU | AOSP |
|---|---|---|---|---|---|
| 🔄 Sync | ✅ | ✅ | ✅ | ✅ | ✅ |
| 🔒 Remote lock | ❌ | ✅ | ✅ | ✅ | ✅ |
| 🔒 Reset passcode | ✅ | ✅ | ✅ | ✅ | ✅ |
| 📍 Locate device | ❌ | ✅ | ✅ | ✅ | ❌ |
| 📍 Play lost device sound | ❌ | ✅ | ✅ | ✅ | ❌ |
| 🛠️ Restart | ❌ | ❌ | ✅ | ✅ | ✅ |
| 🛠️ Remote assistance | ✅ | ✅ | ✅ | ✅ | ✅ |
| 🛠️ Suspend / Restore MHS | ❌ | ❌ | ✅ | ✅ | ❌ |
| 🔔 Send custom notifications | ✅ | ❌ | ❌ | ❌ | ❌ |
| 🧹 Retire | ✅ | ❌ | ❌ | ❌ | ❌ |
| 🧹 Wipe | ❌ | ✅ | ✅ | ✅ | ✅ |
| 🧹 Remove apps and configurations | ❌ | ✅ | ✅ | ✅ | ❌ |
| 🗑️ Delete | ✅ | ✅ | ✅ | ✅ | ✅ |
Bulk device actions
With Devices > Android > Bulk device actions you can run Delete, Rename, Restart, Wipe and Activate eSIM on up to 100 Android devices at once. Retire, Wipe and Delete count toward tenant-wide daily limits (Retire 1,000, Wipe 500, Delete 1,000).
Reporting
On the left side and at the bottom of the Device page, you can find a ton of information about your individual devices.

Left pane
The left pane groups its views under Tools and Reports. Each one focuses on a specific aspect of the device:
| View | Description |
|---|---|
| Device inventory | An extended inventory, such as hardware, OS, battery, network and storage properties. |
| App configuration | All app configuration policies that target the device or user, along with their current status (Succeeded, Error, Pending or Not applicable). |
| Discovered apps | All detected apps and their versions. On personally owned devices you'll only see apps inside a work profile. |
| Device compliance | Every compliance policy assigned to the device and its current state. |
| Device configuration | All device configuration policies that target the device or user, along with their current status (Succeeded, Error, Pending or Not applicable). |
| Filter evaluation | Shows how assignment filters were evaluated for this device, including which filter applied to each policy or app and whether the device was included or excluded. |
| Group membership | The Entra groups the device object belongs to. |
| Managed apps | The apps Intune has deployed to the device, including installation state, version and assignment intent (Required or Available). |
INFO
You can drill down even further into most of this information, including specific policies.
Bottom pane
The device overview has four tabs at the bottom. Above them, the Essentials section summarizes the key facts (compliance, ownership, model, OS, serial number, primary user and more) and stays visible no matter which tab you're on.
| Tab | Description |
|---|---|
| Monitor | Status overview dashboard for configuration profiles, compliance and app installations. |
| Properties | The settings you can edit yourself: device name, ownership (Personal or Corporate), device category, primary user, notes and scope tags. |
| Device details | Device properties, where you'll find information about the IDs and Serial numbers, Enrollment, OS, Network, Storage, Hardware and Conditional Access evaluation. |
| Device action status | Every requested, pending and completed device action for this device. |
INFO
Intune does a full refresh of hardware and software inventory guaranteed every seven days, but some information (e.g. hardware inventory) will update much more frequently.
Reports
For information about more than one device at once, you have the following pre-built reports available:
| Location | Description |
|---|---|
| Devices -> Monitor -> Personal devices on Android Management API | Which BYOD devices are still on the Company Portal implementation and which have moved to the Android Management API. |
| Devices -> Monitor -> Device actions | All device actions in your tenant from the last 180 days. |
| Devices -> Monitor -> Enrollment failures / Incomplete user enrollments | Failed or abandoned enrollments. Android Management API (web) enrollments aren't listed. |
| Devices -> Monitor -> Assignment failures | Configuration profiles that failed to apply, with the affected devices. |
| Devices -> Monitor -> Certificates | Issued SCEP and PKCS certificates, with expiration dates and devices. |
| Reports -> Device compliance | Organizational compliance reports (status, trends, noncompliant settings, devices without policy). |
| Reports -> Device configuration | Profile configurations and device assignment status. |
| Apps -> Monitor -> App install status | Install status of every app, with drill-down to device and user. |
| Apps -> Monitor -> Discovered apps | All discovered apps and the number of devices each one is installed on. |
| Apps -> Monitor -> App protection status | Users and apps covered by your App Protection policies, including unprotected users and flagged (e.g. rooted) devices. |
| Apps -> Monitor -> App configuration status | App configuration policy status per app and device. |
🖥️ Google Admin console
You can access the Google Admin console by opening admin.google.com. When opening the portal for the first time, a welcome wizard will open that will try to help you set everything up.

Home
Home is a dashboard, where you will always land first when opening the admin console. Here you will find an overview of important topics with a whole lot of widgets.
- Users: Add or manage users
- Billing: Manage subscriptions and billing
- Discover: Get the most out of Google
- Product updates: Latest updates in Workspace
- Domains: Manage your domains
- Alerts: View notifications about potential issues
- Chrome Enterprise: Set browser policies, manage extensions, view reports
- ChromeOS device management: Remotely manage devices, secure company data and optimize productivity with advanced security and reporting features
- Apps: Manage web and mobile app access and settings
- Devices: Manage devices and secure your organization's data
- Account settings: Manage your organization's profile and preferences
- Organizational units: Organize users into units for applying policies
- Security: Configure security settings and view alerts and analytics
- Reporting: Monitor your organization's user and admin activity
- Rules: Manage rules to set alerts and actions
- Storage: Manage your organization's shared storage
- Support: Connect with the Help Assistant
On the right side you can also find a link to the Google Workspace Status dashboard, where you will find the current status of all the Google services.

Directory
Manage users, organize them into organizational units and assign administrative roles to streamline management of your Google Workspace services.
Users
When opening Directory, you first come to the Users tab, where you can manage your administrators. You don't need to sync your standard users for Android Enterprise. Intune creates a managed Google Play account on each device during enrollment.
TIP
You should add at least one more Administrator for redundancy to the admin console. You can do that by inviting them via the Invite new user button.
You can invite administrators via e-mail.

When opening a user, you see their information, like apps, licenses, roles, devices and Google storage.

For individual users, you can also restore data from their Google storage and look into logs.
Investigate Logs list
- Check log events for issues related to this user
- Files shared externally
- External content copied
- Files downloaded
- Files printed
- Files deleted
- Reason user reported abuse in a meeting
- Meet abuse report submitted
- Chat message report submitted
- Audit logs related to this user
- Admin log events
- Calendar log events
- Chat log events
- Chrome log events
- Drive log events
- Groups log events
- Meet log events
Organizational units
In the Organizational units tab, you can set up OUs that basically work exactly like in Active Directory. You can create a structure with nesting and apply settings and apps like this.

Directory settings
In the Directory settings tab, you can set up a few settings for your users:
- Sharing settings: Set user sharing behavior
- Profile editing: Choose if users can edit their profiles
- Visibility settings: Choose who’s visible within an organizational unit
- Workspace resource type visibility: Pick which Workspace resource types appear in the Directory

Chrome browser
Set up Chrome Enterprise Core, enroll browsers, configure browser policies and manage their extensions.
Overview
On the Overview page, you can find tasks to help you get started with Chrome Enterprise, as well as subsequent recommendations. You can also find a few key figures relating to your managed browsers, such as Managed Browsers, Managed Profiles, Versions and Extensions.
 |  |
|---|---|
 |  |
These enrollment tokens need to be deployed through Intune if you intend to manage Chrome through the Google Admin console.

More recommendations
- Continue enrolling browsers
- Turn on browser update notifications
- Turn on Enhanced Safe Browsing
- Keep building your structure with org units
Setup guide
Under Setup guide, you will find all necessary tasks for a basic Setup prepared in a simple walkthrough to set up Chrome Enterprise or ChromeOS.
- 🧷 Create test OUs
- 📊 Turn on browser reporting
- 🟢 Enroll a test browser
- ⚙️ Set browser policies
- 🧩 Install Chrome extensions
- 🗹 Verify domain
- 👤 Add an admin user

Or underneath that you find information for a full setup and deployment with links to all available options.
- Set up your organization and verify your domain
- Enroll browsers and set policies
- Configure extensions
- Analyze reports
- Advanced management
- Enable Chrome security insights
Managed browsers
On the Managed browsers page, you will find a list of all the browsers you are currently managing. Here you can also find the information needed to enroll browsers on all available platforms.

To configure the enrollment token through Intune, follow these steps:
- Open the Intune admin center -> Devices -> Configuration and click
+ Create->+ New Policy. - On the flyout, select
Windows 10 and lateras Platform,Settings catalogas Profile type and clickCreate. - Enter a Name and Description on the first Page and click
Next. - On the Configuration settings page, click
+ Add settingsand selectThe enrollment token of cloud policy on desktopfrom the settings picker. - Toggle the setting to
Enabledand enter the enrollment token from the Google Admin console into the new field.

- Click
Nextand on the following pages select the Scope tags you need, assign the policy to your devices and then create the policy.
As soon as the browsers get configured they will then be shown on the Managed browsers page.

When selecting a managed browser in the list, you can drill down to get more information about the individual Browser and the Device it is installed on.

Managed profiles
The Managed profiles page lets you review details about your users' managed Chrome profiles, including profile information, browser version, installed extensions, applied policies and more.
A managed Chrome profile is created automatically when a user signs in to Chrome with their managed Google Account. Managed Google Accounts can sign in to both managed and unmanaged browsers.
Profile information
The following information can be found and drilled deeper into:
| Profile information | Description |
|---|---|
| Profile email | Profile E-Mail |
| Profile name | Profile Name. |
| Profile ID | Profile Unique ID |
| Organizational unit | User's Organizational Unit |
| Browser version | Browser version. |
| OS version | OS version |
| Channel | Current release channel (Stable, Beta, Dev or Canary) |
| Last report time | Time the profile last reported to the Admin console |
| Last policy sync | Time the profile last synced policies |
| Number of extensions | Installed extension and app count |
| Number of profile policies | Applied policies count |
| Identity | Whether the profile is a Google Account |
| Affiliation | How the profile relates to the organization: Affiliated: Profile and browser are managed by the same organization. Unaffiliated cloud machine: Browser is cloud-managed by a different organization. Unaffiliated local machine: Browser is locally managed; the organization can't be confirmed. Profile-only: Managed through Cloud-user policies only, not at the machine level. |
| Machine name | Device name |
Settings
On the Settings page, you can enforce policies for User and browser settings, Device settings and Managed guest session settings.
INFO
If you first open Device settings or Managed guest session settings, you will first need to accept the ChromeOS Online Agreement.
Settings can be applied in two ways.
- To users: policies follow a managed Google Account on any device where the user signs in to Chrome.
- To enrolled browsers: policies apply whenever Chrome opens on a managed Windows, Mac or Linux computer, with no sign-in required.
Optionally, you can also select an organizational unit to target specific users.

User and browser settings
| # | Category | What it covers |
|---|---|---|
| 1 | General | Branding and basics: session length, terms of service, avatar, wallpaper, theme color, organization name and icon, tab sharing |
| 2 | Sign-in settings | Browser sign-in, profile separation, SSO (Azure, Entra), ChromeOS sign-in screens, Android and iOS policy application |
| 3 | Mobile | Applying user policies to Chrome on Android and iOS |
| 4 | Enrollment controls | Who may enroll ChromeOS devices and where they land |
| 5 | Apps and extensions | Allow, block, force-install and pin apps and extensions |
| 6 | Site isolation | Running websites in separate processes |
| 7 | Security | Passwords, lock screen, Incognito, history, certificates, TLS, sandboxing, encryption |
| 8 | Remote access | Remote support and remote desktop for ChromeOS |
| 9 | Session settings | ChromeOS session options, such as the sign-out button |
| 10 | Kerberos | Kerberos single sign-on for ChromeOS |
| 11 | Network | Proxy, DNS, SSL/TLS, WebRTC, VPN, CORS, local network access |
| 12 | Android apps | Android app behavior on ChromeOS: backup, certificates, link handling |
| 13 | Startup | Home button, homepage, new tab page, startup pages, Desk sync |
| 14 | Import settings | Importing bookmarks, passwords, history and more from another browser |
| 15 | Content | Cookies, JavaScript, pop-ups, URL blocking, screen capture, Cast, cloud file handling |
| 16 | Printing | Printer access, defaults, color, duplex, PIN printing, print history |
| 17 | User experience | Bookmarks, spell check, languages, autofill, developer tools, guest mode, New Tab page |
| 18 | Connected devices | Smart Lock, Phone Hub, Nearby Share, Messages, Click to Call |
| 19 | Accessibility | ChromeOS accessibility features: screen reader, magnifier, dictation, high contrast |
| 20 | Power and shutdown | Battery saver, idle and lid actions, wake locks, browser idle timeout |
| 21 | Omnibox search provider | Default search engine, site search shortcuts, enterprise search |
| 22 | Hardware | USB, serial and HID access, microphone, camera, storage devices, sensors |
| 23 | Legacy site compatibility | Temporary switches that restore old browser behavior for older sites |
| 24 | User verification | Verified Access for ChromeOS, with service accounts that can verify users |
| 25 | Browser reporting | Managed browser and profile reporting, event and Gen AI/SaaS usage reporting |
| 26 | Installed App Reporting | App usage telemetry on ChromeOS |
| 27 | Chrome Safe Browsing | Safe Browsing level, download restrictions, password alerts |
| 28 | Chrome Enterprise connectors | Content analysis for uploads, downloads, pastes and prints (DLP) |
| 29 | Generative AI | AI features such as Help me write, Gemini and AI Mode integrations |
| 30 | Chrome updates | Update behavior, release channels, relaunch notifications |
| 31 | Chrome variations | Google's server-side feature rollouts |
| 32 | Legacy Browser Support | Opening certain sites in an alternative browser |
| 33 | Virtual machines (VMs) and developers | Linux VMs, command line access, port forwarding on ChromeOS |
| 34 | Parallels Desktop | Windows apps on Chromebooks via Parallels |
| 35 | Setting sources | Policy precedence and merging |
| 36 | Other settings | Metrics, memory and performance, sync, device tokens, inactivity deletion |
| 37 | Desk API | Third-party control of ChromeOS desks |
| 38 | Data controls | Paste, screenshot and watermark rules (Chrome Enterprise Premium) |
| 39 | Chrome management for signed-in users | Applying user policies when users sign in to Chrome |
Device settings
| # | Category | What it covers |
|---|---|---|
| 1 | Enrollment and Access | Forced re-enrollment, powerwash, verified access, lost-device message |
| 2 | Sign-in Settings | Guest mode, sign-in restrictions, sign-in screen look, SAML single sign-on, sign-in screen URL blocking, restricted hours |
| 3 | Sign-in screen accessibility | Accessibility features on the sign-in screen, such as screen reader, magnifier and high contrast |
| 4 | Device update settings | ChromeOS auto-updates, target version, release channel, rollout, forced updates |
| 5 | Kiosk settings | Managed guest sessions, kiosk alerts, URL blocking, keyboard and logging for kiosk devices |
| 6 | Kiosk power settings | Idle, screen and lid actions and sleep schedule for kiosks |
| 7 | Kiosk accessibility | Accessibility features during kiosk sessions |
| 8 | User and device reporting | Device status, telemetry, logs, inactive-device alerts, usage reports |
| 9 | Display settings | Screen resolution and scale for internal and external displays |
| 10 | Power and shutdown | Sign-in screen power, scheduled reboots, battery charging, screen saver |
| 11 | Virtual machines | Linux VMs for unaffiliated users, Android apps from untrusted sources |
| 12 | Other settings | Hostname, time zone, Bluetooth, USB access, bandwidth throttling, hardware options |
| 13 | Chrome management – partner access | Lets EMM partners manage ChromeOS devices |
| 14 | Imprivata | Imprivata login screen integration, shared kiosk mode, shared apps and extensions |
| 15 | Security | Post-quantum TLS, device security key attestation, TLS key exchange and cipher preferences on the login screen |
Managed guest session settings
| # | Category | What it covers |
|---|---|---|
| 1 | General | Managed guest session, session length, terms of service, avatar, wallpaper, QR code generator |
| 2 | Apps and extensions | Task manager, extended background lifetime for extensions |
| 3 | Security | Incognito, history, geolocation, TLS and certificates, remote debugging, screen capture, token removal |
| 4 | Remote access | Remote access clients and hosts, firewall traversal, remote support, clipboard sync |
| 5 | Session settings | Logout button in tray, logout confirmation dialog |
| 6 | Kerberos | Kerberos tickets, domain autocomplete, default ticket configuration |
| 7 | Network | Proxy, SSL errors, DNS-over-HTTPS, WebRTC, VPN, local network access |
| 8 | Start-Up | Home button, homepage, new tab page, pages to load, browser launch |
| 9 | Content | SafeSearch, screenshots, cookies, JavaScript, pop-ups, URL blocking, Cast, insecure content |
| 10 | Printing | Printing on/off, defaults, color and duplex, PIN printing, history |
| 11 | User experience | Bookmarks, spell check, languages, developer tools, autofill, system features, display options |
| 12 | Accessibility | Spoken feedback, magnifier, high contrast, keyboard and mouse aids, face control |
| 13 | Power and shutdown | Wake locks, screen dimming, idle settings, screensaver |
| 14 | Omnibox search provider | Search suggestions, default search provider, side panel search |
| 15 | Hardware | External storage, USB, HID and serial access, microphone, camera, sensors |
| 16 | Legacy site compatibility | Temporary switches for older web behavior |
| 17 | Chrome Safe Browsing | Protection level, download restrictions, SafeSites filter, intrusive ads |
| 18 | Other settings | Surveys, high efficiency mode, tab discarding, policy fetch delay, Fast Pair |
| 19 | Data controls | Data control event reporting, custom watermark appearance |
| 20 | Chrome Enterprise connectors | Content analysis for uploads, downloads, file transfers, text and prints, real-time URL check |
| 21 | Generative AI | AI policy defaults, wallpaper and video background AI, built-in AI APIs, AI Mode sharing |
| 22 | Browser reporting | Security event reporting |
Custom configurations
On the Custom configurations page, you can enforce settings via JSON that are currently not available on the settings page.

INFO
You can find information about how to write the JSON settings here.
Tokens
On the Tokens page, you can view or revoke currently active enrollment tokens.

Apps and extensions
On the Apps and Extensions page, you can view, add, remove, assign and control ChromeOS apps and Browser extensions. Additionally, you can process app & extension requests and set up Kiosk Settings.
On the Overview tab, you find all the Apps and Extensions you have set up, with the ability to drill down into each.

On the Users and browsers tab, you can add the following Apps & Extensions via the + in the bottom right corner.
- Add from Chrome Web Store
- Add from Google Play
- Add the Chrome app or extension by ID
- Add by URL
- Add an isolated web app
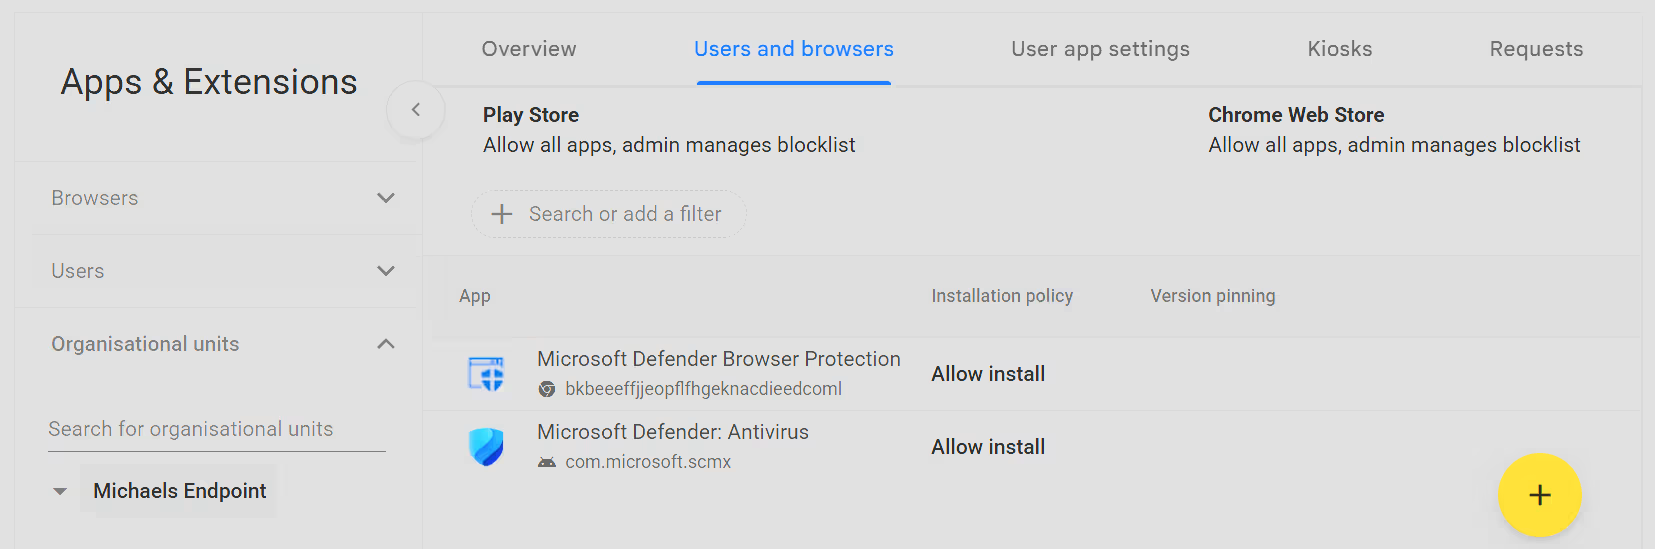
To add a Browser extension you select Add from Chrome Web Store. In the following pop-up you simply search and open what you need and then click Select.

To add an App for Chrome OS you select Add from Google Play. In the following pop-up you simply search and open what you need and then click Select.

Once you have added the extension or app, click on it to set different policies about the installation and behavior.
Installation policy options
Chrome Extension
- Force install + pin to browser toolbar
- Force install
- Force install, allow users to disable
- Force install + pin to browser toolbar, allow users to disable
- Allow install
- Block
- Block, uninstall from Chrome
ChromeOS App
- Force install + pin to ChromeOS taskbar
- Force install
- Allow install
- Block

On the User app settings tab, you configure settings specifically about which apps can be installed and how they should work.
| # | Category | Description |
|---|---|---|
| 1 | Allow/block mode | Controls whether apps and extensions are allowed or blocked for users. |
| 2 | Advanced extension blocking | Provides additional controls for blocking Chrome extensions, including blocking extensions by category. |
| 3 | Chrome Web Store settings | Controls the appearance, content and behavior of the organization’s Chrome Web Store. |
| 4 | Additional app settings | Contains additional policies for managing apps, extensions, installation sources, permissions and related ChromeOS/Chrome behavior. |

INFO
To use the Kiosks tab, you need to buy the ChromeOS Enterprise Upgrade.
Connectors
On the Connectors page, you can connect your security solution to Chrome Enterprise.

Reports
On the Reports page, you find the following pre-built reports.
- Versions
- Apps & extensions usage
- Chrome log events
- Legacy tech
- Chrome crash
- Gen AI and SaaS app
Devices
Manage mobile devices, computers, ChromeOS devices and networks for your organization.
Overview
The Overview page is a tile view of all device types Google can manage, with a count of enrolled devices or browsers on each tile:
- ChromeOS devices: Enrolled Chromebooks and other ChromeOS devices
- Managed browsers: Chrome browsers enrolled via Chrome Enterprise Core
- Mobile devices: Android and iOS devices managed by Google's own endpoint management
- Endpoints: Computers that access Google Workspace
- Google Meet hardware: Meeting room devices
- Chrome setup guide: Shortcut to the Setup guide of Chrome Enterprise

INFO
Because Intune is your EMM, your Android devices will not show up under Mobile devices. They are managed and reported in Intune only.
Chrome
The Chrome menu contains the same pages as Chrome browser, plus the Devices list for enrolled ChromeOS devices.
INFO
To enroll ChromeOS devices, each device needs an eligible ChromeOS upgrade (see Billing). Which one depends on the device and deployment: ChromeOS Enterprise Upgrade, ChromeOS Education Upgrade or Kiosk & Signage Upgrade. Some devices already come bundled with an upgrade.
IMPORTANT
You can also connect ChromeOS Devices to Intune. This will help you to:
- Sync device information between Google and Intune.
- View device information in your Intune inventory.
- Apply remote actions, like deprovision, restart, lost mode and wipe.
To do this, follow these steps:
- Open the Intune admin center -> Tenant administration -> Connectors and tokens -> Chrome Enterprise and click
Connect.

- On the appearing flyout copy the Client ID and OAuth Scopes and click
Google Admin console.

- Sign in, confirm the sharing of information between Google and Microsoft and go to Security -> Access and data control -> API Controls and select MANAGE DOMAIN WIDE DELEGATION.
- Select
Add newto create the API client for your connection. - Paste the previously copied values into Client ID and OAuth scopes (comma-delimited).
- Select
Authorizeto save all changes. - Go back to the Intune flyout and click
Launch Google to connect now. - Sign in with a Google admin account that can manage ChromeOS devices and has access to the Admin SDK Directory API. This account appears in the Google audit logs for every action you start from Intune.
As soon as the status changes from Syncing to Active, your ChromeOS devices show up in Devices -> All devices as Chrome-{serialNumber}.
INFO
- Only one connection per tenant is allowed.
- ChromeOS devices are always Corporate and show compliance as Not evaluated. Compliance policies are not supported.
- Restart only works for kiosk and managed guest session devices.
Mobile and endpoints
Here you find Google's own mobile and endpoint management, which you will not use for your Intune-managed devices. The setting that matters is Settings -> Third-party integrations -> Android EMM. It shows all EMM providers bound to your managed Google domain, which is where you will find your Intune tenant.

Under Manage EMM providers, you can remove bindings you no longer need, like old test tenants and turn on Authenticate Using Google.
Authenticate Using Google
With this turned on, users have to sign in with their Google Workspace account when they enroll a device.

In Intune, the counterpart is the Settings catalog setting Device restrictions -> Users and Accounts -> Require users to authenticate with a Google Workspace account for corporate-owned fully managed and work profile devices.

It requires the upgrade to a managed Google domain, a verified domain and existing Google accounts for your users.
After authentication, the Google Workspace account can't be changed or removed until the device is unenrolled, even if you later set the setting to False. The same way, as if you enrolled with an Entra account.
WARNING
Don't switch organizational units with Intune-managed users to Google's Advanced mobile management. OUs managed by a third-party EMM have to stay on Basic.
Networks
Under Networks, you can create Wi-Fi, Ethernet, VPN and mobile networks (installs your carrier's eSIM), upload CA certificates and create SCEP profiles.
| Type | Applies to |
|---|---|
| Wi-Fi | ChromeOS, Google Meet hardware, Android/iOS (Advanced only) |
| Ethernet | ChromeOS, Google Meet hardware |
| VPN | ChromeOS |
| Mobile | ChromeOS 101+ |

INFO
These networks don't reach your Intune-managed Android devices, because pushing Wi-Fi to Android/iOS requires Advanced mobile management and OUs managed by a third-party EMM have to stay on Basic. Deploy Wi-Fi, VPN and certificates via Intune.
Apps
Manage settings for Google Workspace apps and services.
- Google Workspace: Core services included for free
- Additional Google services: Other Google services, such as YouTube, Maps or Google Play
- Web and mobile apps: Android apps for devices managed by Google
- Google Workspace Marketplace apps: Third-party apps from the Workspace Marketplace
INFO
Don't add Android apps for your Intune-managed devices under Web and mobile apps. App management there only applies to devices managed by Google and most of it requires Advanced mobile management. Approve and assign your apps in Intune via Managed Google Play instead.
Google Workspace
On the Google Workspace page, you see the Service status of each service, which you can turn ON or OFF for everyone, organizational units or groups. Click on a service to configure more individual settings.

TIP
The free Essentials Starter edition doesn't include Gmail. If you do not use the services, turn them off so your users do not work with an unsupervised workspace.
Generative AI
Control the AI features your users can access. The available settings depend on the edition of Google Workspace you are using.
Gemini in Workspace
Under Conversation history and deletion, you decide whether users can delete their Gemini chats manually and when chats are auto-deleted, or let users choose their own setting. Google states that your content isn't reviewed by humans or used for model training outside your domain without permission.

Gemini Notebook
Turn Gemini Notebook (formerly NotebookLM) on or off for everyone or for organizational units.

INFO
Users without the right license can still use Gemini Notebook, but under the consumer Google Terms of Service instead of the Workspace terms. Set it to OFF if you don't want that.
Security
Manage alerts, rules and single sign-on for your organization.
- Alert center: Security and admin alerts, such as suspicious logins, leaked passwords or changes to SSO settings. Each alert has a severity, a status and recommended actions.
- Rules: Shortcut to Rules, to set alerts and actions.
- Set up Single Sign-On (SSO) with a third-party IdP: SSO for managed Google Accounts with an external identity provider, like Entra.

SSO with third-party IdPs
Under Third-party SSO profiles, you will find an automatically created Microsoft OIDC profile. This is a pre-configured system profile that enables the sign in with your Entra account.
Under Manage SSO profile assignments, you can see and change which organizational units or groups use this profile.

Data
Overview
The Overview page sums up Google's privacy commitments and links to the privacy resource centers for Google Workspace and Chrome Enterprise:

Compliance
The Compliance page collects guides and controls for regulations and standards.
- Free: Compliance configuration guides, privacy resources and ChromeOS personal data controls (GDPR)
- Paid upgrade:
- Data regions (US or Europe)
- Vault retention rules
- Client-side encryption with your own keys
- Access Transparency logs and control over which Google staff can access your data and when they need your approval
Data import and export
Export a copy of your organization's data from Google Workspace core services to a Google Cloud Storage bucket.
- Requires a super admin account with 2-Step Verification turned on, which is at least 30 days old.
- An export takes about 72 hours (up to 14 days) and can't be canceled in the console.
- The export is deleted automatically 60 days after it started.
Reporting
View reports and audit logs to examine potential security risks and analyze user and administrator activity.
- Overview: Key metrics and trends.
- App reports: Usage of each Workspace app.
- Devices: Trends for ChromeOS and mobile devices managed by Google.
- Audit and investigation: Log events per data source.
TIP
Use Audit and investigation -> Admin log events to see who changed what in the Admin console. Actions started via the Chrome Enterprise connector in Intune show up here as the connected Google account.
Billing
Subscriptions
The Subscriptions page lists all your subscriptions with their licenses and payment plans.

Payment accounts
Here you manage your payment profiles, payment methods and invoices.
Buy or upgrade
On this page you can add or switch subscriptions split into three categories.
Google Workspace: Free and paid Google Workspace editions

Devices and browser: Android Enterprise, Chrome Enterprise Core and paid ChromeOS upgrades

Advanced AI access: AI add-ons

License settings
On this page you can assign licenses manually or enable automatic licensing.

User upgrade settings
Under User upgrade requests, you choose whether users can request a subscription upgrade.
Account
Look into your organization's details, data residency, accept terms of service and more.
Account settings
- Profile: Shows the basic details of your organization.
- Preferences: Controls how quickly new features and products reach your users.
- Smart features for Google Workspace: Sets the default for smart features.
- Account management: Lets you delete your whole Google organization.
- Legal and compliance: Holds terms of service and other necessary legal information.

Domains
Add custom domains and create allowlists for other domains.

Rules
On this page you can configure alerts and automatic action rules.
INFO
You can only create rules with a paid Google Workspace edition.
Which rule types are available depends on your edition and admin privileges:
- System-defined rules: Default alert rules supplied by Google
- Activity rules: Custom alerts based on log events, in premium editions also with automatic actions
- ChromeOS action rules: Restrict actions on ChromeOS devices, such as copy and paste from specific URLs or screen capture and sharing
- Data protection rules: Alerts for activity involving Drive files (DLP)
- Trust rules: Control who users can share Drive files with or receive them from
Storage
Manage Google Workspace storage for your organization.
- Workspace storage: Used storage of your shared pool, split into Drive, Photos and Gmail
- Storage settings: Set storage limits for organizational units, groups and users
- Users using the most storage: Top consumers in your organization
- Shared drives using the most storage: Needs an edition with shared drives

💡 Conclusion
Android Enterprise combined with Intune gives you an enrollment option for every scenario, from personal phones and fully managed devices to kiosks and zero-touch deployments.
Enrollment options for every taste
- Personal phones → BYOD with a work profile
- Company phones with private use → COPE
- Company phones for work only → COBO
- Kiosk or shared devices → Dedicated devices (COSU)
- Devices without Google services → AOSP
- Large rollouts → add zero-touch on top
What I like most is the greater freedom Android provides compared to iOS. The work profile lets companies offer their users a real benefit with a company phone they can also use privately. Work and personal data stay completely separated, so you can give something back to your users without compromising on security.
If you use what Android Enterprise offers, like the separation of work and personal data, app protection, Managed Google Play and Defender for Endpoint, Android provides in my opinion as much security as iOS does. And in contrast, you are the one in control and not the ecosystem that could change at any time.
So try it out if you like.
You can start quickly and at low cost, as shown in the Quick start guide.
References
- Microsoft Learn - Configure the Microsoft Managed Home Screen App for Android Enterprise
- Microsoft Tech Community - New policy implementation and web enrollment for Android personally owned work profile is now GA
- Microsoft Learn - Device actions
- Android Enterprise Recommended devices
- Android Zero Touch EMM Provider
- Android Zero Touch Device Reseller
- Microsoft Learn - Configure Chrome Enterprise connector
- Microsoft Learn - View ChromeOS device information in Intune
- Google - Android Enterprise Help
- Google - Workspace Documentation
- Google - Chrome Enterprise Help
- Google Workspace Status Dashboard